Tag: sewing

  • Giraffes for Christchurch

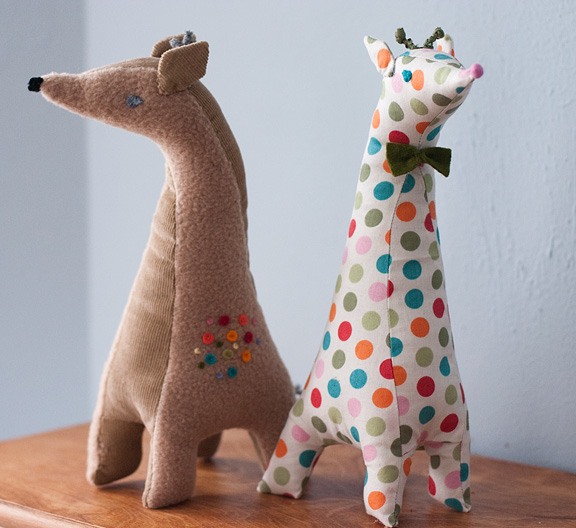
    Wee Wonderfuls Giraffe
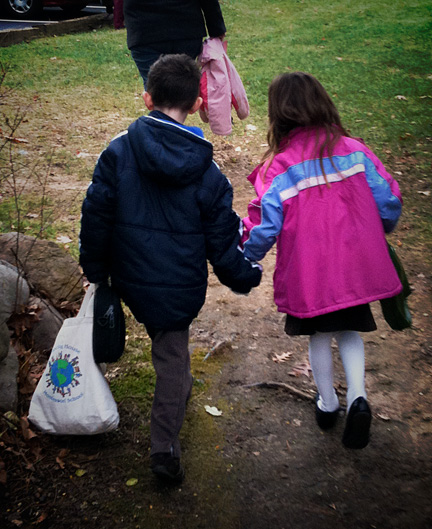
    These two guys are on their way to New Zealand, where they will be given to children affected by the recent earthquake there. I have had a penpal in New Zealand since I was in 7th grade (We have met twice as adults — once in New York and once in London. Someday I’ll get to New Zealand!) After I made these, I realized I should have made stuffed squirrels. When my friend came to New York, she was fascinated by the squirrels in Central Park because she had never seen them before!
    I used a pattern from Wee Wonderfuls: 24 Dolls to Sew and Love.. The spotted guy is made from fabric I won through Deb’s “Present a Week” challenge I did last year at Works in Progress. Deb lives in Christchurch, so I thought it was only appropriate to use some of the fabric she sent me to give back to her community. The other giraffe is made of fleece and corduroy because I wanted to make a more cuddly version. I used some light-weight fusible interfacing on the fleece to keep it from stretching too much.
    Leonie at Kiwi at Heart is organizing the effort to collect handmade stuffed animals and dolls. Click below for more information:

  • Summer Dresses

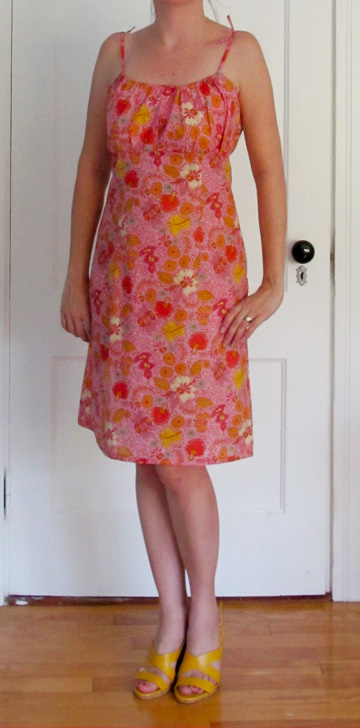
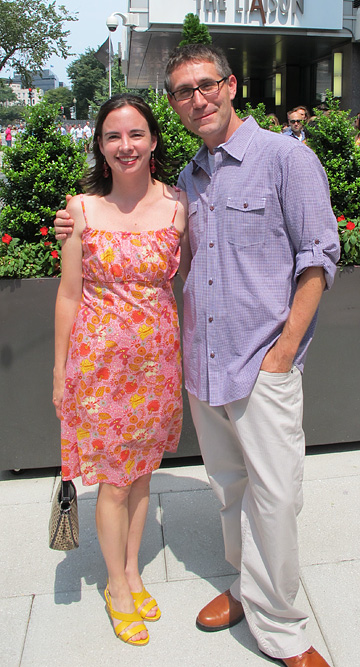
    Now that it’s fall, I’m finally getting around to posting the two dresses I made this summer, both for the same wedding. The first was Burda 8071, the one I posted earlier asking advice on whether to add the flounce around the bottom. I did not end up going with the flounce, in large part because I wanted to be DONE with it, but overall I really like this dress. I ended up wearing it to two different weddings. I LOVE the feeling of the cotton voile, though it is quite sheer, so having to wear a full slip (basically a stretchy tube from bust to knees!) sort of canceled that out.

    Here it is at the wedding we went to in Washington, D.C. There was the wedding and lunch, and then a hotel rooftop pool party later that night. I expected the evening event to be fancier but it turned out most people got more dressed up for the ceremony/lunch.

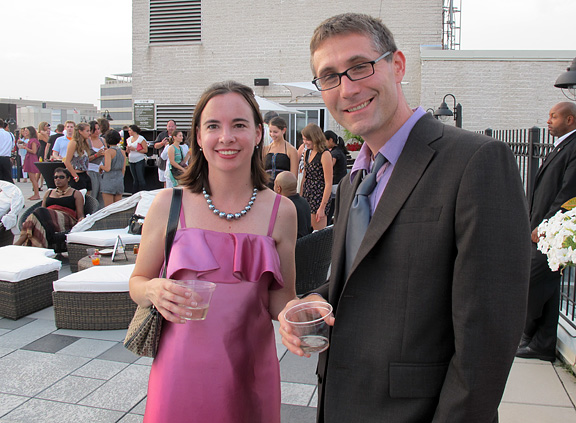
    The second dress is from a pattern I bought at Burdastyle.com, #125 from the June issue of the magazine. This was a frustrating experience, not the sewing of the dress, but just getting the pattern. I wasn’t able to download it after I paid for it for four days, which I think is totally unacceptable. For once, I had some long stretches of time to work on it that weekend, but had to wait several days to actually get the pattern. My e-mails to customer support and comments left in the forums there were ignored for several days. That said, I was mostly pleased with the pattern once I got it. I made it from some polyester charmeuse that I bought for $2.50 a yard. I love the ombre effect, but the downside was that the fabric was an unattractive pale purple on the reverse side, meaning I couldn’t do a single thickness of fabric for the ruffle as the pattern calls for. I ended up cutting out the LONG spiraling ruffle piece twice and making the ruffle double-layered. That made it bulkier than I would have liked. On the other hand, I didn’t have to do a tiny narrow hem. After figuring out that I could pull the dress over my head, I also left out the back zipper, which saved quite a bit of time (I have never sewn a lining to a zipper, and maybe I never will!)

    These are NOT the shoes I wore to the wedding. I have some pretty greyish/silver sandals that my sister later borrowed and hasn’t returned!

    Here’s a shot from the wedding:

  • The Birthday From Outer Space

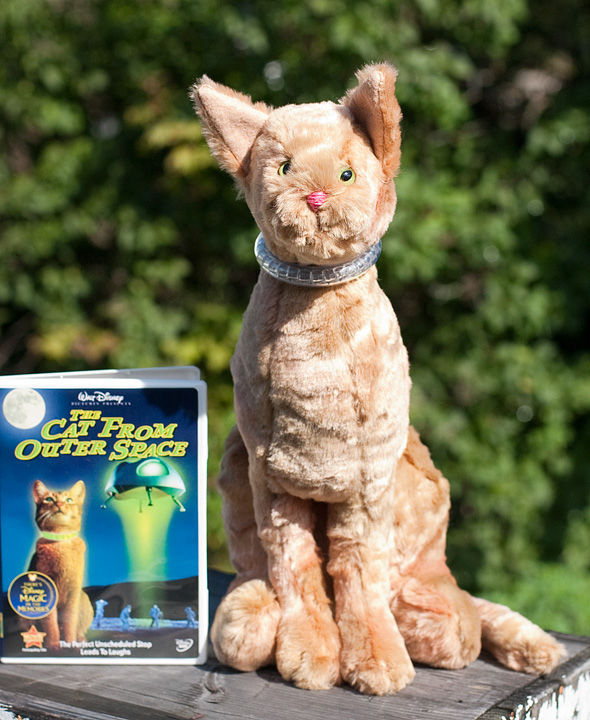
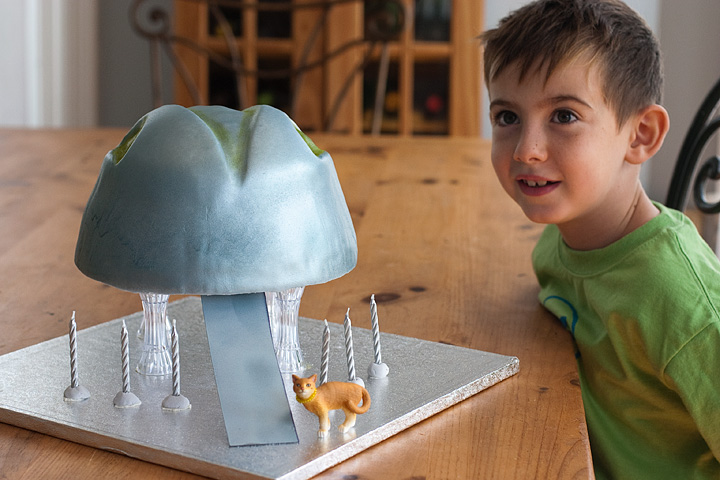
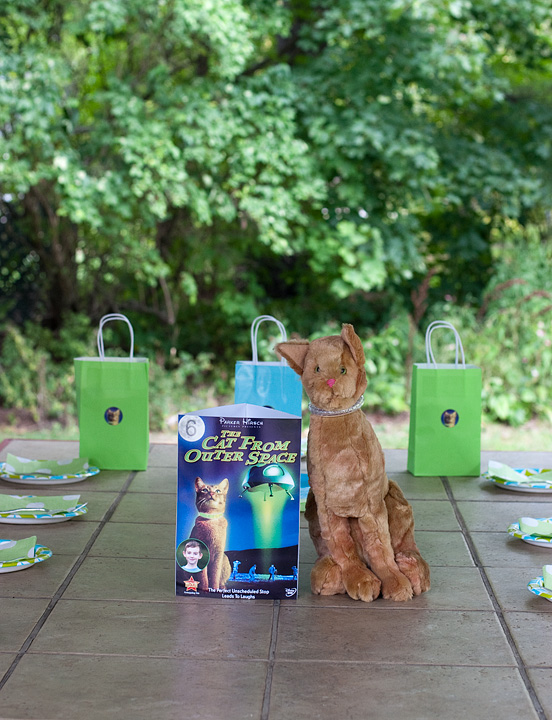
    Parker turned six last week, and we celebrated with a small party with just his grandparents, aunt and uncle and cousins on Saturday. I think I was so relieved to not have to make 10 party favors like last year’s mass-produced Lowly Worms that I went a little overboard for the three children in attendance (the birthday boy and two cousins). The theme was “The Cat from Outer Space,” a 1978 Disney movie my husband enjoyed as a child and Parker has adored since we let him watch it earlier this summer.

    Of course I had to make him “Jake,” the cat/star of the movie. I found a free pattern for a sitting kitten here by Runo Dollmaker, but that seemed too small and squat, so I enlarged the pattern in Photoshop so it was 150 percent taller. I think I could’ve gone with a bit less height since the end result is sort of oddly stretched out, but I was just glad all the pieces still fit together fairly well after I tinkered with the pattern. This was my first experience using plastic stuffed animal eyes (hence the crooked placement) and my first jointed stuffed animal (the head swivels).

    My husband, the food editor, was in charge of the cake. Though he generally does not like to bake, he goes all out for Parker’s birthday. (Last year’s Huckle cake used 4 dozen eggs!) This year’s cake was smaller, but just as impressive to the birthday boy.
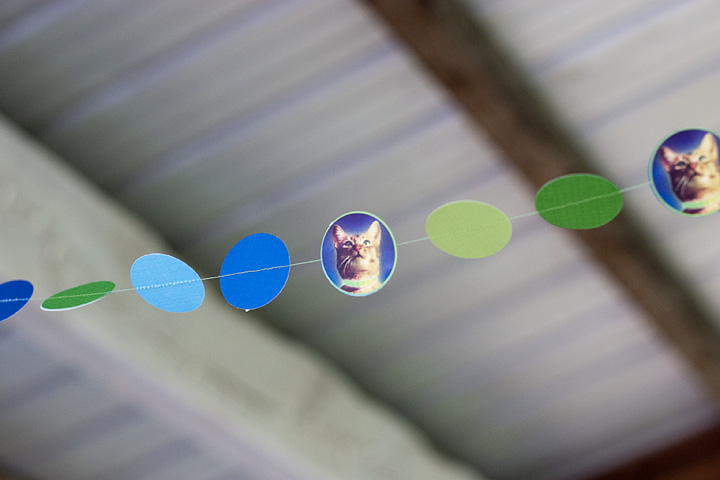
    To continue the theme, I scanned the DVD cover and used the image to make invitations, stickers, a garland and a table decoration. I have a large Fiskars Squeeze Punch, I think it is 1.5″ in diameter, that I LOVE. It was so easy to punch out a bunch of circles to make the garland, then I just sewed them together using the sewing machine. To make the cat stickers, I formatted the picture of the kitty in Photoshop to make it the size of the punch, printed a bunch on one page and then punched them out and ran them through the Xyron 1.5″ “create-a-sticker.”
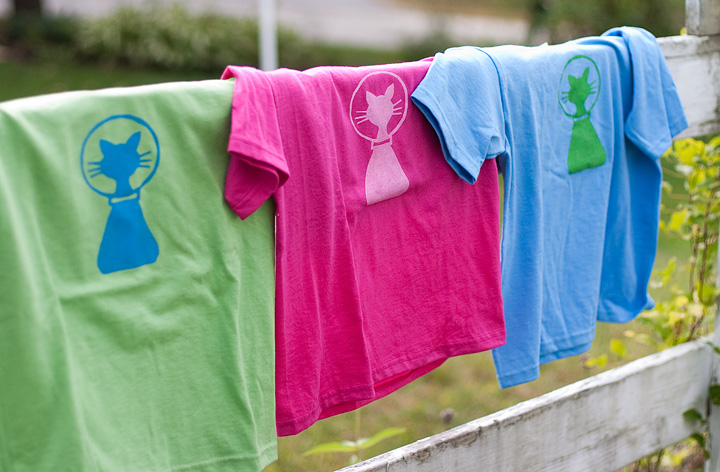
    I also made freezer-paper stenciled t-shirts for the kids. I spotted a “Cat from Outer Space” movie poster online that had this cute cat graphic as part of the title, so I copied it and enlarged it to make the stencils for the shirt. I know a lot of freezer paper stencil tutorials say to print your design and then trace it onto to the freezer paper, but I just cut pieces of freezer paper to 8.5″ X 11″, taped it to a piece of copy paper and printed right on the freezer paper. Cutting carefully, I was also able to use the cut-away part of the stencil to make another shirt for Parker using the negative space. (Something to keep in mind if I ever am making 10 of these next year… cut carefully and get two stencils out of one image!)
    For activities, I made the treasure stones I mentioned in an earlier post, but we called them “alien rocks.” Parker helped me pick out little trinkets to hide in them and helped me make the rocks. (the recipe doesn’t specify how many rocks you can make with one batch. We made three good sized stones). No pictures, because they were destroyed pretty quickly, but I think they liked them!

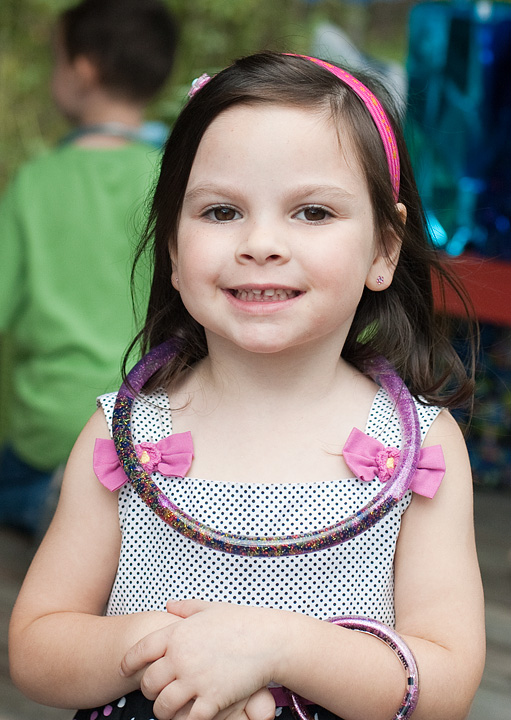
    We also made sparkly necklaces and bracelets out of the extra vinyl tubing I had from making Jake’s collar. There are many tutorials out there, I followed this one at Family Fun, using tubing with a 1/4″ outside diameter for the bracelet and tubing with a 1/4″ inner diameter for the closure. For the necklaces, we used tubing with a 1/2″ outside diameter. These were really fun to make, though the bracelets were a bit trickier because we didn’t have a funnel that was small enough to fit in the opening. We improvised by using drinking straws to fill the tubes with water… holding a finger over the top of the straw while it’s in water and then releasing it into the tube.

    I wasn’t sure if the boys would enjoy this but both Parker and my nephew liked it. Surprisingly the bracelets and necklaces haven’t leaked, but you could always add a bit of glue to be on the safe side. This is such a cheap craft, the tubing sells for about 22 cents a foot. I’m thinking of getting all the supplies and making a kit for my cousin’s four daughters for Christmas.
    For more projects, check out the inspiring list at:

  • Double Birthday

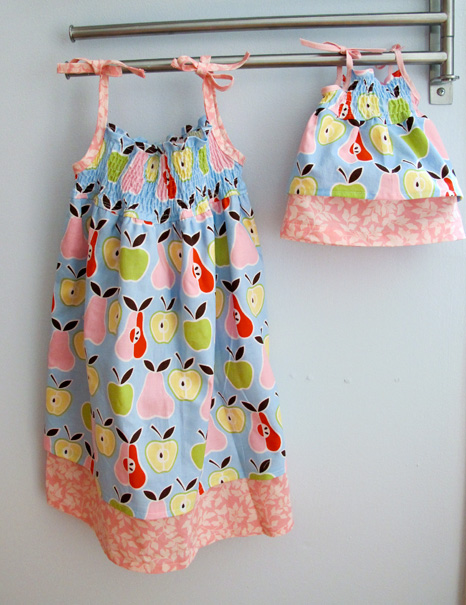
    My adorable niece and nephew celebrated their 5th and 6th birthdays last weekend with an outdoor party, water balloons and two cakes: chocolate with Sleeping Beauty on top for the birthday girl and vanilla with Buzz Light Year on top for the birthday boy. I made my niece two sundresses, one for her and one for her American Girl doll, using this tutorial at From an Igloo. It really is an easy dress but for some reason I was having one of those nights when everything goes wrong. First, I sewed the longer skirt piece on top of the shorter piece instead of under it, gathered it and sewed it to the bodice before realizing my mistake. (The only thing I hadn’t done was trim the seam and topstitched it). Then I forgot to take the elastic thread out when I sewed the first shoulder tie on. I also had a bit of trouble getting the elastic thread to work correctly for the shirred bodice. I ended up winding the bobbin using my machine rather than by hand like all the tutorials say and it seemed to work. (though my lines are horrible wonky and uneven.)

    For the doll dress I just scaled everything down. I had a dress pattern for American Girl dolls I downloaded from the Internet somewhere and used that roughly to measure how wide to make the bodice and how long to make the skirt. The skirt isn’t as full as the full-size version because I was running out of fabric.

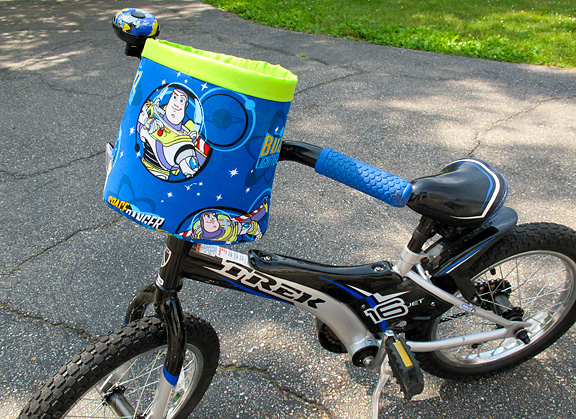
    I bought my nephew a few pounds of mixed LEGO pieces off eBay (and ran them through my dishwasher secured in a lingerie bag to sanitize them) and made him a little basket for his bicycle. I used this tutorial at Noodleheads. (I stuck it on my son’s bike for this picture.) When I was making the binding strip to go around the top edge I made one folded side narrower because I was worried I wouldn’t catch the other side when sewing it on, but I went too far and my stitches on the inside are not even close to the edge so it looks pretty messy.

  • Paintbox Pillow

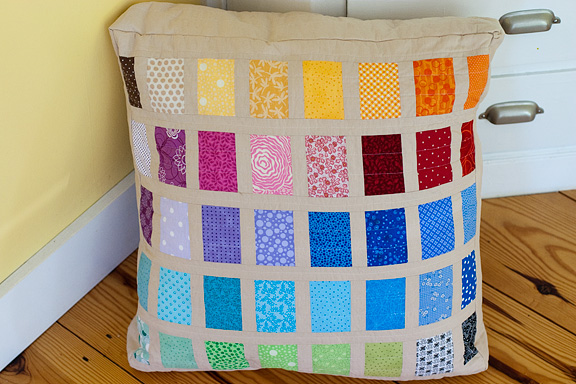
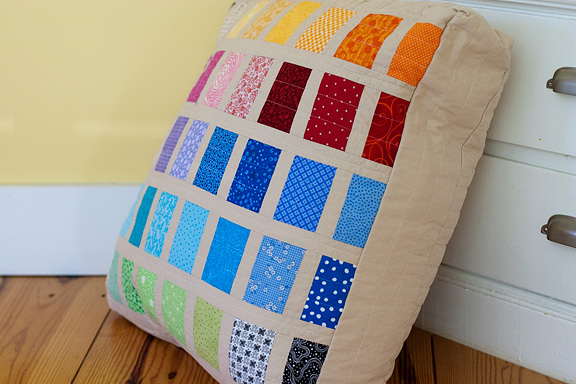
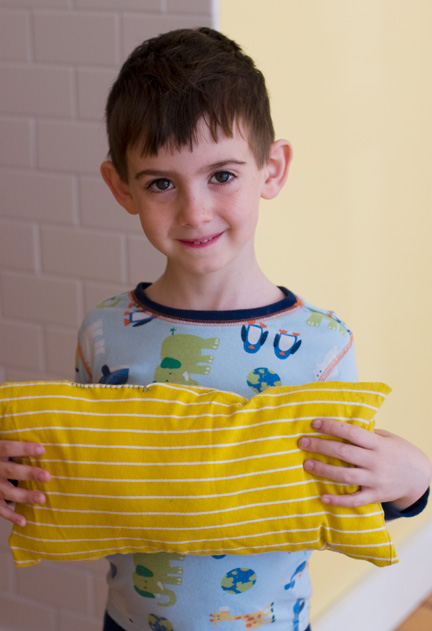
    I STILL haven’t finished the Paintbox Quilt I started months ago, but in the meantime, I used half of the little pieces I cut out for the back of the quilt (I’m going to do something more plain on the quilt instead) to make this floor pillow for the reading corner in my son’s classroom. His last day of kindergarten is tomorrow, I can’t believe it! But, he’ll be staying at the same school for first grade, so he will get to enjoy the pillow with his classmates.

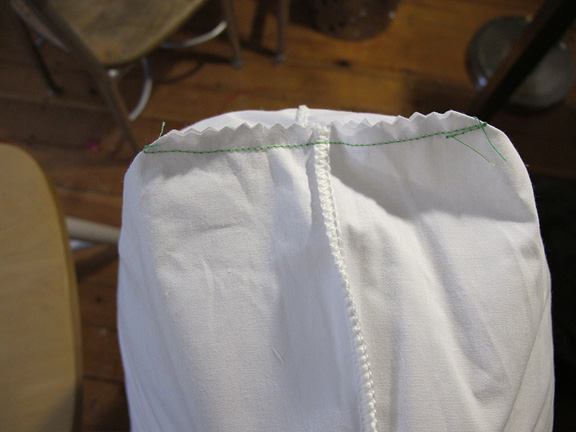
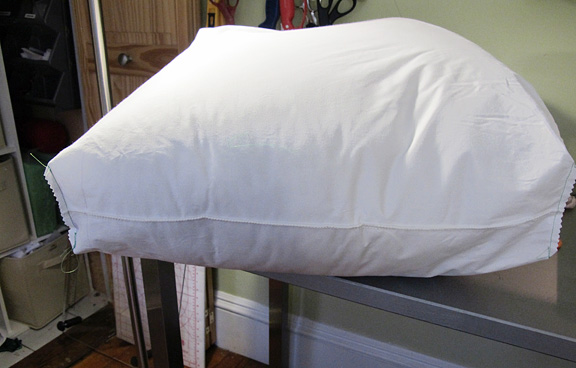
    I started with a large, square pillow from Target, and sewed across the corners to make it more box-shaped, using a technique I found in Martha Stewart’s Encyclopedia of Sewing and Fabric Crafts. (Similar to how you would make a flat-bottomed purse or tote, if you’ve ever done that).

    The back of the pillow is just the same beige sashing fabric, quilted in straight(ish) lines about an inch apart. The cover is removable, thanks to a zipper along one edge. (not pictured because it’s not my best work!)
    I used a cotton/poly blend batting so the cover didn’t crinkle up as much as I would’ve liked, but overall, I love how the colors look together.

    I still have some vague idea that I will make individual gifts for the teachers, as well, but we’ll see. Technically, his last day of school is tomorrow, but “commencement” isn’t until Saturday. And then he’s going back for four weeks of summer school/camp. So it depends on what deadline I chose to observe!

  • Secret Agent Kit

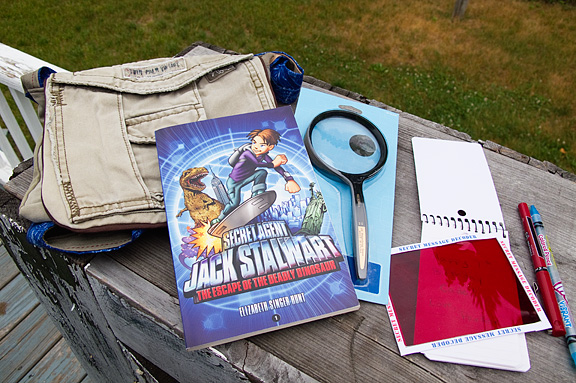
    I put together this gift for my friend’s 7-year-old, who is very into spies and secret agent stuff. The bag is made from an old pair of my husband’s cargo shorts using this tutorial at Noodlehead, though I had to modify the size and shape a bit because I only had shorts to work with instead of pants. I also didn’t have any bias binding on hand, so I used brown piping along the flap edges, which looks just as good I think. I was a bit worried that it ended up looking more like a purse than a secret agent/adventure bag, but I’m told the birthday boy likes it!

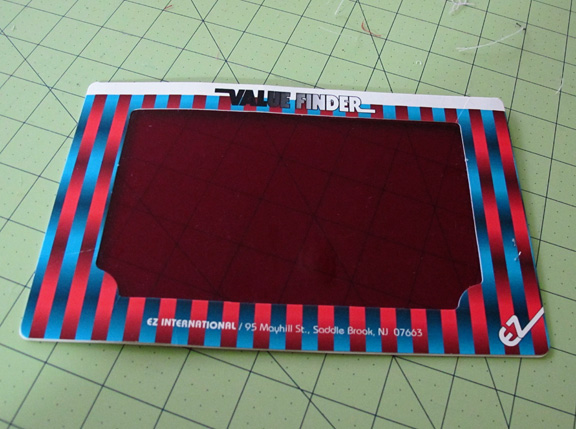
    The coolest thing in the kit is the “secret message decoder.” I’ve had this idea in the back of my head ever since seeing these secret message Valentine’s Day cookies, and when I was recently re-organizing a bunch of craft and sewing supplies, I came across this:

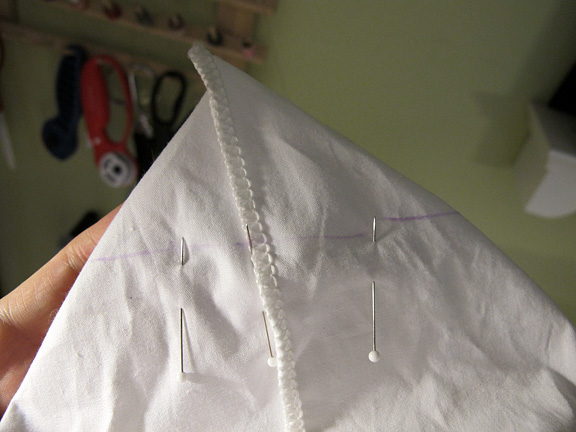
    I don’t remember where I got it, I think it was included in a box of fabric/quilting supplies I got at a yard sale long ago. I do know that I’ve never used it for its intended purpose, which I’m guessing has something to do with evaluating the light/dark values of fabric. So I removed the cardboard frame and made a new one (cutting the red film in half so I could make another one for my own little secret agent).

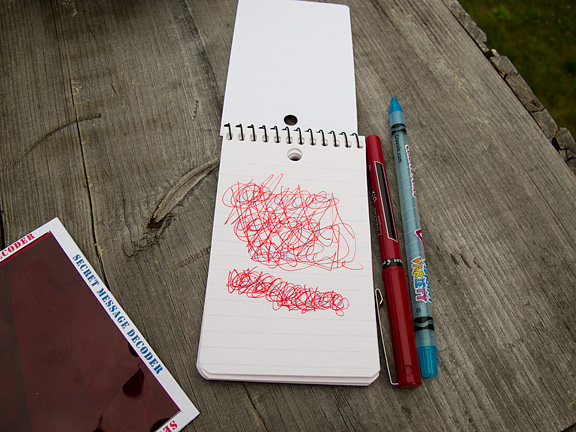
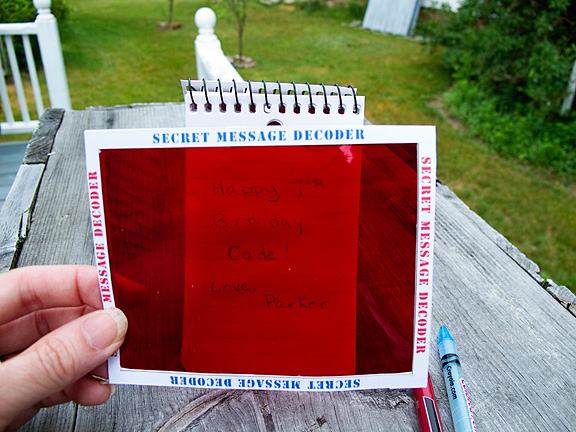
    You can write something in light blue ink or pencil, then scribble all over it with red ink. When you put the red plastic over it, the message is revealed!


  • My apprentice

    I loved reading Beverly Cleary books when I was young, and my 5-year-old really likes having them to read to him now. We’ve gone through all the Henry Huggins books, The Mouse and the Motorcycle, and the Ramona Quimby series multiple times. After listening to a chapter in “Ramona and her Mother” that featured Romona using her mom’s sewing machine for the first time, Parker very sweetly asked if he could try mine if he was really careful. Of course, his first plan was to make some pants for one of his stuffed animals, despite the fact that in the book, Ramona is crushed when the “slacks” she tries to make for her stuffed elephant turn out awful, and she ends up storming off and squeezing out an entire tube of toothpaste in the sink. (“Slacks” always makes me think of my grandmother, who also says “dungarees.”)

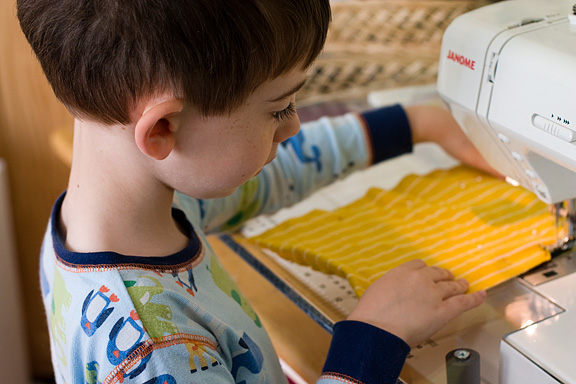
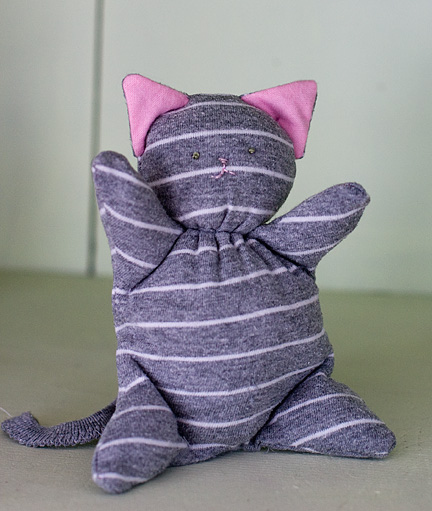
    So I gently suggested an easier project, and we settled on a pillow for our cat and a little stuffed cat for Parker made out of two of his old t-shirts. I set my sewing machine on the slowest speed and had him stand up so he could press the pedal and guide the fabric. He did a great job on the pillow!


    I did most of the work on the kitty, which is a variation on the Mooshy Belly Bunny by Holly at Chez Beeper Bebe. I was pushing for a bunny, but Parker looked at the picture and said “That’s too CUTE!” Emphasis on CUTE, with a bit of a disdainful tone rather than the way I would say it, “That’s TOO cute!”

  • Paintbox Quilt Top

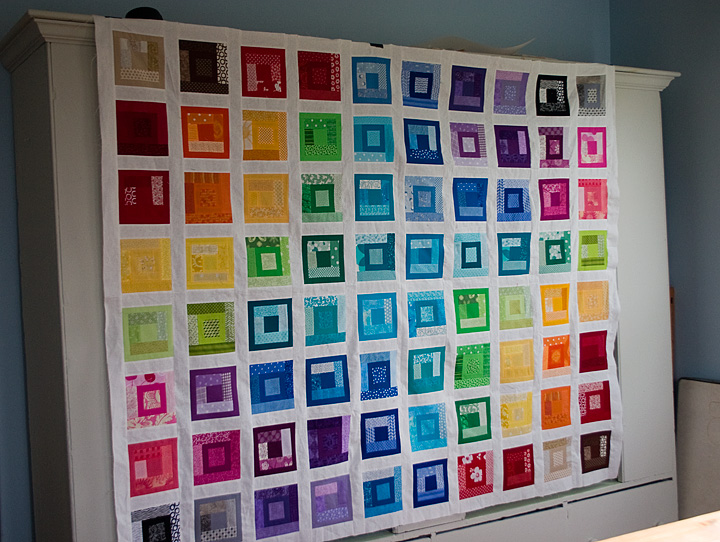
    Here’s the finished top to my Paintbox Quilt from the quilt-a-long at Oh, Fransson! (turned 90 degrees so it wouldn’t drag on the floor). I wasn’t going to post any pictures of this quilt until I was done, but I have a bad feeling I’m going to mess up the quilting so I might as well show it off in its pristine state. I’ve never made a quilt this big and the thought of basting it and then maneuvering it through my sewing machine to quilt it is quite intimidating. Though a lot of the other quilt-a-long participants are using a stippling quilting pattern, I think I’m going to go with wonky, narrow lines because the few times I’ve done stippling have not been fun, and I know I’d have trouble keeping a consistent look if I stopped and started a lot.

    The quilt top looked so pretty hanging up in my dining room, I’m tempted to call it curtain and be done with it.

  • Ticker Tape Doll Quilt

    As my son gets invited to more and more birthday parties, I’ve noticed the trend of kids NOT opening their gifts during the party. I understand the reasons for it, but I also think it’s nice for my son to see his friend open the gift he brought, rather than have it squirreled away to be opened in private later. And to be honest, it especially irks me when I’ve made someone a gift, because I want to see the reaction. (and to be REALLY honest, I like hearing the praise of other adults who appreciate the work that went into the gift!) This particular gift was given to one of Parker’s girl friends/girlfriends. Back in November, we had this conversation:

    Parker:  I’ve realized that I love A.

    Me: (surprised silence)

    Parker:  I thought you’d be happy for me!

    A. is a wonderful little girl, but their mutual affection seems to have cooled down a bit to friendship, which I think is appropriate for two kindergarteners!

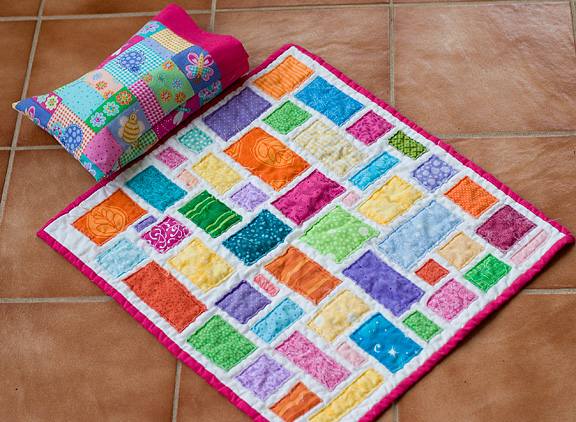
    I made the pillow case using my tutorial (minus the trim between the cuff and the body), and the quilt using this Ticker Tape Quilt tutorial at Sew,Mama,Sew! The scraps were all leftover from the Paintbox Quilt I’m getting close to finishing! I forgot to take a picture, but the back is the same print as the pillowcase, which looks nice with the rectangular quilting lines. Who knows? Maybe this quilt will end up being passed down to my future grandchild! Ha.

    The happy couple last fall:

  • Robot Memory Game

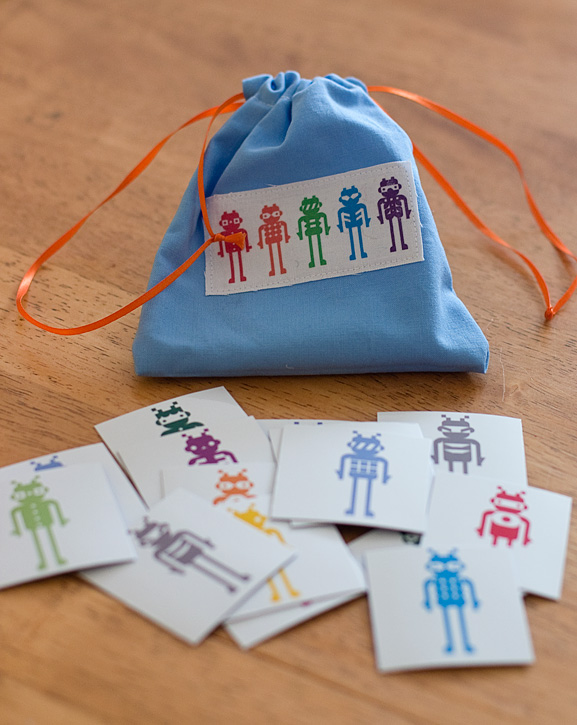
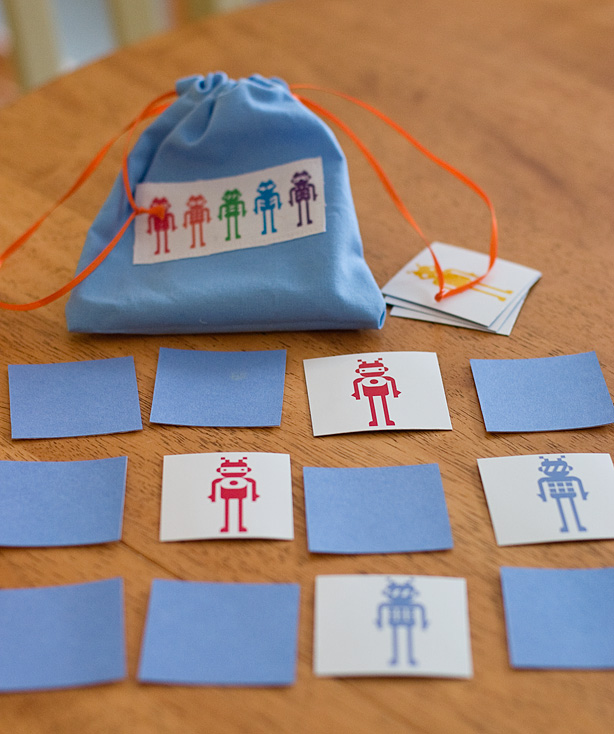
    I don’t generally go crazy with my son’s Easter basket, and especially so this year given that our house looks like the day after Christmas thanks to generous friends and family who showered him with gifts after his recent surgery. But I did make him this little memory game featuring his current obsession: robots.

    My first thought was to use clipart, but I was worried I wouldn’t find enough or it would take forever to re-size each image. Then I thought of the perfect solution: a dingbat font! I found this cute, free set of robots at dafont.com. (The font is called “Lost Robo” by Slaager David Alexander). I then typed up a page of robots, using a different color for each one, at about 300 pt. to get each robot to be about 2″ tall.

    I then printed two copies on photo paper, glued a piece of blue cardstock to the back of each for stability and cut them apart. (Two robots got discarded after I unsuccessfully tried to use a corner rounder punch on the corners… anyone have a corner rounder punch they like? I hate mine. It always jams)

    I also printed a few robots onto iron-on transfer paper and added that to a strip of white fabric to label the little storage bag. My son enjoys playing a memory game on my husband’s iPhone, so hopefully he will like this low-tech version as well!