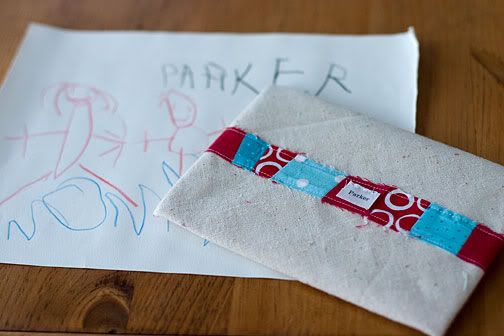
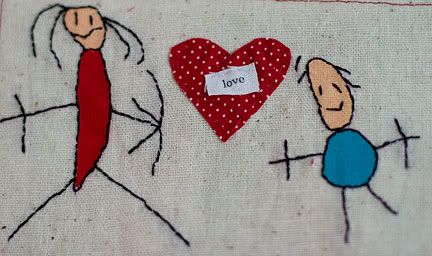
I decided at the last minute to enter the True Love Valentine Contest at Sew, Mama, Sew! and make this little fabric card and envelope for my son. I used the same technique that I recently used to make my husband a notebook cover, but this time, I used a smaller paintbrush and painted before embroidering, which worked better than trying to paint right up to the stitching. (and I used a picture he drew of me and him instead of Daddy and the cat).
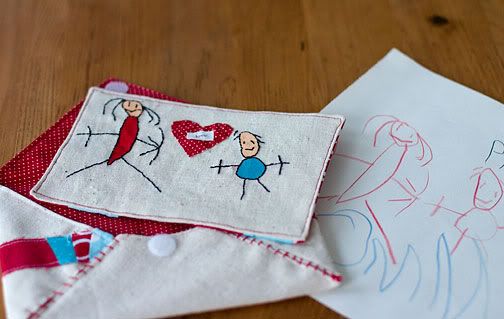
I’m sure he won’t be terribly excited by it, but it will make a nice keepsake. And I know he’ll at least like the envelope, since he’s always writing letters to friends and relatives.
Tag: holiday
-
Last-minute Valentine
-
Be My Valentine (but keep your germs to yourself)
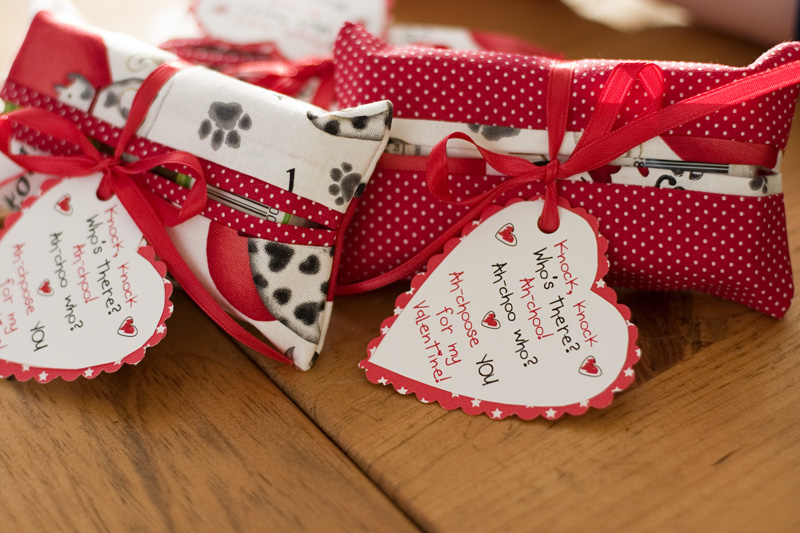
I have no idea what we’ll do this year yet, but last year I made 20 tissue cozies for my son’s preschool classmates. I’m sure the kids would’ve preferred candy but figured the parents would appreciate the tissues during cold and flu season.
Depending on how far you want to carry the theme, attach a card with the following message:
“Knock, knock.”
“Who’s there?”
“Ah-choo!”
“Ah-choo who?”
“Ah-choose YOU for my Valentine!”
Grown-ups may gag at the punny sentiment, but at least a tissue will be close at hand.
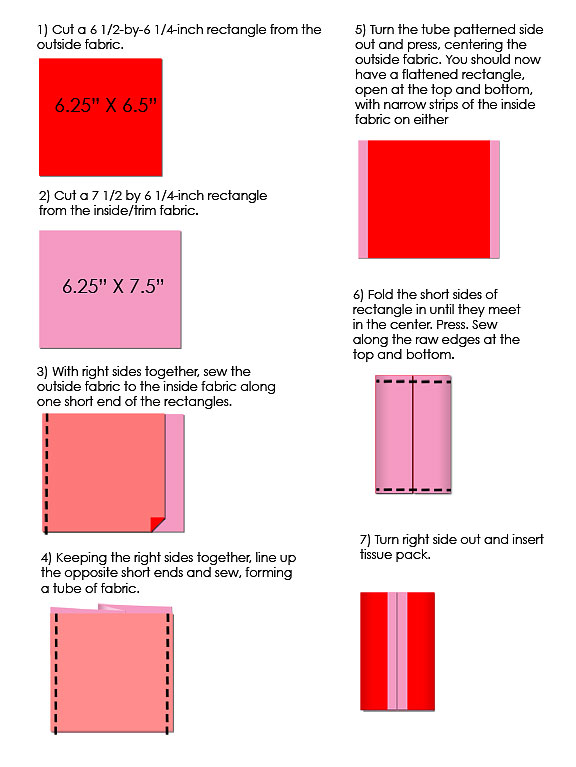
You can click here to read the how-to article I wrote for AP. This really is a very easy project, but the written instructions make it sound more confusing than it is, so here’s my attempt at illustration via Photoshop.
-
Halloween Snow Globes (minus the snow)
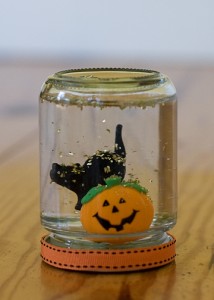
We have been having an annual apple picking party and harvest dinner for about 10 years now, and for the last three or four, I’ve set up a craft table for the kids. I’d like to say that the projects have gotten more involved because the kids are getting older, which is true, but also I think I feel the need to “top” whatever we did the year before.The party was Saturday, and there were probably about 30 kids, most of them my son’s kindergarten buddies. I felt like every time I turned around I would see a PILE of boys rolling across the yard. It was a little hectic. But most of them did stop by the craft table to make these little Halloween-themed snow globes.
They were easy to make, but definitely required adult help given the glass, glitter and water. I found several other tutorials online that suggested using floral clay to adhere the figurines. I tried it and it worked great for that purpose, but the glitter also stuck to the clay, which resulted in nothing but a few flecks of glitter swirling around after the first shake. Others also suggest using hot glue to adhere the figures, and seal the jars, but I figured hot glue plus 30 kids was asking for trouble.
*** EDITED TO ADD: after a few days, even some of the figures that seemed secure started to float around, so I’m not sure what to suggest in terms of adhering them. I haven’t tried the hot glue idea, but if you’re making these with only a kid or two instead of 30, that might be the way to go ****
Materials:
_ glass jar with lid
_ distilled water
_ polymer clay
_ thread seal tape (found with plumbing supplies at hardware stores)
_ small plastic figurines (I used cupcake picks)
_ glycerin (found with the baking supplies at craft stores)
_ glitter (I also had a small set of autumn/Halloween colors but those went fast)
_ ribbon
_ scissors
_ double-stick tape (not shown)
Instructions:
1) Pinch off a small amount of clay and squeeze it in your hands for a few minutes to soften and condition it. I did this ahead of time for the party, and set the clay on a heating pad for a few minutes to warm it up. It’s possible I have very weak hands, but this took some muscle.
2) Roll the clay into a ball. Insert figurines into the clay, and stick the whole ball onto the underside of the lid. Press firmly, building the clay around the figurine’s base. We had some trouble with the figurines coming un-stuck and floating around. Make sure the figurines aren’t spread out so widely that they won’t fit in the mouth of the jar.
3) Add a small amount of glitter to jar.
4) Fill jars with water almost to the top. Add a few drops of glycerin, which is supposed to make the glitter fall more slowly.
5) Wrap thread seal tape around the rim of the jar. This stuff is a bit tricky to work with. It’s not really sticky, but it it twists on itself rather easily. My jar lids weren’t very deep, so I tried to wrap the tape only around the very top of the jars so it wouldn’t be peaking out from under the lid later. If your jar has a tight seal, you might want to skip this step.
6) Carefully invert the figurines into the jar and screw the lid on.
7) Use double-stick tape to wrap a ribbon around the lid to decorate if desired.
-
Pantyhose Pumpkins
We made these cute pantyhose pumpkins last year at our annual apple-picking party and they were a big hit with the 20 kids ages 3-8 who attended. To save money and time, I cut the pantyhose legs in half and gave each child two pieces to tie together, resulting in mini-pumpkins. This year, I had grand visions of creating some kind of black cat, but that proved to be too complicated, hence the simple spider and ghost.
You can find instructions in my Associated Press article, as well as an audio slideshow on how to make the pumpkins by clicking below:
(AP) Pantyhose Pumpkins tutorial(AP) Pantyhose Pumpkins slideshow
There are some more great autumn craft ideas here at mama smiles. I’d like to try the sun catchers.
-
Reversible 4-in-1 Cape
Surprisingly, my son has yet to waver from his desire to be an astronaut for Halloween this year, but here’s something I made him last year in an attempt to cover his ever-changing alter-egos: a reversible, 4-in-1 cape. With two colors to choose from plus button-on embellishments and a button-on hood, he can quickly transform himself from knight to dragon to super hero to king. I also made a red and pink superhero/princess/butterfly/Little Red Riding hood cape for my niece. For the butterfly, I added loops of ribbon at the front corners of the cape that she can slip over her wrists, and a large loop of ribbon with velcro at either end to gather up the middle of the back of the cape and turn it into wings.
I can’t post the material from the article and audio slideshow tutorial I did for The Associated Press last year because of copyright restrictions, but the links below will get you there. Or you can click on the links in my tutorial page.
Reversible Cape AP Article & Tutorial
