Tag: gifts

  • Gifts for far-flung friends

    I just spent three days with my best friend who lives much, much too far away. In addition to the good company and good food, I also got a chance to see her family and inspect whether they REALLY liked the Christmas gifts I sent them. Though I’m sure it’s possible they only took them out for display purposes before I arrived, they did seem to genuinely like everything I sent.

    Here’s the Mommy & baby Black Apple dolls I made for my friend’s adorable daughter, featuring pigtails heavily inspired/directly copied from Larissa at mmmcrafts. If I was smart, I would’ve made the baby doll using the full size pattern and then enlarged the pattern to make the Mommy doll, but I didn’t decide to make the baby until after I made the Mommy. It was pretty tricky to make such a small version, and I ended up leaving the entire bottom edge of the body open to stuff it. (but here’s one smart thing: if you’re adding pigtails, leave the opening in the head where one of the pigtails will be, so when you turn the doll right-side-out, you can cover up your messy hand-stitching with a bow)

    And here’s the recipient with an armful of babies:

    I made my friend’s 6-year-old son a personalized space-themed pillowcase using my tutorial, and tooth pillow using Larissa’s darling pattern. It’s the same pattern I used to make my son’s tooth pillow, but this time I also made a little hat.

  • Charming

    cupcakes

    These are my first attempts at making polymer clay charms as gifts for all the little girls I know. There are soooo many cute projects in The Polymer Clay Cookbook, but I’m running out of time before Christmas to make more. I definitely want to try the bacon and eggs plate and some of the other savory dishes. I found them easier than expected to make. They require just tiny amounts of clay, and once you have the clay out it’s easy to make four or five at a time.  The hardest part actually was wrapping the wire to make the little jewelry attachments.

    pies

    In addition to the charms, I’m making some without the jewelry wire for my son, who I think will enjoy playing with them with all the little animal figurines he likes to set up.

  • Story Dice Tutorial

    stacked

    Aren’t these little story dice adorable? I used to think so, but making them turned out to be such a frustrating process that I’m no longer sure! I was inspired by this wonderful set at The Small Object  and this tutorial at Matsutake on transfering images to wood using glue and Mod Podge.  But I take full credit for coming up with the CRAZY idea that I could make a set for each of my son’s (TWENTY-TWO) pre-school classmates. In the end, I made eight sets, enough for his closest friends and a few other friends and relatives.

    bagged

    The images I used are digital scrapbooking elements by Kate Hadfield. I already had a few sets, and I love the painted style.  (And at the time, I justified the cost by figuring that if I divided it among 22 kids, it was a bargain! Ugh). I tried the Mod Podge technique but it didn’t work. Maybe I didn’t use enough glue or Mod Podge. Then I tried a rub-on technique using transparency sheets. No luck. Finally, I used this packing tape transfer technique I read about at How About Orange, and finally, that worked. (Note: this technique works with laser printed images and photocopies, but not inkjet prints)

    With all that out of the way, this really is an easy project, but it is not a quick one. I’m happy but not thrilled with the final result. Some images didn’t transfer as well as others, or the final coat of acrylic spray turned a bit cloudy for some mysterious reason.

    MATERIALS:

    wooden cubes (mine are 1.25 inches)

    a variety of 1-inch images (digital scrapbooking elements, clipart or hand-drawn)

    laser printer

    clear packing tape

    scissors

    small bowl of warm water

    Mod-Podge

    paint brush

    clear matte spray

    INSTRUCTIONS:

    1) Print images using a laser printer. I used Photoshop to format mine in columns because they will be covered later with strips of packing tape.

    printed

    2) Cover images with packing tape.

    3) Cut out images. (Alternatively, you can leave the sheet of paper whole and cut the images apart later. It’s easier to cut them now, but the next step — rubbing off the paper — is easier using the full sheet)

    taped

    4) Dip the tape-covered image in warm water to moisten the paper backing. I found that if I let them soak for more than a minute or so, the image didn’t transfer well. So just dunk it enough to get it wet.

    bowl

    5) Using your fingertips, NOT fingernails, rub the paper until it starts to come off. Continue wetting the paper and rubbing it until it is removed.

    rub

    6) The images will still have a bit of adhesive stuck to them, so lay them sticky-side up to dry. I noticed that pieces that often appeared totally clear turned out to have bits of paper still stuck to them that didn’t show up until they dried. You can go back and rub them off again or just tell yourself that a 5-year-old is not going to notice or care.

    backing2

    7) Apply a thin layer of Mod Podge to both the block and the image and adhere the image to the block. Repeat for remaining sides of the block. Allow blocks to dry, then seal with matte acrylic spray.

    glue

    My husband is hosting seven of our son’s friends tomorrow for a cookie-baking party. I’m giving the four boys sets of the story dice. The girls are getting polymer clay charms (pictures coming soon!). Those were much easier, and very cute, but I feel a little bad giving the boys the more “educational” toys and the girls jewelry. I hate to contribute to gender stereotyping…

  • Dinosaur Play Mat

    dino_mat_closed   dino-playmat-opener

    An article I wrote last year for CRAFT magazine has now been posted online! Click below to check out the step-by-step instructions, and downloadable templates:

    How to: Make a Dinosaur Play Mat

  • A Busytown Birthday

    View Busytown Birthday
    (It appears that clicking on the image above no longer brings you to a gallery of images, so I’ve posted them below)

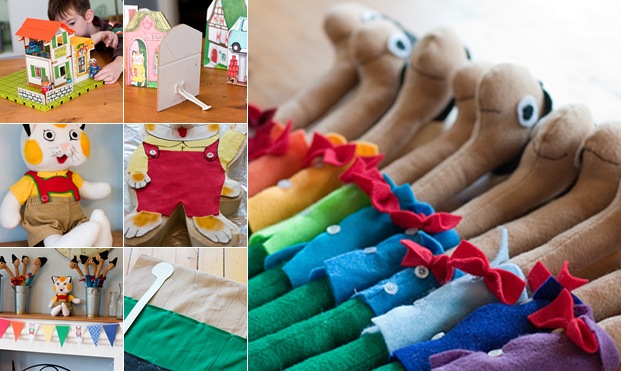
    My son has been smitten with Richard Scarry’s Busytown characters since June, when he picked up two of his books while we were on vacation. They were in Italian, but that didn’t matter. He poured over them for hours, including about half of our plane ride home from Rome. So we decided to make Busytown the theme of his 5th birthday party earlier this month.

    The amazing Huckle Cat cake is entirely the work of my food-editor husband. It was a super-moist, dense yellow cake (FOUR DOZEN EGGS), covered in buttercream and decorated with fondant.

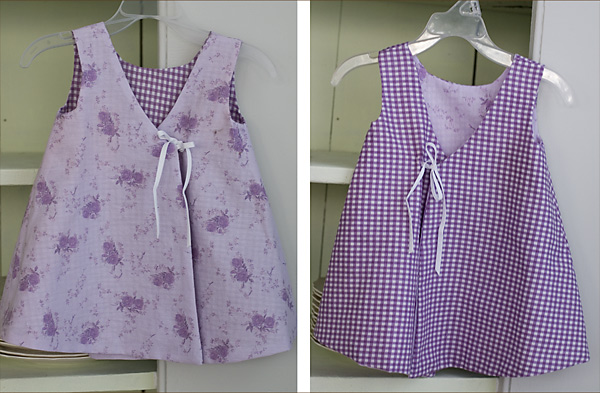
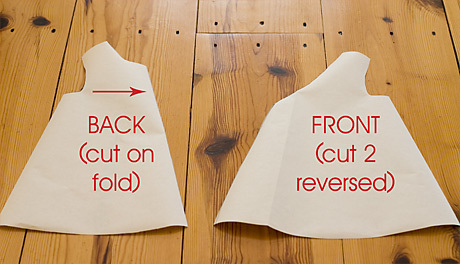
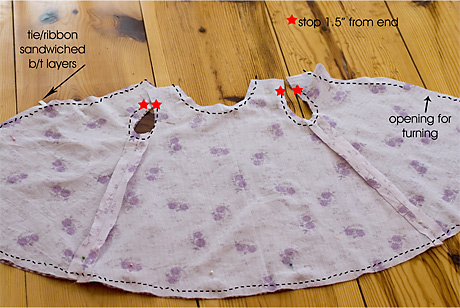
    Meanwhile, the stuffed Huckle was my project. I started with a pattern for a baby doll, added the ears, tail and nose and lengthened the feet. The pattern included a little shirt, which I altered a bit to look more like Huckle’s. The pants are a modified version of an American Girl doll clothing pattern!


    I bought a used but perfect copy of the out-of-print “Richard Scarry’s Biggest Make-It Book Ever” on eBay and scanned various pages to make the invitations and decorations. It also included the pattern for the Lowly Worm dolls I made as favors, though I came up with my own construction method to streamline the process since I was making so many. Rather than cut and sew 10 bodies, 10 pants and 10 shoes, I sewed long pieces of tan, green and grey felt together, traced the pattern 10 times, cut in between and then sewed on the drawn line. That part went quickly but I admit that by the time I got to all those buttons and bow-ties I was pretty sick of the whole project.

    I had grand visions of sewing a cute bunting but ended up just cutting triangles from leftover scrapbooking paper and some more images from the “Make-It” book. I strung them together by sewing a piece of ribbon across the top of the triangles.

    Parker’s main present, other than the stuffed Huckle, was another eBay find: a 1976 “Puzzletown” set so he can build his own Busytown. We came up with what we thought was a great idea: scanning more pages from the “Make-It” book (which included cutout images of various Busytown buildings) and attaching them to fiberboard to make extra pieces. My husband used a jigsaw to cut out all the pieces, but the fiberboard (actually a piece of paneling) was just a hair too wide to fit in slots on the Puzzletown base. Had we realized that earlier, we probably could’ve sanded the edges, but since I already had glued the pictures on, we stuck plastic stands (cut from cabinet child-proofing devices) to the back so they could be free-standing. I think this idea would be great to do with other books, or even using a child’s own drawings. You could cut a notch at the bottom of the pieces and use another little piece of fiberboard for a stand.

    Here’s a picture of the 1976 “Puzzletown”


    And here are the new pieces we made:


    All in all, it was a great success! Huckle has bumped all other stuffed animals from their usual spot at bedtime, and even has been going to kindergarten this week.

    UPDATE: Please do not ask me to share the Lowly worm pattern. As mentioned above, I found it in a book and am not comfortable sharing it. But I am sure if you look at a picture of Lowly, and my picture of how I traced the pattern, you can figure out that he is basically a long rectangle shape, with a rounded top for a head and an oval-ish shape at the bottom for his foot.

  • Felted Farm

    View Felted Farm

    My friend Annmarie introduced me to felting a few months ago, and since then I’ve made some wet-felted beads, Easter eggs (see my article and audio slideshow on my tutorial page) and a few needle-felted animals, including a hummingbird that my son thought was either a seal or an airplane. So I wasn’t particularly confident in my abilities when I decided to try a needle-felted playscape, but I’m really happy with the results. The biggest challenge was figuring out how to make the barn and fence since everything else is really just stabbing bits of wool roving into various lumps. For the barn, I ended up making paper templates for the walls, side and roof, then cutting out pieces of acrylic felt in those sizes. (I’m sure purists would use wool felt or needle-felt the whole thing, but I used what I had on hand). Then I needle-felted over the shapes, reinforcing the sides with pipe cleaners, sewed the walls together at the corners and needle-felted the whole thing to the base.

    Click on the pictures to see more photos and detailed descriptions of some of the other steps.

  • Reversible, buttonless wrap dress

    Here’s one of my two tutorials that were chosen as “Best of 2008” by Craftster.org. I know summer is almost over, but this little dress also could be made in heavier fabric and worn as a jumper.

    My goal here was a dress for a friend’s daughter that 1) was reversible 2) didn’t include buttons on both sides because I thought that might be uncomfortable against baby skin 3) didn’t require binding because I stink at that.


    1) Start with a basic A-line dress shape. I used McCall’s 2213 and made the neck a bit rounder. I then drew a line to mark the shape of the cross-over panel. (I think you also could make the big piece the front of the dress and draw use a slightly different shape to make straps that cross over each other at the back of the dress)

    2) Here’s the two pieces you should have (you’ll have to trace the back panel twice b/c you’ll ruin it when you cut the cross-over panel piece)


    3) Lay the side pieces of fabric A right sides together on the back panel and sew the side seams. Do the same for your second fabric.

     4

    4) Lay the pieces out flat, here’s what you should have:

     5

    5) Pin the two pieces right sides together, with your ties sandwiched between the two layers on one side.  Sew around the whole thing except for the top of the shoulders, stopping about 1.5 inches from the end of the shoulders where marked and leaving an opening on one side for turning later. (if you were making cris-crossed straps, I think you’d stop at the opposite edge on the two outside edges but I’m not sure)


    6) Turn right side out and press. Line up the shoulder seam by folding back the outer fabric and pin the inner fabric.

     7

    7) This part is hard to describe: sew along that edge, then keep going, matching the edges of the second fabric, so you’re sewing along the other fabric as well. Basically you’re sewing the shoulder seams and then tucking them in.

     8

    8)Tuck the shoulder seams in, press and slipstitch the opening closed. Also, close up the opening you used for turning.

     9

    9) Figure out where you want the bow to end up and make two button holes, so you can thread one of the ties through to the inside and then back up to make the bow.
    (I didn’t do this right for my first example so here’s another dress showing it)

    12

    I don’t have any pictures of the recipient of the purple dress, but here’s adorable Miss Bridie wearing the yellow floral/blue check version. This picture was taken about a year after I sent it to her, and as you can see, it works well as a cute little top as well as a dress. And though I originally envisioned it with the tie in the front, it’s cute either way!

    bridie

  • Cloudy With a Chance of Meatballs

    cloudy

    I loved this book when I was little and had no idea there was a sequel until I bought the original earlier this summer as a gift for one of my son’s friends. For those who haven’t read it, it’s a tale of a town where all the food falls from the sky. (It’s also been turned into a movie recently but the plot appears to be quite different).  I decided (the night before the party of course) to make some felt food to go with it, hence the odd assortment pictured above.

    The meatball and ravioli are needle-felted. The ziti is wet-felted, made by wrapping wool roving around a pencil. The donut, sauce and pickle are made out of acrylic craft felt, though the frosting on the donut is needle-felted wool.

    I’ve made a ton of felt food in the last year or so, mostly as gifts for my son, his friends and young relatives. I bought some fantastic fruit patterns from Bugga Bugs, and for other items I’ve just made things up as I went along. I even made one of my favorite desserts – a chocolate éclair – which became proof that even if you don’t let your 4-year-old son watch television, he still will turn everything into a weapon. “Really?” I asked him. “You’re going to shoot me with a chocolate éclair?”

    View Felt Food

    Check out the article I wrote for AP about felt food in my tutorial page above, along with a how-to on making felt sushi.

  • His & Her quillow playmats

    girlquillow

    boyquillow My son has two friends whose parents met in childbirth class, so their birthdays are quite close together. When they turned five recently, I made them each a playmat quillow: a quilt that folds up into a pillow. For the girl version, I designed it to look like the floor plan of a house, with a bed, tables and chairs. For the boy version, I went with a street scene.

    I used the same basic block for both (I think it is called a framed 1-patch) and just altered the colors for the various blocks. I didn’t use batting or binding, just backed them with fleece, top-stitched around the edge and machine quilted around the squares. I used gray fleece for the pockets because I ran out of green.

    quillow

    I made my son a slightly larger train track version earlier this summer to take on vacation. It was perfect to keep him cozy on the plane, as a pillow in the car and a playmat in the hotel.

    trainmat

    They were really easy to make, but of course I had some help.

    sammy