Calendar

November 2024
M T W T F S S
 123
45678910
11121314151617
18192021222324
252627282930  

Featured at:

craftsterBest of Craftster 2008

As seen on CraftGossip.com

Fan of:

the-long-thread-button

Cozy Reading

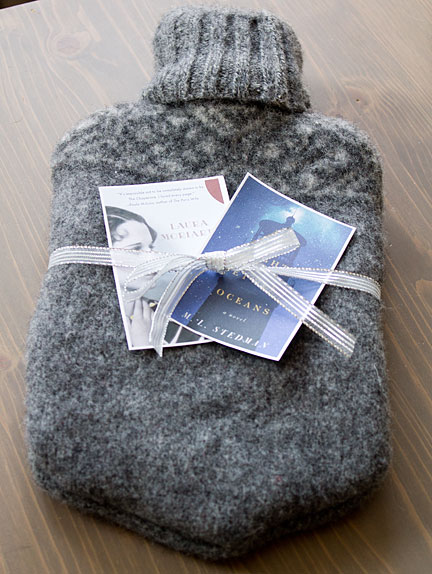
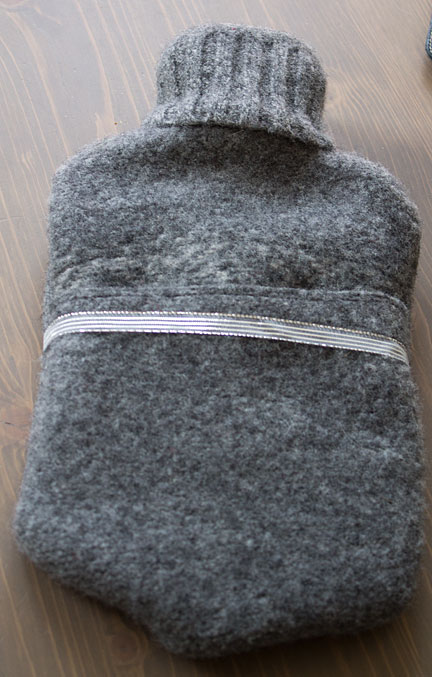
I got my mom a Nook last year as a combined birthday/Christmas gift. And while I’m not sure how much she actually uses it, I’ve tried to encourage her by getting her Barnes and Nobles gift cards or ebooks as gifts. But those can be kind of boring to open, so for her birthday a few weeks ago, I decided to make her a hot water bottle cozy to go with the ebooks, as in “curl up with a good book on a cold winter night.” I printed pictures of the books I was giving her and packaged them with the cover like this:

My first plan was to knit the water bottle cover, but I didn’t have time. Then I remembered I have a few felted wool sweaters, so I used one of those instead. My sweater was probably a bit too thick … it was a little hard to sew. But overall, it was a cute, fast project.

I followed the instructions at The Flying Quiche, except I added an opening at the back to make it easier to get the cover on and off.

Giveaway Winner!

Thank you to everyone who stopped by for my giveaway, and for all the great teacher gift suggestions! I need to come up with something pretty soon… my son’s last day of school is Dec. 19 … I think it is a bit ridiculous that he is off for five days BEFORE Christmas! Anyway… the random.org random number generator picked number 26, so the winner is Maureen, who said:

“I would be so excited to win these as I do live in a cold climate (NY) and I also suffer from Raynoud’s Syndrome so I really have a problem with cold on my hands and feet especially. Thanks so much for offering this wonderful giveaway, it is generous of you to participate and give us a chance to win.Have a wonderful Christmas”

Maureen, I’ll e-mail you to get your address!

In other news, I’ve had an extremely productive week off from work. Like last year, I had to use up some vacation/personal days before the end of the year. I’ve been busy sewing, knitting, baking, painting, cutting, glueing … and a bit of shopping 🙂 I still have a few more projects to do, but I’m hoping to get most of them done this week.

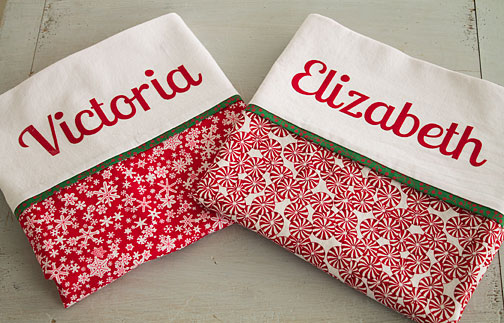
One of my projects was a set of cute Christmas pillowcases for my co-worker’s daughters, who are 5 and 7. This is a great gift particularly if you will see the recipient before Christmas (I don’t think it would seem too special to get a Christmas-y pillowcase on Christmas day or later…) In this case, it’s perfect because our work party is tonight. I’ve had the red fabric for years, and the white is leftover from the curtains I made for our cabin. I used the tutorial I wrote a few years ago for AP (you can find a link on my tutorial page), with one tiny change. (I made the contrasting trim a bit narrower). And I added their names using iron-on flocked vinyl cut with my Silhouette machine.

Giveaway Day!


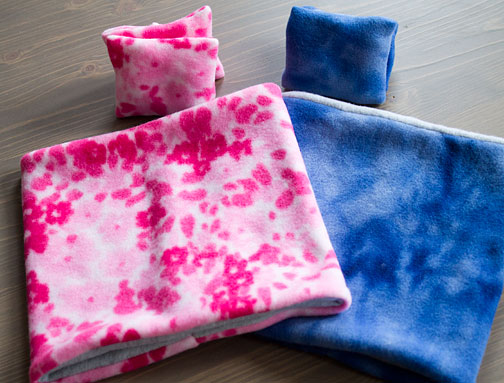
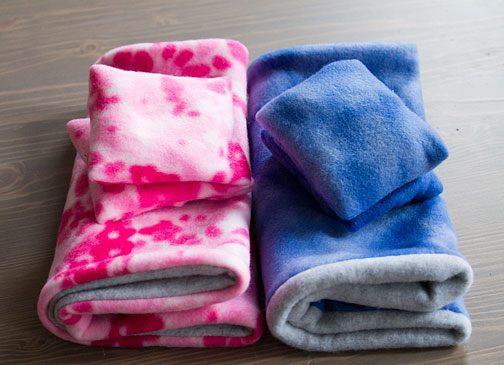
Welcome and Happy Holly-days! For the wonderful Giveaway Day at Sew, Mama, Sew!, I am offering a set of “his and hers” neck and pocket warmers! The neck warmers/gaiters are made of a double layer of fleece. They both are reversible to a neutral gray, and they’re a great alternative to scarves. Very warm, and no worry about getting tangled. The pocket warmers have removable fleece covers, which should be taken off before popping the pocket warmers into the microwave (30 seconds or so is plenty). Now, I realize some of you may live in warmer climates where such things are unnecessary, but perhaps you have far-flung friends and relatives who could use these? I will wrap them up in coordinating ribbon for easy gift-giving.

Just leave a comment below. Anything will do. But if you feel chatty, I’d love to hear any ideas you have for a teacher’s gift for a male teacher. The purse/wristlets I made for last year’s teacher is not going to cut it this year!

And if you don’t win, you can check my tutorials on how to make your own!  The pocket warmer tutorial is HERE. You can find the neck gaiter tutorial by clicking on the “tutorial” link at the top of the page and then scrolling down.


For those who are new to my blog, I hope you’ll come back and look around! As a bit of background, I’m a reporter for The Associated Press by day, crafter by night. Sometimes the two intersect and I get to write sewing and craft columns for AP, but my main job is covering politics and other topics in New Hampshire. My husband is the national food editor for AP, and we have an 8-year-old son who enjoys sewing as long as it involves jamming his foot down on the sewing machine pedal as hard as he can 🙂

I will close comments at 10 p.m. EST Friday, and will announce the winner Saturday. I will ship internationally.

Please check out all the other great giveaways by clicking the image below:

Holidays, here I come

I really need to get back on track with this blog! I have next week off from work, and plan to spend the vast majority of my time working on various Christmas gifts and decorations, so I promise to start posting more …

In the meantime, here’s a little roundup of some past holiday projects and/or tutorials for any of my newer readers. Click on the pictures to go back to those posts.

Fabric Chain Advent Calendar

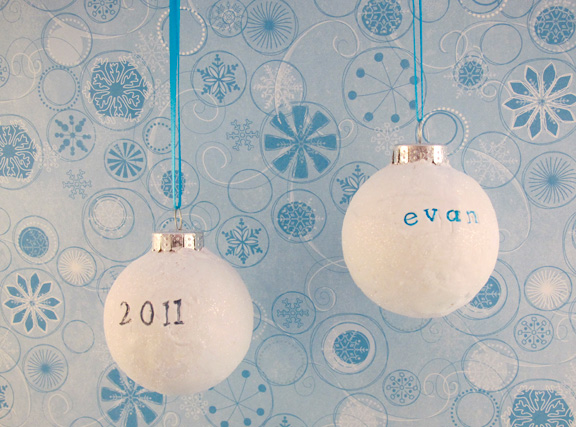
Snowball Ornaments

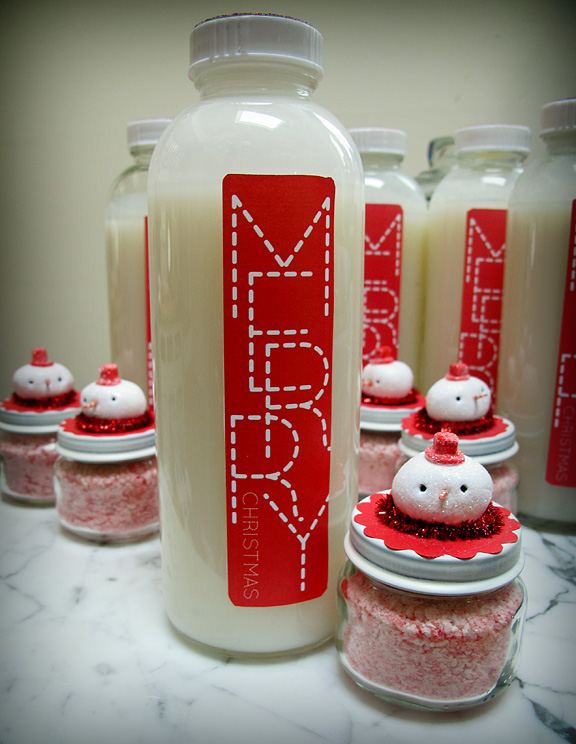
Peppermint Coconut Cocktail

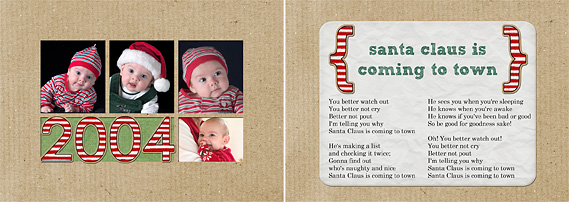
Family Photo Songbook

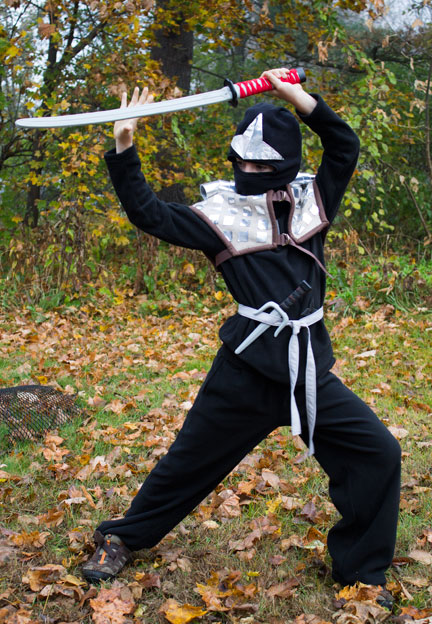
Ninjago Cole ZX Costume


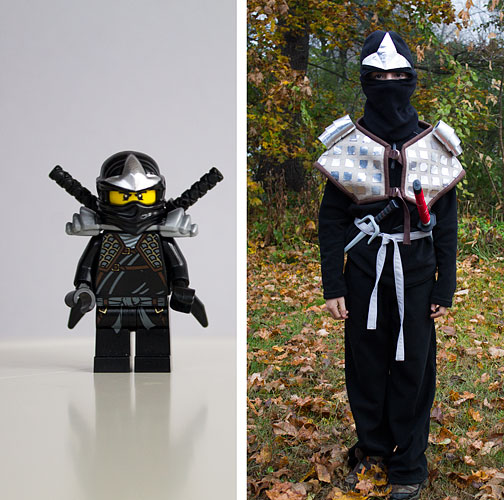
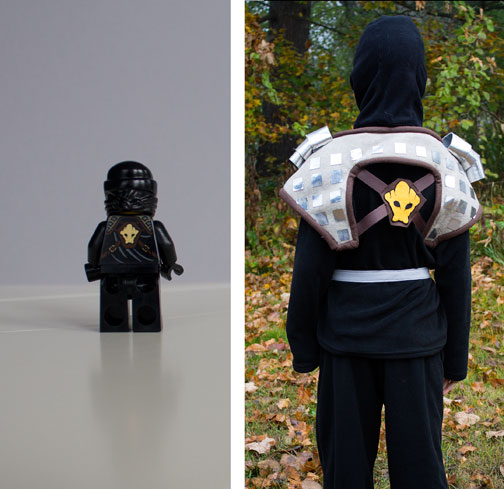
When Parker first told me he wanted to be a ninja for Halloween, I wasn’t thrilled because I don’t like the association with violence. On the other hand, I thought “easy costume!” Then he clarified that he would like to be “Cole ZX,” one of the LEGO Ninjago characters. So that left me studying a tiny minifig trying to figure out how to recreate all the bits and pieces that go along with that character.

I decided to go easy on myself and start with purchased clothing: black fleece pants, a top and a ski mask, all from Target and all items of clothing that Parker will wear all winter. Plus, it can be very cold here on Halloween (last year, we got almost two feet of snow a few days before Halloween. This year? Who knows if we’ll even have Halloween with this storm coming).

Parker also decided he didn’t want whatever you call the thing that Cole wears on his back to hold his swords. So that left whatever you call the thing that Cole appears to have wrapped around his shoulders. Parker thinks this is “armor.”


I bought half a yard each of brown and light tan felt ($2.99/yard at Jo-Ann’s), which was way more than I actually needed, 2 yards of brown strapping and two sets of gold D-rings. I made a pattern by tracing the black fleece top onto newsprint and then sort of drawing what I thought the front and back of the armor/vest should look like.

Once I had a basic pattern, I tried it on Parker and modified it a bit, making the back longer. It occurred to me later that I could’ve just made a super-simple vest out of one layer of felt, but I decided to get a bit fancier, so I made two: one out of the dark brown felt for the lining and one out of the light tan felt for the exterior. I then sewed the two vests together, right sides facing out, all along the perimeter, close to the edge. If I had some brown bias tape on hand, I could’ve used that to finish the raw edge (or left it unfinished, it’s felt, it won’t fray). But since I had a ton of brown felt leftover,  I cut it into 2-inch strips and sewed strips together until I had one piece long enough to go around the whole vest. (I think it was about 96″ total). I sewed the binding strip to the front of the garment, using maybe a 3/8″ seam and then folded it around to the back and sewed it in place. I didn’t pin, I just held the binding in place and sewed “in the ditch” on the front. My original plan was to finish this earlier, scan my pattern and post it here for others who want to make the same costume but I ran out of time. Hopefully I will do that eventually, and it can be a resource for next year!


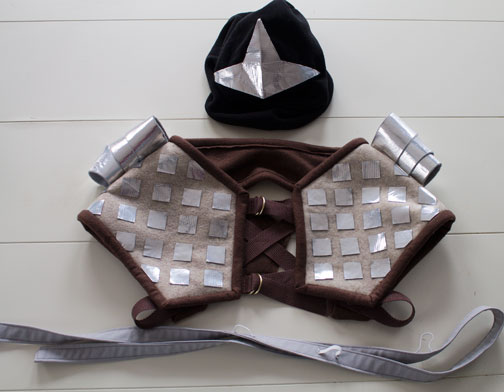
For the silver “armor” or whatever it is, I cut squares of silver duct tape I had leftover from some other project. For the shoulder thingies, I stuck strips of the tape to gray felt, cut it into strips and rolled the strips into rings, with each one fitting into the one before it. These are just sewed in place by hand with a few stitches. The vest looks a little big in these pictures, but for actual trick-or-treating, he’ll be wearing another shirt under the fleece, so I think it will look better once it’s a bit more filled out.

For the mask, I cut out the shape out of cardstock and then covered it with more tape, and then sewed it in place by hand. I didn’t go crazy stitching it because I want to remove it after Halloween so he can still use the ski mask all winter. The belt, which could’ve been a bit wider, was made from leftover fabric from my sofa slipcovers. I added a few loops of elastic to hold the weapons more securely.

Here’s a shot of the main pieces:


Closing the Camp

We finally closed up our summer camp for the season last weekend. While it has a wood stove, it is not insulated (in fact, you can see daylight right through the floor boards), and we have to turn the water off for the winter. It was sad to say good-bye, but we really did have an amazingly wonderful first summer, and I know we will enjoy it for years to come.

But all that cleaning and packing reminded me that I never really shared many pictures of all our renovations and the sewing/craft projects that were involved.

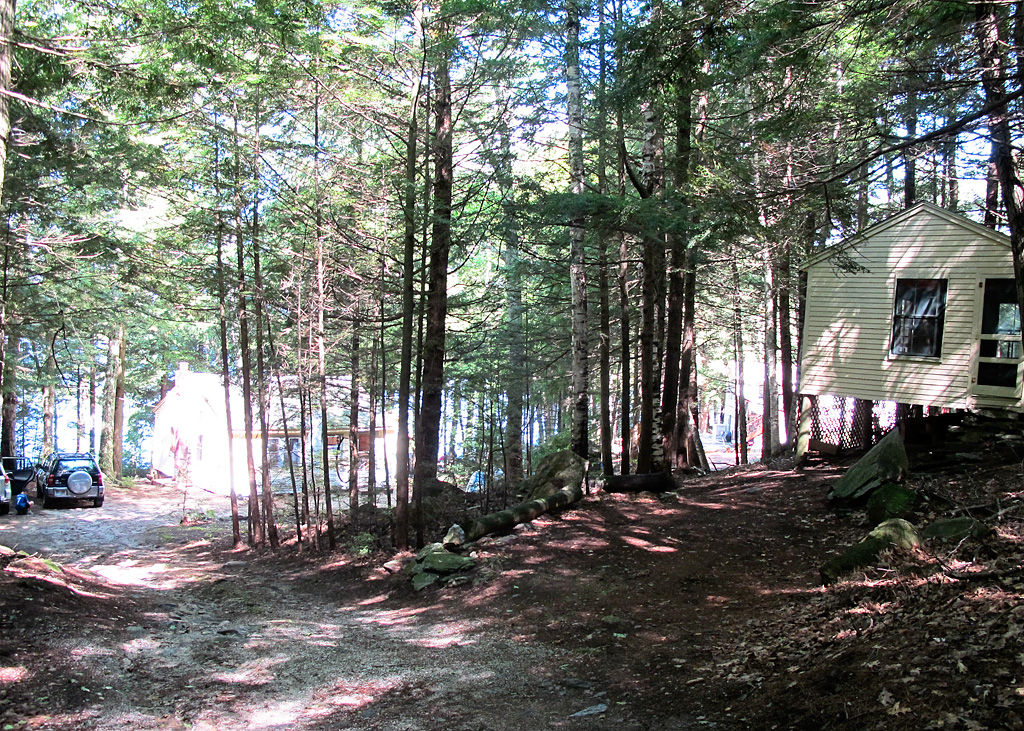
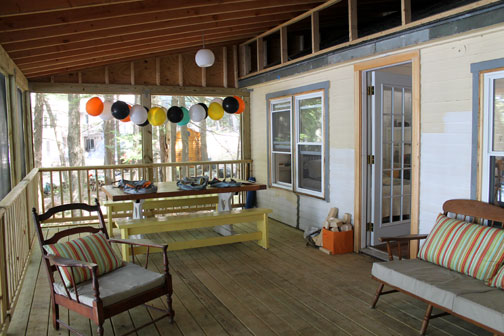
We have two buildings: a one-room cabin (with a bathroom tacked on the side) that basically has our kitchen in one corner, living room in another, bedroom in the third and dining area in the fourth. And we have a one-room “bunkhouse.” (the bunkhouse is on the right in the picture below. The cabin is down the driveway, with the water on the other side of that). We moved the small deck that was facing the water to the driveway side of the house to make a low, entrance-way deck, and added a large, screened in deck facing the water. (I don’t mean ‘we’ actually built it… we hired someone for that!)
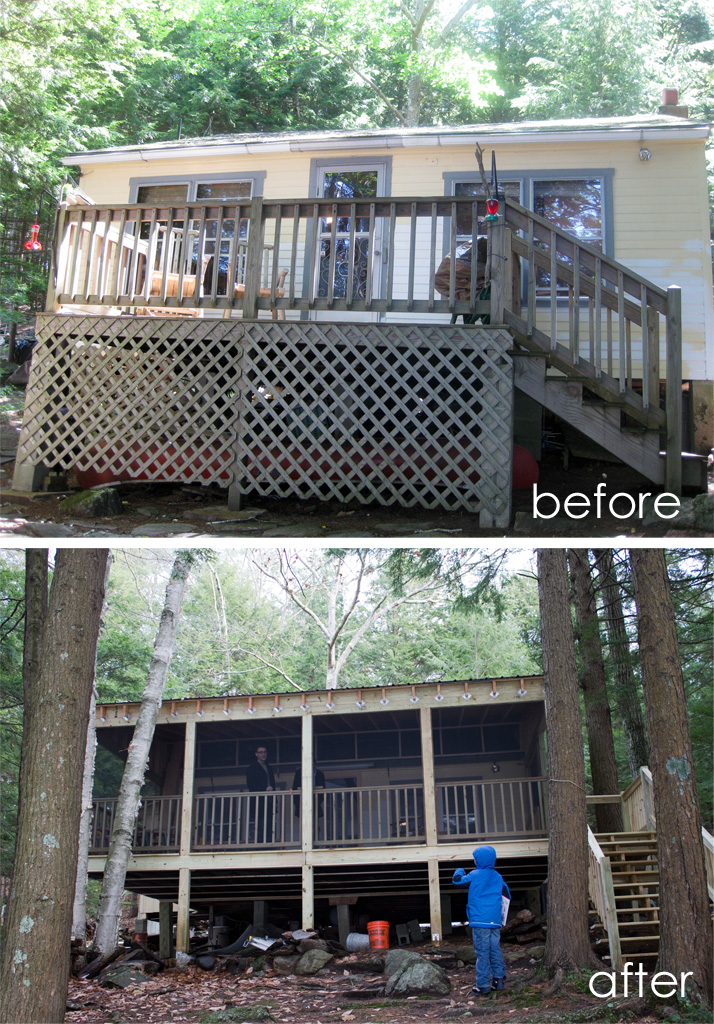


The new deck really is where we spent nearly all our indoor time. We bought a new dining room table for our house, so we brought our old dining room table from home to the camp. I wasn’t too worried about it getting damaged by any rain that might blow in since this table was our biggest bargain ever _ purchased at an auction for $5 years ago. But it held up fine all summer (we moved it inside for the winter). My husband found the benches at an antique/junk shop for $20 and I painted them yellow.

We also re-used some furniture that the previous owners left us. I made new cushions and covered them with indoor/outdoor fabric. Though somehow I measured the backs of the chairs wrong and those pillows are a bit too small. Oh well.
 

Here’s what the inside of the cabin looked like before the previous owners moved out:
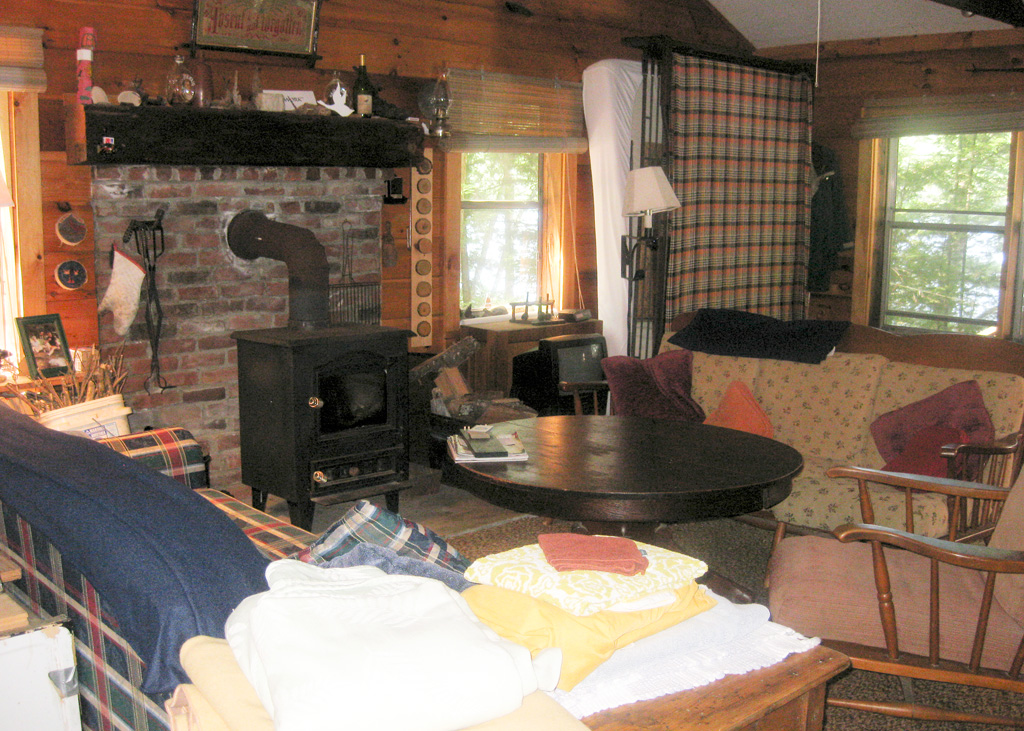
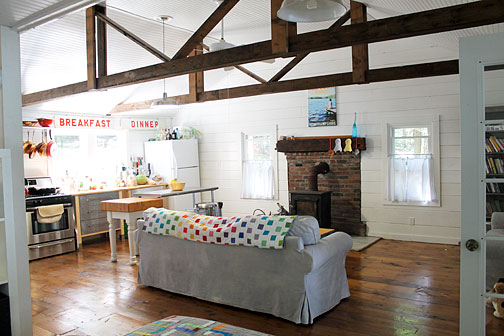
We ripped up the carpet and linoleum underneath (luckily, neither was glued or nailed down) and were ecstatic to find wood floors that apparently had always been covered. We put a few coats of polyurethane on the floors, and LOTS of white paint on the walls. (Renting a paint sprayer made this go FAST). We hired someone to put the bead board paneling on the ceiling, to remove a small walled-in area infront of the bathroom (we’re guessing that that area used to be the bathroom, and then a new one was added on). It didn’t make any sense to have basically a closet leading to the bathroom, so we tore that down, just leaving the post you see in the picture below. So there used to be a wall where those open shelves are, and another on the other side of the bathroom door. A lot of people questioned whether we should’ve left everything so open, but really, there was never a time when someone was in bed and someone else was in the kitchen or whatever. I think it would be different if we had a bigger family, but it’s just us three.

Inside, most of the furniture (including all the kitchen cabinets) is from IKEA. The closest one to us is about an hour and a half away. We actually rented a U-Haul van to get all the stuff, which worked out great because one of the kitchen drawer units was in the clearance section already assembled. The metal kitchen island is from Sam’s Club. The wooden butcher block used to belong to my husband’s aunt. We bought the “Now Serving” signs at an auction years ago and used to have them hanging in our living room at home.
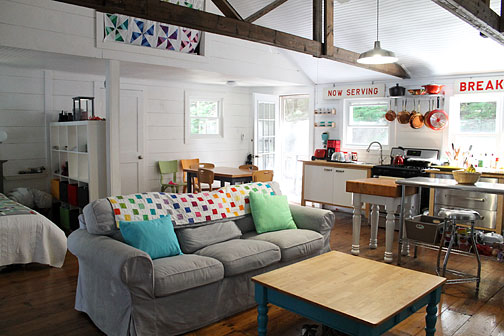
The dining room table and chairs were yard sale finds. The coffee table was from our living room at home; I repainted the legs.
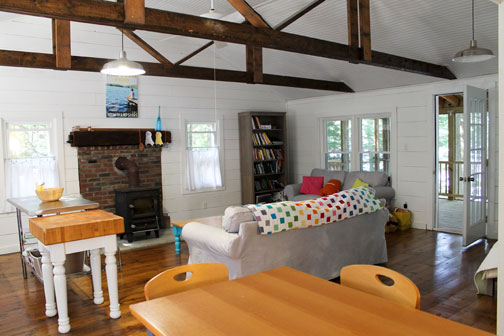
 

As mentioned in previous posts, I made the quilts on the sofa and our bed, as well as the sofa throw pillows. I also dyed the sofa slipcovers (not very successfully, but still better than plain white, I think). I also made simple white cafe curtains for the windows that face our neighbors’ homes, and a quilt-block curtain to cover the opening of the storage space in the eaves of the cabin (next year we want to look into opening up that space and making it a sleeping loft for Parker. For now, he sleeps on the sofa. That worked fine… we just sit on the deck after he goes to bed. But if we did the loft, we wouldn’t have to make up a bed for him every night).
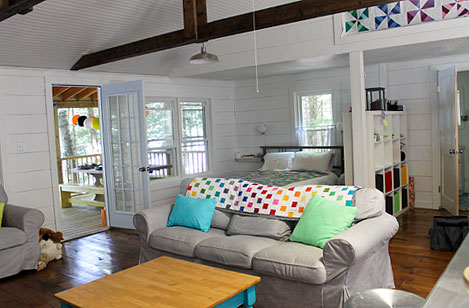
 

I also made the boxes for our IKEA Expedit shelving. I really didn’t like any of the IKEA options for boxes and didn’t want to spend a fortune. Target has canvas bins, but they’re too small. I finally settled on covering cardboard file boxes from Staples with felt. Now, the file boxes are just a tiny bit longer than the shelves, but if you had this shelving unit against a wall, I think it would be fine because you probably wouldn’t have the unit flush against the wall. So the little bit could overhang in the back and not be so obvious. Here, it did annoy me a little bit because our shelves are open on both sides, but I pretty much had them stick out on the bed side of the unit.
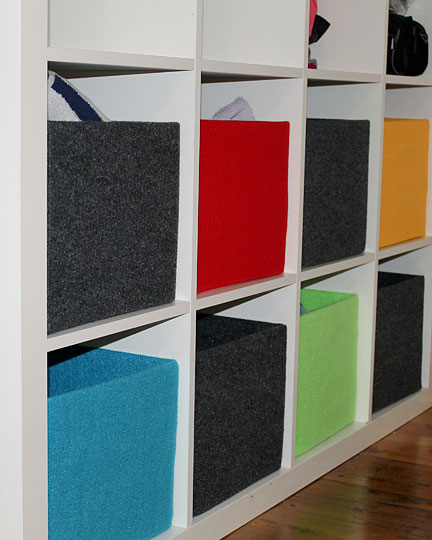
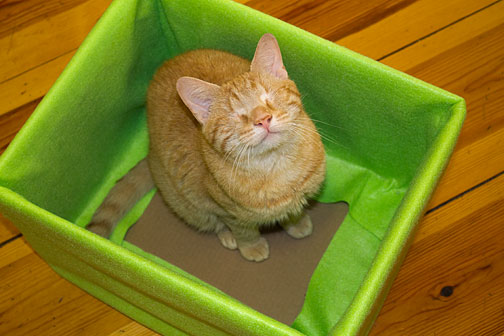
I think I got the medium-strength cardboard file boxes, and they held up fine being stuffed with beach towels, etc., all summer. And I just bought the inexpensive acrylic felt off the bolt at Jo-Ann’s. I hope to do a tutorial on how I covered them soon, but basically I cut a piece of felt the size of the box bottom (plus extra for seam allowances) and pieces that were the width of each size but twice as tall (plus about two inches extra in height) So when those pieces were sewn together, I could insert the box and fold down the cover to the inside of the box. That was then held in place by cutting a piece of cardboard the same size as the box bottom, wrapping it in felt, and inserting into the box. So the covers are easy to put on and can be removed easily as well if needed. Here’s Tangerine trying out one of the boxes while I was making it. This is before I inserted the final piece in the bottom.
 

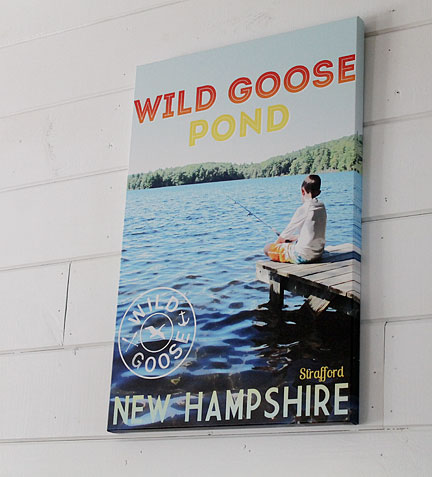
I designed this canvas using a picture I took of Parker on the dock. I played around with it in Photoshop, trying to make it look like an old fashioned travel advertisement, and had it printed at Paper Coterie when they had a 60 percent off sale. I got the biggest size, 20 X 30, but it still looks small on this wall. Next year, I’d like to add other artwork.
 

The bunkhouse turned out to be perfect for guests. Here’s the before picture:
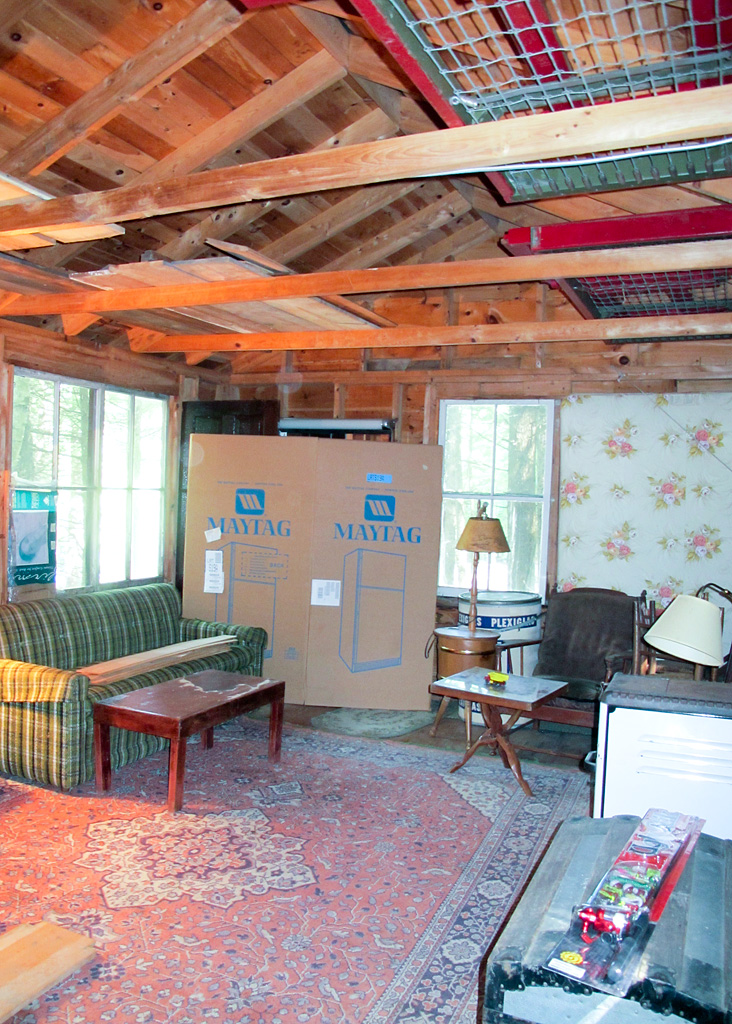
 

Here’s the after:
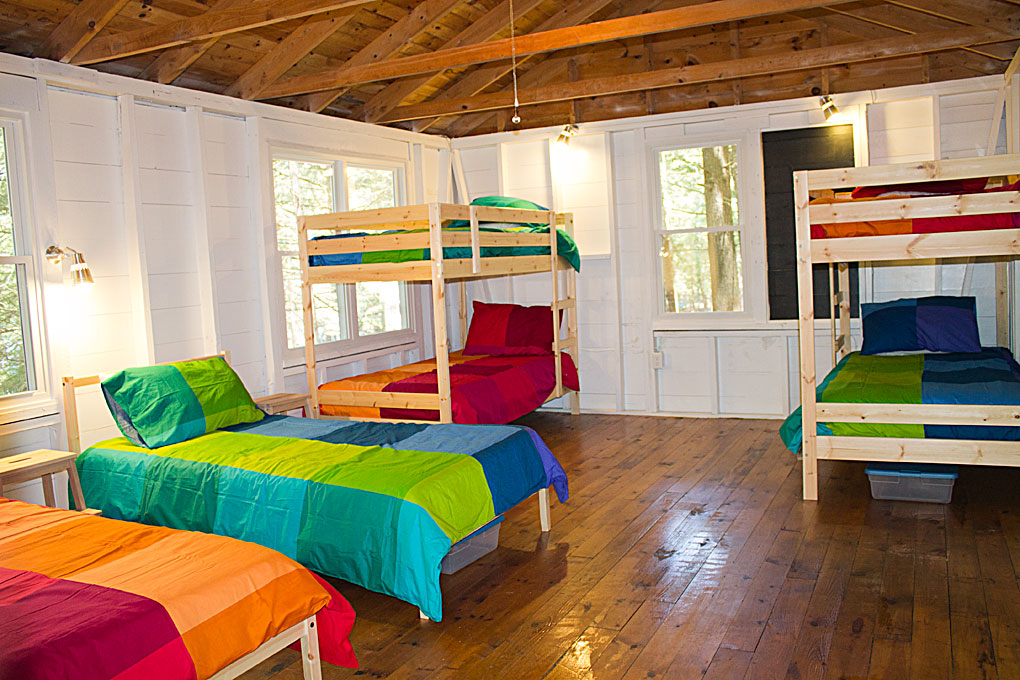
Pretty much everything in here is from IKEA. (Except the mattresses… those we got locally as cheap as we could). As we did in the main cabin, we basically emptied the building (including TONS of wood, junk, etc. stacked UNDER the buildings and in the rafters… Seriously, we ended up with four Dumpsters full of debris), scoured it with bleach, painted the walls white and polyurethaned the floors.

Wow, that was a long post! And it makes me really sad that I won’t see any of this until probably April!


Autumn Knitting

It was 34 degrees here this morning, so I suppose I should face reality that summer is over!
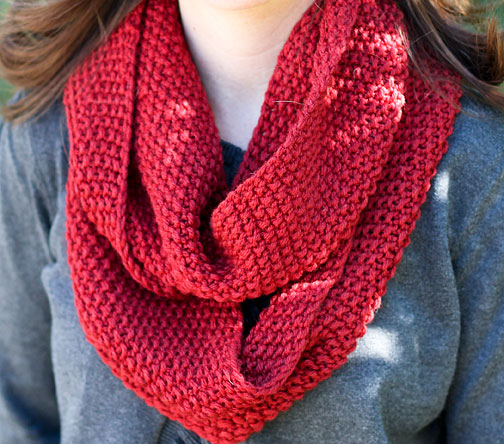
My sister is heading off to Canada for a short vacation this week, so I gave her her birthday gift a bit early (our birthday is next week). I made her this cowl (Pattern is the “GAP-tastic Cowl” by Jen Geigley on Ravelry). It is so cozy, I was tempted to keep it for myself. But my sister really loved it, and really appreciated the work that went into it. She even claimed not to see the mistakes, even when I pointed them out! It was not at all difficult to knit, even for a beginner like me, but it took me quite a long time just working on it here and there. The directions call for making it even wider, but I stopped at about 8-9 inches wide, which seems plenty.

I used Knit Picks Gloss HW/Aran yarn in a pretty cranberry color (it’s not as RED as it looks in this photo).

I also finished up this cap for my cousin’s best friend, who was recently diagnosed with a brain tumor and is undergoing chemo. It is unbelievably sad and I am heartbroken for my cousin and her friend, whom I’ve known for most of my life. The pattern is the Race for Life 2009 Chemo Cap by Erica Downs.

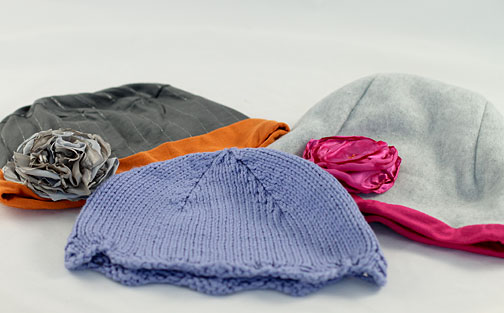
To go along with the knit cap, I also made two other reversible hats, one fleece lined with jersey knit and another just jersey fabric, plus a few removable flower pins.

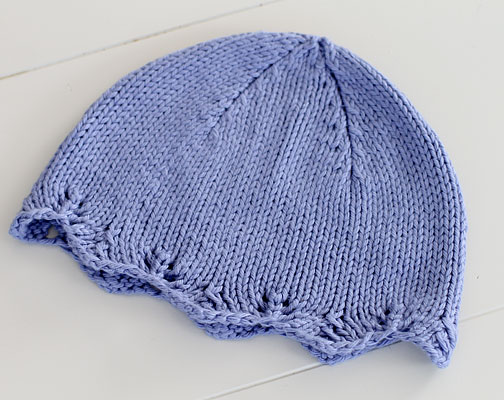
And lastly, on a much happier note, I made a little knitted hat for my blogging friend MaryAnne’s adorable baby girl. I forgot to take pictures of it here, but you can see the cute model at MaryAnne’s blog, Mama Smiles.

Spy Party

Parker’s birthday is later this month, but we had his party a few weeks early to take advantage of the late-summer warm weather given that he had his heart set on a sleepover party at our cabin.

We invited four of his buddies for a “spy training” party, and it was a blast!

I was so grateful for all the wonderful, detailed ideas I found on a blog called Birthday Blueprint. You’ll see that I followed many of them very, very closely!

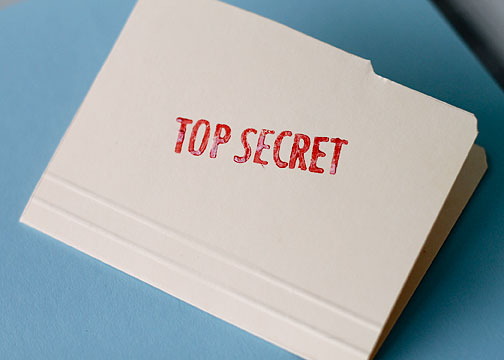
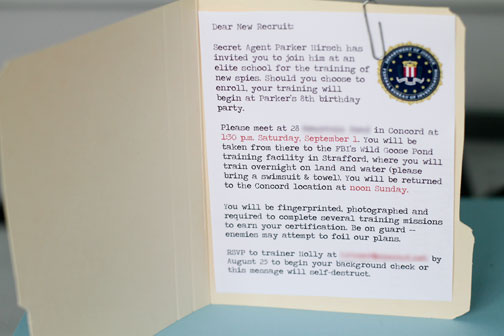
First, the invitations:

I cut regular file folders into mini-folders, with the invitations tucked inside:


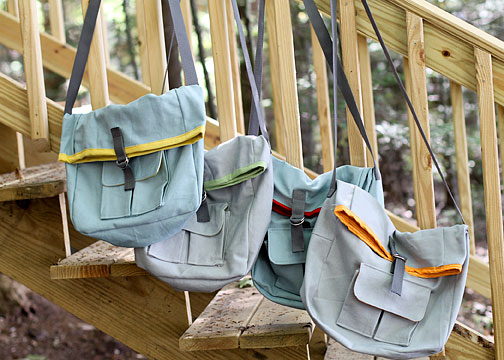
I also made each boy a spy/adventure bag, using a free pattern for a nature explorer bag at Chez Beeper Bebe. I simplified the pattern a bit by making fewer pockets and flaps, and skipping the bias binding around the top. Instead of that, I just made the linings about an inch taller, and then folded them over the top of the exterior and topstitched. Not the most refined finish, but these were for 8-year-old boys. I also added another D-ring to make the bags actually close. I used leftover fabric from my living room slipcovers for the bag exteriors, and random leftover fabric for the interiors. So each bag cost less than $2 for the straps and D-rings.


One boy asked me if they could keep their bags, and when I said yes, he hugged me. Another one kept saying “Do we have to bring them home? Do we?” Sigh.

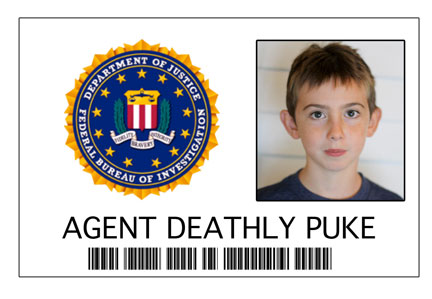
In each bag was tucked a pencil,notebook, ID badge, fingerprint card and one item related to the “secret mission” game we played later. I have plenty of reporter’s notebooks given my day job, so I just glued black cardstock to the fronts and added the “top secret” stickers.

Here’s our screened-in porch set up for the party (I bought this pack of balloons at Target thinking it would be all primary/rainbow colors. It turned out to be an odd assortment of white, black,orange, yellow and teal. Oh well).

When the boys arrived, we did their fingerprints and picked their code names. To figure out the names, I asked each of them to call out two adjectives and two nouns. I wrote them down on slips of paper and had them pick one of each for their names. We ended up with: Blue Missile, Red Gun, Massive Ejector Seats, Weak Bullet and …

(For the party, I wrote their names on their badges. I then took headshots of each kid, and used those to make photo ID badges that we will mail to them with their thank-you notes)

We also did “laser training” _ they had to get through this maze of yarn without touching it. I hung some tiny jingle-bells on the yarn as “alarms,” though I think the boys had removed them by the time I took this picture.

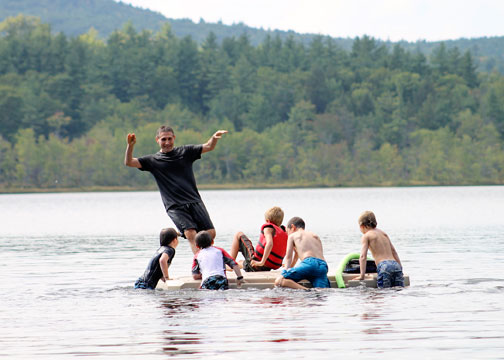
 The boys then headed out onto the pond for a rousing game of “Push off the Raft” aka “Spy Agility Training” with my husband, while I set up the secret mission/clue hunt.

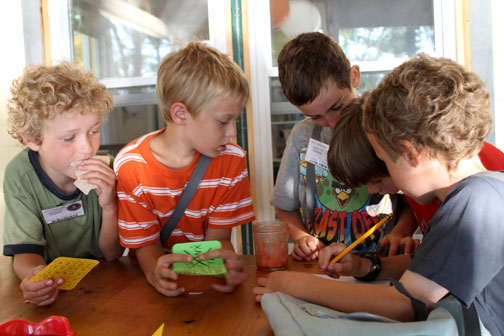
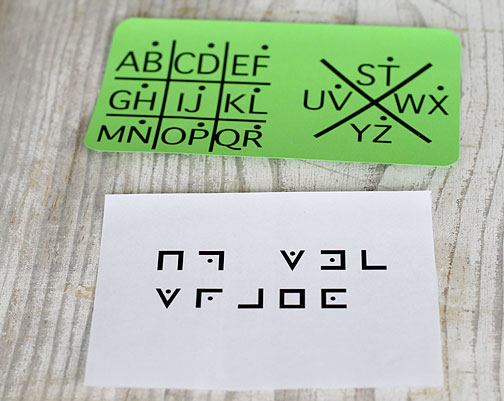
The clue hunt worked very well. I gave them an envelope with the first clue, and they had to figure out who had the cipher to solve it. Each kid got to feel special when it was his turn to use his special cipher, but they all worked together to solve the clues.

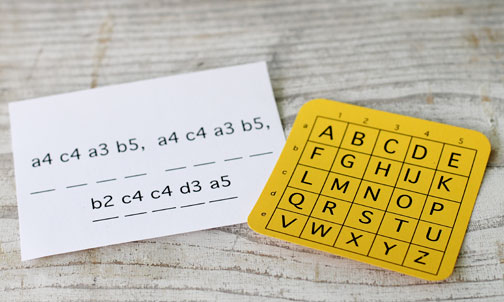
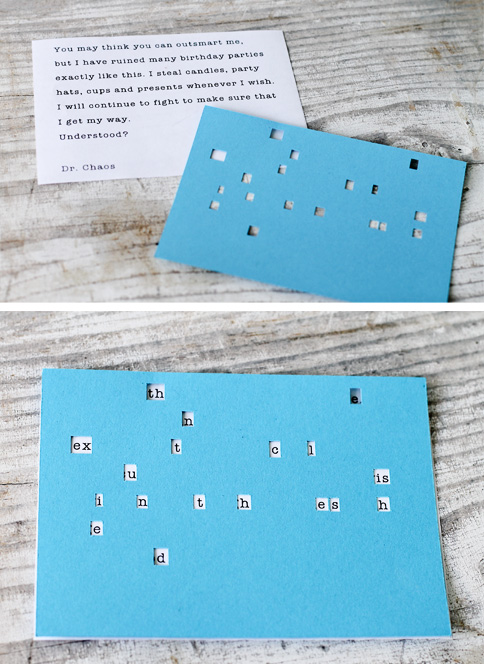
You’ll see my first clue is very similar to the Birthday Blueprint clue, though I constructed it a bit differently. I typed up the message, making sure the letters for the coded message were in the right order within the words, and then used my Silhouette machine to cut out the cipher _ a piece of cardstock with boxes cut out, so when it was laid over the note, the message appeared. (“The next clue is in the shed.”)


Clue #2 used a mason cipher to spell out “ON THE TRAIL” and led them to a trail in the woods on our property. (I used a free font called FAM-Code)

 Clue #3 spelled out “Dock, Dock, Goose” to send them down to the dock. This was a simple graph/substitution code.

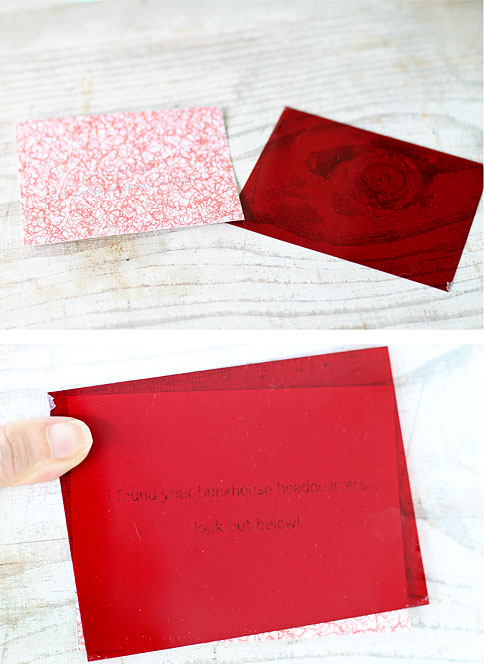
From there, the went to the bunkhouse, using a piece of red plastic to read the clue “I found your  bunkhouse headquarters. Look out below!” (Clue was hidden under a bed). For this clue, I downloaded the red sqiggle design from the Martha Stewart website.

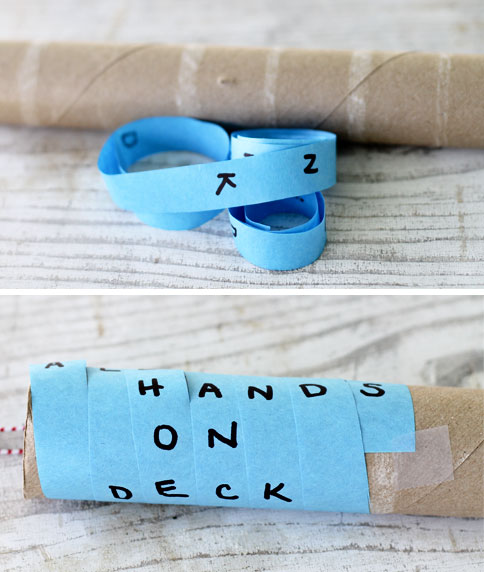
Finally, the last clue involved a cipher device called a Scytale (directions can be found on the NSA’s kid’s page, under “games and activities” and “make it at home,” but basically you wrap a thin strip of paper around a paper towel tube or similar item, write your message and then un-wind it. One of the kids had a paper towel tube in his bag, and had to figure out that he should wrap the paper around it to reveal the message: “ALL HANDS ON DECK”)

This led them back to the porch/deck, where the cake was waiting. We had planned to make a bomb-shaped cake, with a sparkler/candle that had to be “de-fused” but my husband saw this idea in a magazine and Parker loved it. This actually the leftovers… it was arranged nicely on a big platter with candles. It had nothing to do with the theme, but no one cared!


Lovey Dovey Ram


I recently got a birth announcement from one of my college friends. We weren’t particularly close, but we did drive back and forth from North Carolina to New England a few times (he was from Massachusetts), which is something of a bonding experience given the long ride!
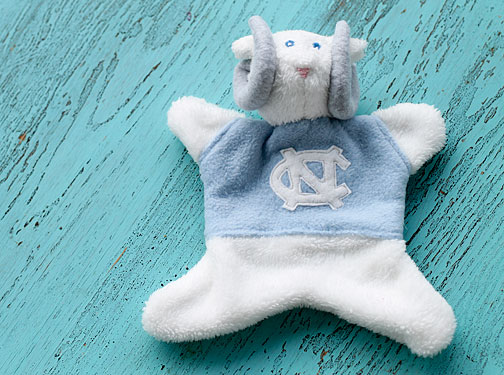
So I decided to make another Lovey Dovey using the pattern by Abby Glassenberg at While She Naps, but altered to resemble Ramses, the mascot of our alma mater, UNC.
I probably should have tried to change his face a bit to make it more ram-like, and the horns were kind of tricky, but close enough!

I’m also trying to make an effort to use my fabric stash instead of buying more stuff, so I was happy that I had everything I needed on hand for this little project.

Speaking of which, hopefully I’ll be back this week with a post on Parker’s 8th birthday party, which included five handmade “spy gear” bags made with leftover sofa slipcover fabric!


Souvenir Sachets

I had the most incredible weekend last weekend: six of my friends from college spent three days with me at our camp. I went to the University of North Carolina, and the six who visited all live there or in Tennessee, so I was shocked that they all accepted my reunion invitation, rathern than suggesting that I travel south instead! I had not seen two of them in 17 years, but it was amazing how we all just settled in like we were back in the dorm where we all met. We had perfect weather, including the most amazing sunsets.

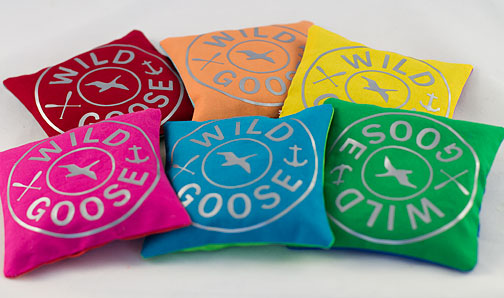
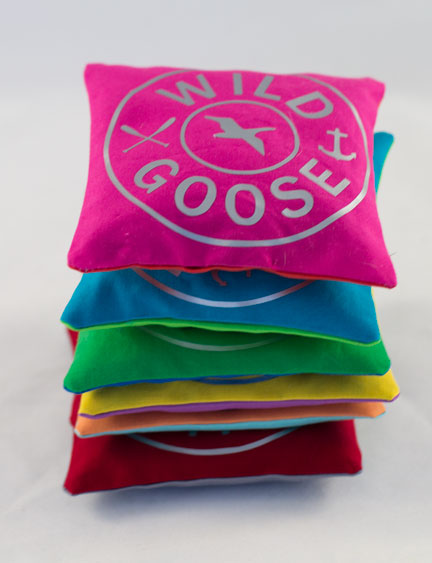
As a little gift, I made them each a small sachet, filled with pine needles from the camp. I used leftover charm-square fabric pieces, so I didn’t even have to cut the fabric. I used my Silhouette machine to add the “Wild Goose” logo, using iron-on vinyl. The logo is actually from a Boy Scout camp that’s across the pond. The previous owners of our cabin used to have t-shirts with the logo, and they sent it to me.