Surprisingly, my son has yet to waver from his desire to be an astronaut for Halloween this year, but here’s something I made him last year in an attempt to cover his ever-changing alter-egos: a reversible, 4-in-1 cape. With two colors to choose from plus button-on embellishments and a button-on hood, he can quickly transform himself from knight to dragon to super hero to king. I also made a red and pink superhero/princess/butterfly/Little Red Riding hood cape for my niece. For the butterfly, I added loops of ribbon at the front corners of the cape that she can slip over her wrists, and a large loop of ribbon with velcro at either end to gather up the middle of the back of the cape and turn it into wings.
I can’t post the material from the article and audio slideshow tutorial I did for The Associated Press last year because of copyright restrictions, but the links below will get you there. Or you can click on the links in my tutorial page.
Reversible Cape AP Article & Tutorial
Stich/Craft
-
Reversible 4-in-1 Cape
-
A Busytown Birthday
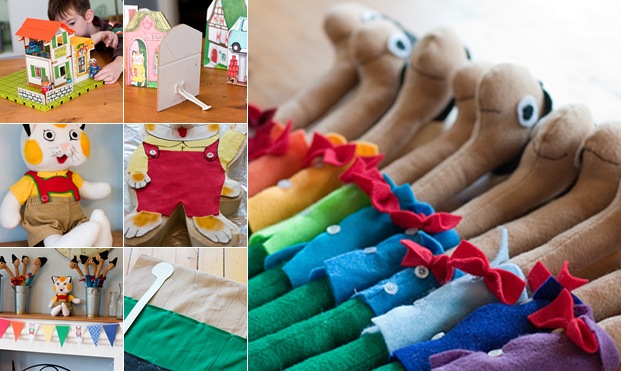
(It appears that clicking on the image above no longer brings you to a gallery of images, so I’ve posted them below)My son has been smitten with Richard Scarry’s Busytown characters since June, when he picked up two of his books while we were on vacation. They were in Italian, but that didn’t matter. He poured over them for hours, including about half of our plane ride home from Rome. So we decided to make Busytown the theme of his 5th birthday party earlier this month.
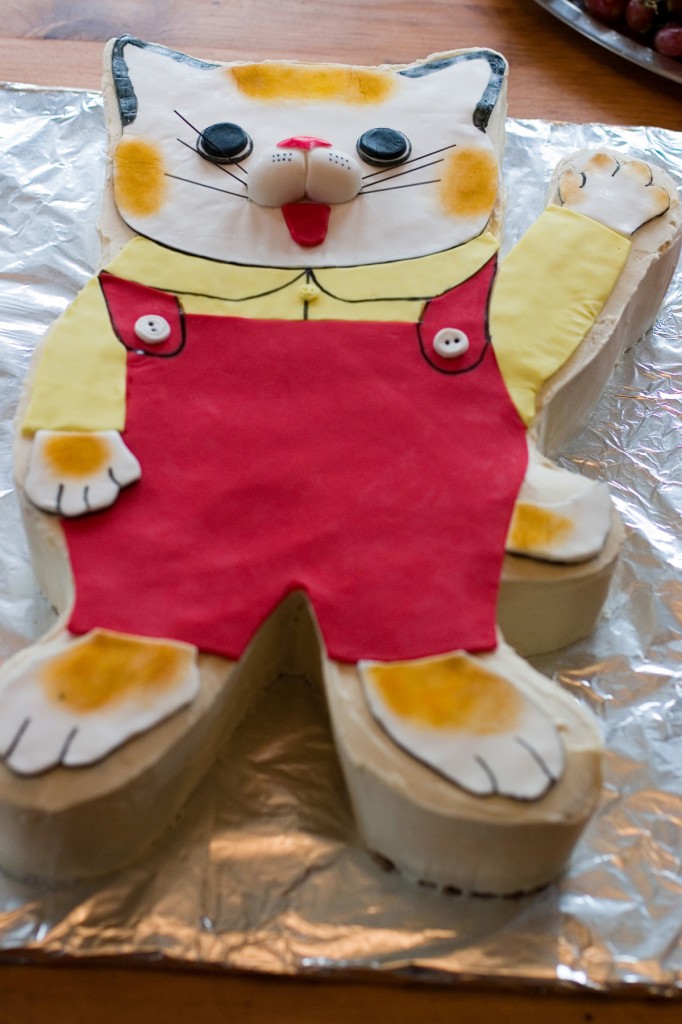
The amazing Huckle Cat cake is entirely the work of my food-editor husband. It was a super-moist, dense yellow cake (FOUR DOZEN EGGS), covered in buttercream and decorated with fondant.
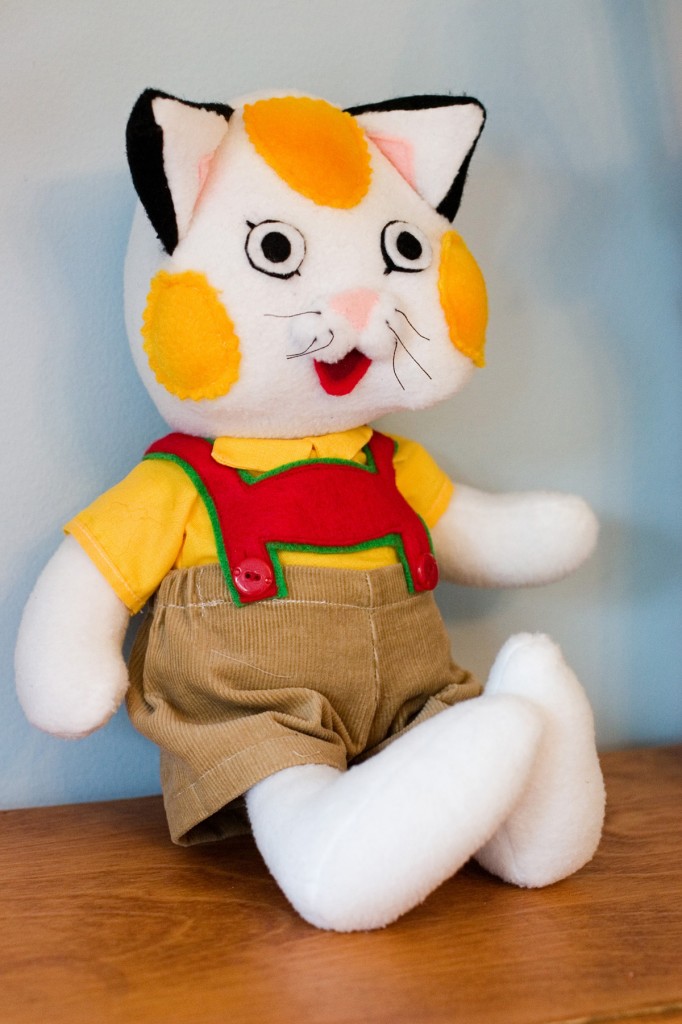
Meanwhile, the stuffed Huckle was my project. I started with a pattern for a baby doll, added the ears, tail and nose and lengthened the feet. The pattern included a little shirt, which I altered a bit to look more like Huckle’s. The pants are a modified version of an American Girl doll clothing pattern!
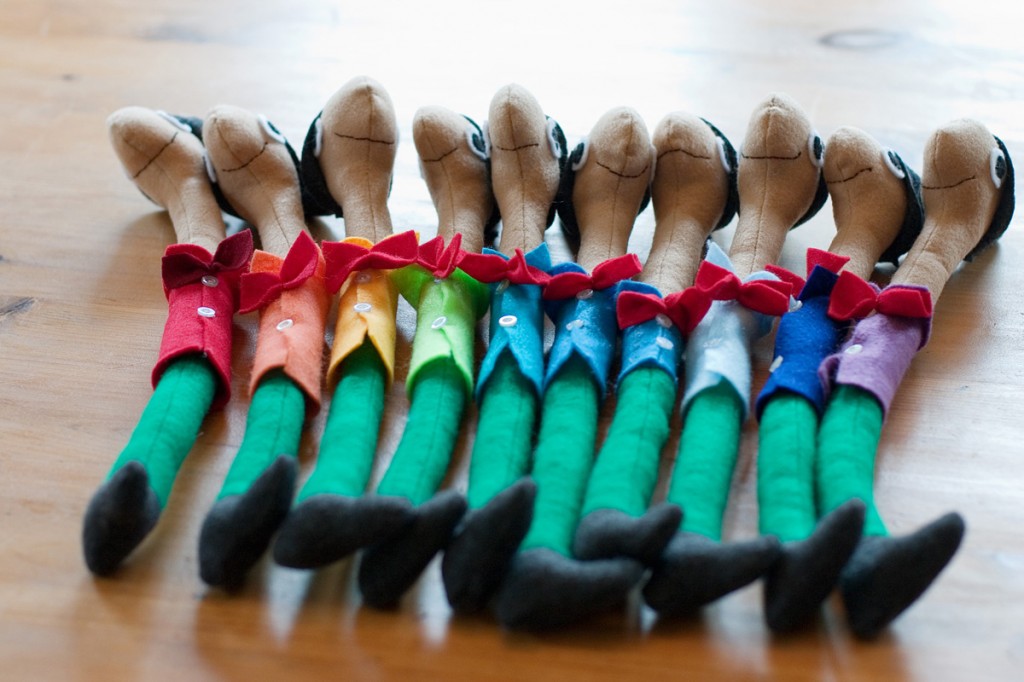
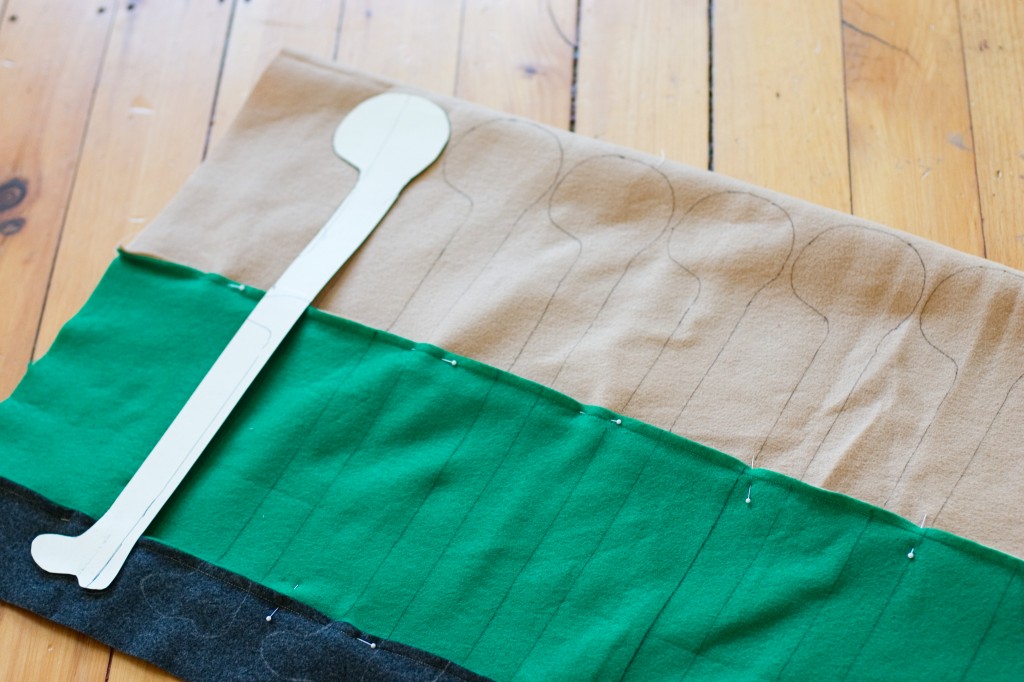
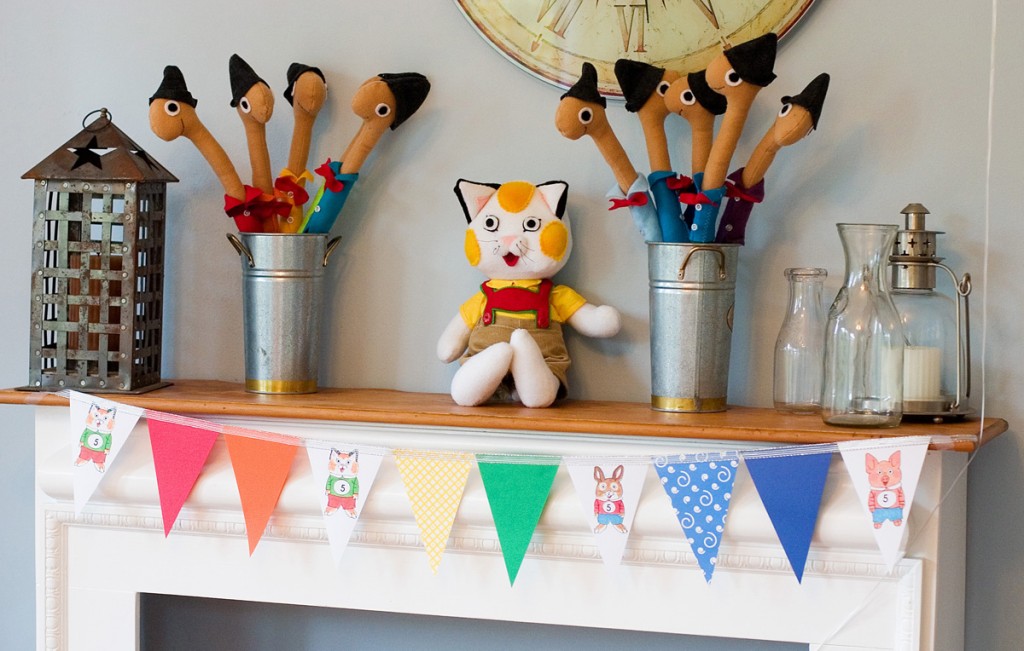
I bought a used but perfect copy of the out-of-print “Richard Scarry’s Biggest Make-It Book Ever” on eBay and scanned various pages to make the invitations and decorations. It also included the pattern for the Lowly Worm dolls I made as favors, though I came up with my own construction method to streamline the process since I was making so many. Rather than cut and sew 10 bodies, 10 pants and 10 shoes, I sewed long pieces of tan, green and grey felt together, traced the pattern 10 times, cut in between and then sewed on the drawn line. That part went quickly but I admit that by the time I got to all those buttons and bow-ties I was pretty sick of the whole project.
I had grand visions of sewing a cute bunting but ended up just cutting triangles from leftover scrapbooking paper and some more images from the “Make-It” book. I strung them together by sewing a piece of ribbon across the top of the triangles.
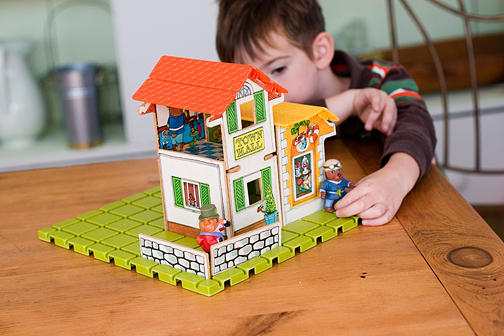
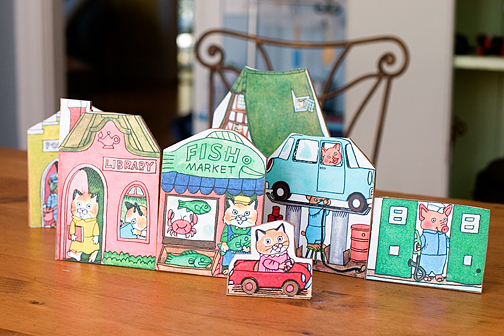
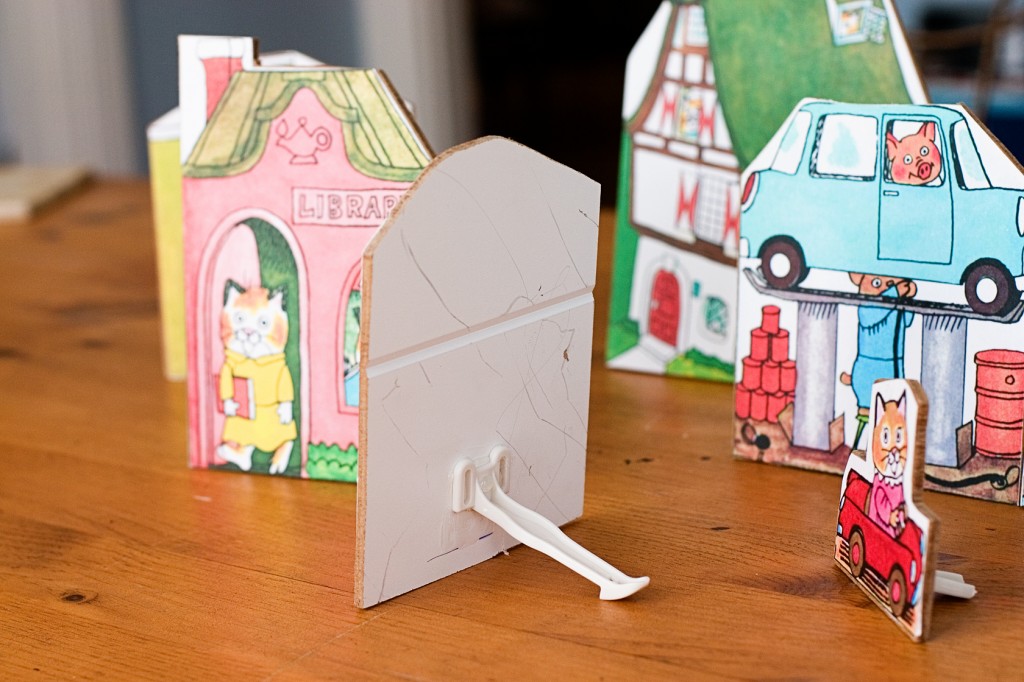
Parker’s main present, other than the stuffed Huckle, was another eBay find: a 1976 “Puzzletown” set so he can build his own Busytown. We came up with what we thought was a great idea: scanning more pages from the “Make-It” book (which included cutout images of various Busytown buildings) and attaching them to fiberboard to make extra pieces. My husband used a jigsaw to cut out all the pieces, but the fiberboard (actually a piece of paneling) was just a hair too wide to fit in slots on the Puzzletown base. Had we realized that earlier, we probably could’ve sanded the edges, but since I already had glued the pictures on, we stuck plastic stands (cut from cabinet child-proofing devices) to the back so they could be free-standing. I think this idea would be great to do with other books, or even using a child’s own drawings. You could cut a notch at the bottom of the pieces and use another little piece of fiberboard for a stand.
Here’s a picture of the 1976 “Puzzletown”
And here are the new pieces we made:
All in all, it was a great success! Huckle has bumped all other stuffed animals from their usual spot at bedtime, and even has been going to kindergarten this week.
UPDATE: Please do not ask me to share the Lowly worm pattern. As mentioned above, I found it in a book and am not comfortable sharing it. But I am sure if you look at a picture of Lowly, and my picture of how I traced the pattern, you can figure out that he is basically a long rectangle shape, with a rounded top for a head and an oval-ish shape at the bottom for his foot.
-
Tooth Pillow

It’s been milestone city around here lately: Parker started kindergarten, turned 5 and lost his first tooth all within a week. It makes me sad, yet also a little excited because it means I can finally renew my driver’s license and replace the horrible picture that was taken one-week post-partum.
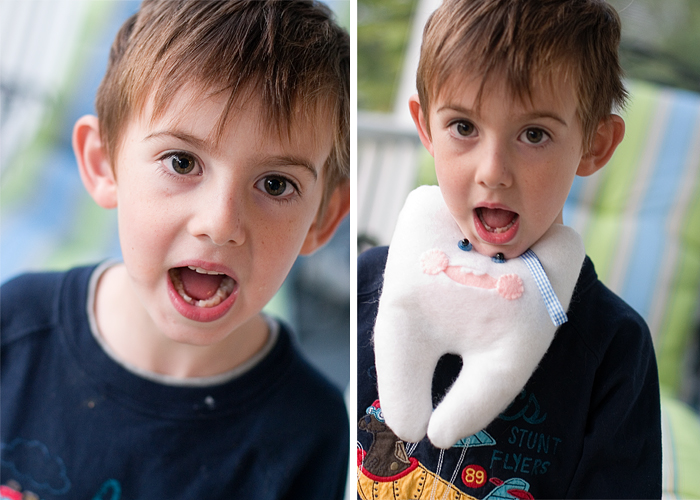
It’s unclear whether the tooth was actually ready to come out or whether we helped it along … On Sunday, Parker jumped at me while I was sitting on the couch and hit his chin. He laughingly said, “You almost knocked my teeth out Mommy!” and lo and behold, the tooth actually was loose. When it fell out a few days later, my husband sent me a picture of the gaping hole, and I raced home from work to whip up this tooth fairy pillow before they got home from a playdate. The wonderful pattern is by Larissa Holland at mmmcrafts. Thanks to her great instructions, I was able to make it in just half an hour, though it came out about bit lopsided because I was so rushed, and I didn’t add any cute embellishments because Parker’s favorite things are knights and astronauts, and I couldn’t see any way to create easy armor or a spacesuit for a tooth. But he didn’t seem to mind.
-
Felted Farm
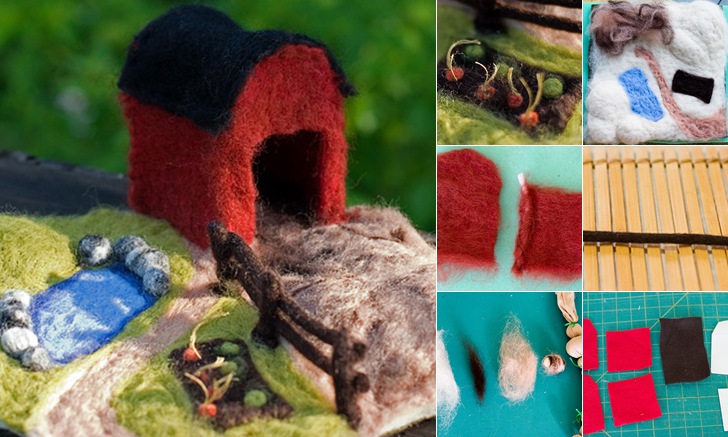
My friend Annmarie introduced me to felting a few months ago, and since then I’ve made some wet-felted beads, Easter eggs (see my article and audio slideshow on my tutorial page) and a few needle-felted animals, including a hummingbird that my son thought was either a seal or an airplane. So I wasn’t particularly confident in my abilities when I decided to try a needle-felted playscape, but I’m really happy with the results. The biggest challenge was figuring out how to make the barn and fence since everything else is really just stabbing bits of wool roving into various lumps. For the barn, I ended up making paper templates for the walls, side and roof, then cutting out pieces of acrylic felt in those sizes. (I’m sure purists would use wool felt or needle-felt the whole thing, but I used what I had on hand). Then I needle-felted over the shapes, reinforcing the sides with pipe cleaners, sewed the walls together at the corners and needle-felted the whole thing to the base.
Click on the pictures to see more photos and detailed descriptions of some of the other steps.
-
Eco-friendly construction
At a yardsale earlier this summer, I picked up the “Woman’s Day Book of Best-Loved Toys & Dolls” published in 1982. It’s full of slightly creepy-looking dolls, a hideous satin teddy bear billed as “a smooth and shining example of the latest style in bears” and a ridiculously complex Star Wars play set that required a table saw, saber saw, band saw, drill, awl, nailset, hammer, screwdriver, C-clamps, vise … you get the idea.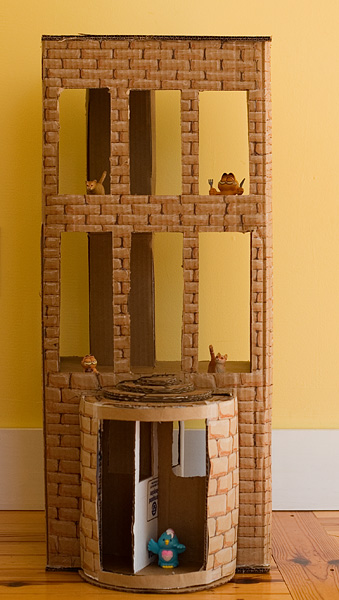
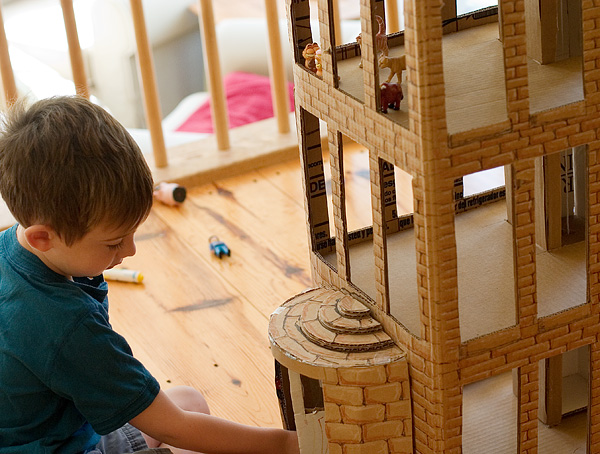
Once I talked him out of THAT, my son settled for the cardboard “Super City” which looked, if not simple, a heck of a lot easier that cutting and applying Formica to teeny tiny spaceship consoles.
We decided to make the skyscraper, naturally, because it was the biggest building and sported not only an elevator but a revolving door. And by “we” I mean: I made the whole thing, working about an hour a day for a week, pausing only to snap “Don’t throw that at me when I have a sharp knife/hot glue gun in my hand.”
I admit to taking some short cuts, i.e., eliminating three of the top floors and half the windows. Imagine this with TWICE as many windows! By the time you finished cutting them there’d be no walls left.
At one point, as I started drawing the little brick pattern on the walls, my husband walked by and said, “You’re crazy.” But honestly, the bricks were by far the easiest and most satisfying part of the whole project, and my son actually was able to help, coloring about 10 bricks before he wandered off, bored. The shading just involved scribbling with a brown crayon along the left side and bottom edge of each brick, and doing the same with a white crayon along the top and right side. It probably took about 10 minutes per side, and I didn’t stab or burn myself once.
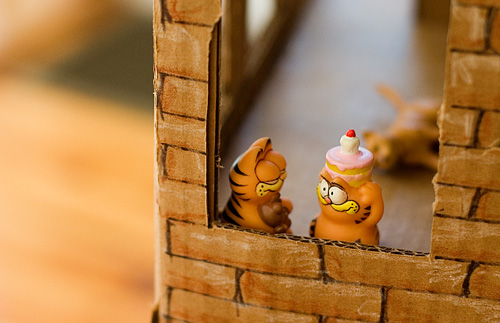
Though the building is designed for super heroes, we’re more into “anmials” around here, including my husband’s vintage Garfield collection.
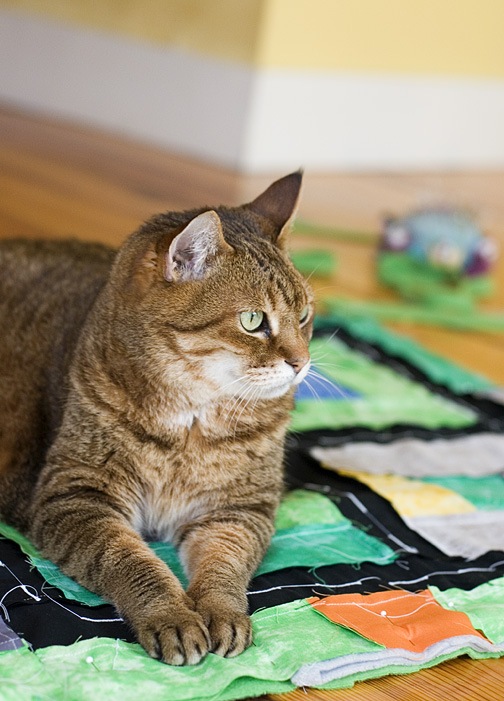
Party on the third floor! The cat in the background clearly already has had too much to drink.
-
Reversible, buttonless wrap dress
Here’s one of my two tutorials that were chosen as “Best of 2008” by Craftster.org. I know summer is almost over, but this little dress also could be made in heavier fabric and worn as a jumper.
My goal here was a dress for a friend’s daughter that 1) was reversible 2) didn’t include buttons on both sides because I thought that might be uncomfortable against baby skin 3) didn’t require binding because I stink at that.

1) Start with a basic A-line dress shape. I used McCall’s 2213 and made the neck a bit rounder. I then drew a line to mark the shape of the cross-over panel. (I think you also could make the big piece the front of the dress and draw use a slightly different shape to make straps that cross over each other at the back of the dress)

2) Here’s the two pieces you should have (you’ll have to trace the back panel twice b/c you’ll ruin it when you cut the cross-over panel piece)

3) Lay the side pieces of fabric A right sides together on the back panel and sew the side seams. Do the same for your second fabric.

4) Lay the pieces out flat, here’s what you should have:

5) Pin the two pieces right sides together, with your ties sandwiched between the two layers on one side. Sew around the whole thing except for the top of the shoulders, stopping about 1.5 inches from the end of the shoulders where marked and leaving an opening on one side for turning later. (if you were making cris-crossed straps, I think you’d stop at the opposite edge on the two outside edges but I’m not sure)

6) Turn right side out and press. Line up the shoulder seam by folding back the outer fabric and pin the inner fabric.

7) This part is hard to describe: sew along that edge, then keep going, matching the edges of the second fabric, so you’re sewing along the other fabric as well. Basically you’re sewing the shoulder seams and then tucking them in.

8)Tuck the shoulder seams in, press and slipstitch the opening closed. Also, close up the opening you used for turning.

9) Figure out where you want the bow to end up and make two button holes, so you can thread one of the ties through to the inside and then back up to make the bow.
(I didn’t do this right for my first example so here’s another dress showing it)
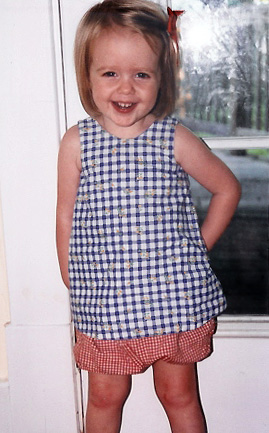
I don’t have any pictures of the recipient of the purple dress, but here’s adorable Miss Bridie wearing the yellow floral/blue check version. This picture was taken about a year after I sent it to her, and as you can see, it works well as a cute little top as well as a dress. And though I originally envisioned it with the tie in the front, it’s cute either way!
-
A tour & a tutorial
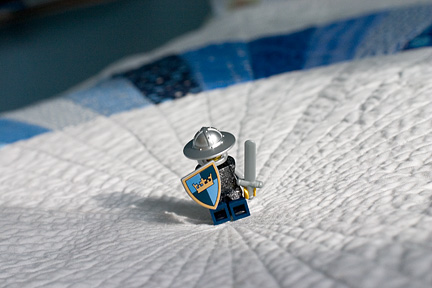
When it was time to redecorate my son’s room last winter, he had just abandoned his fascination with dinosaurs and was heavy into knights. Since then, we’ve cycled through trains and now we’re on to a consuming passion for Richard Scarry books. So my husband and I knew better than to design his room around his obsession du jour. Instead, we let Parker pick the wall color and added a few small touches that reflected his interests.
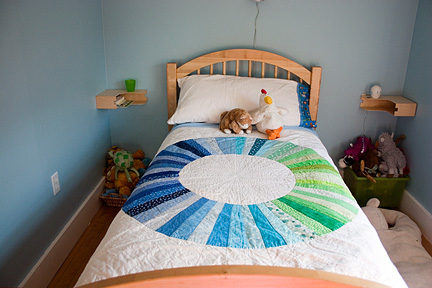
I made the Colorwheel Quilt from Joelle Hoverson’s Last-Minute Patchwork + Quilted Gifts, changing the rainbow color scheme to blues and greens, and told him to think of the circle as King Arthur’s round table. I used the leftover fabric to make a curtain for his closet, dyed the formerly yellow slipcover I had made for his chair a nice apple green and made very simple faux Roman shades for the windows.
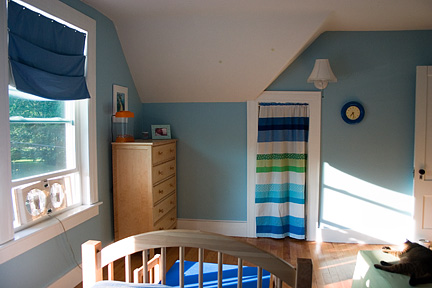
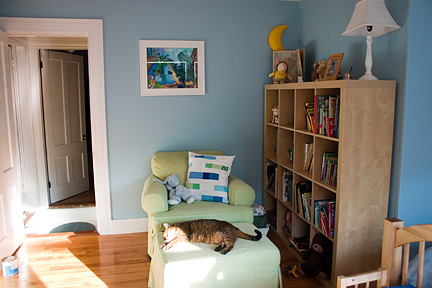
To make the shades: I cut rectangles out of the solid blue linen-blend fabric and window shade lining an inch larger than the inside measurement of the window, sewed them together leaving an opening for turning and then turned the panel right side out and sewed the opening by hand. I added grommets along the top edge and the sides, and cup hooks screwed into the window frame to hang the panels.
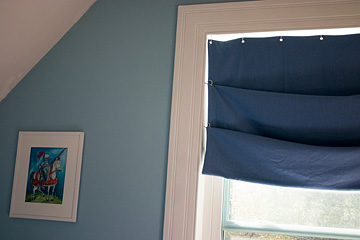
The knight theme was limited to a few prints purchased from Bealoo Art Designs, and a pillowcase I made for his bed. The pillowcase was so easy, I’ve made several more as gifts for other kids, and wrote an article and tutorial you can find HERE or on my tutorials pages above.
I admit, I wasn’t eager to re-do his room because I still loved his “nursery.” But I preserved a bit of it by including a piece of fabric from his baby quilt in the new quilt. Now if I could just find some Richard Scarry fabric….
-
Cloudy With a Chance of Meatballs
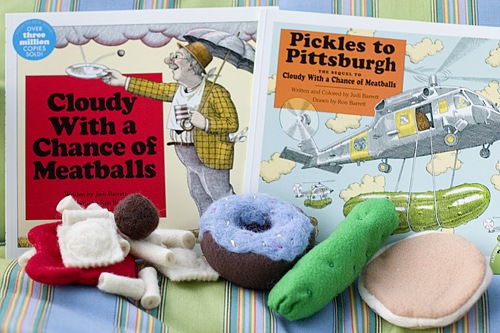
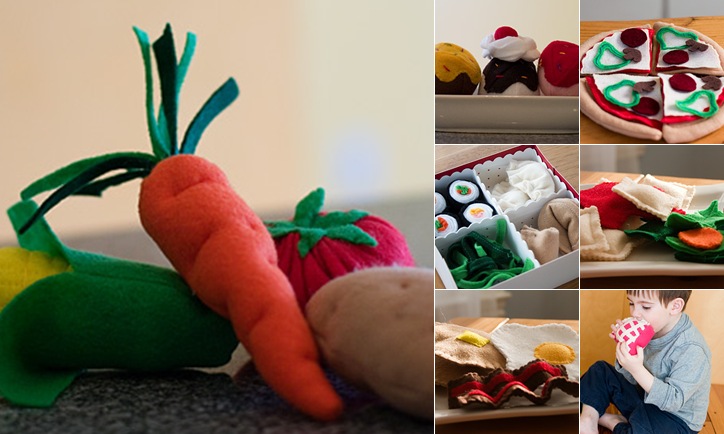
I loved this book when I was little and had no idea there was a sequel until I bought the original earlier this summer as a gift for one of my son’s friends. For those who haven’t read it, it’s a tale of a town where all the food falls from the sky. (It’s also been turned into a movie recently but the plot appears to be quite different). I decided (the night before the party of course) to make some felt food to go with it, hence the odd assortment pictured above.
The meatball and ravioli are needle-felted. The ziti is wet-felted, made by wrapping wool roving around a pencil. The donut, sauce and pickle are made out of acrylic craft felt, though the frosting on the donut is needle-felted wool.
I’ve made a ton of felt food in the last year or so, mostly as gifts for my son, his friends and young relatives. I bought some fantastic fruit patterns from Bugga Bugs, and for other items I’ve just made things up as I went along. I even made one of my favorite desserts – a chocolate éclair – which became proof that even if you don’t let your 4-year-old son watch television, he still will turn everything into a weapon. “Really?” I asked him. “You’re going to shoot me with a chocolate éclair?”
Check out the article I wrote for AP about felt food in my tutorial page above, along with a how-to on making felt sushi.
-
His & Her quillow playmats
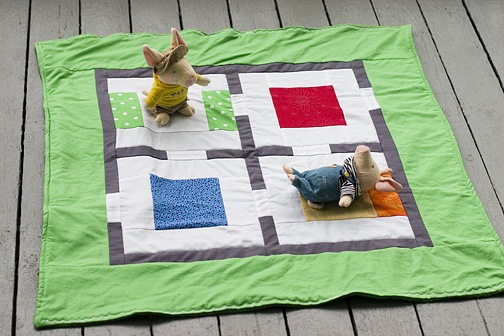
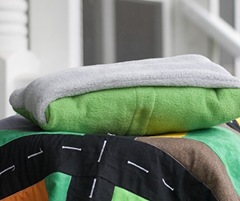
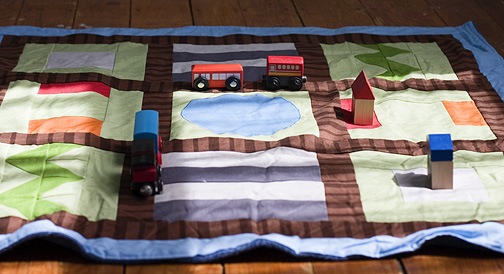
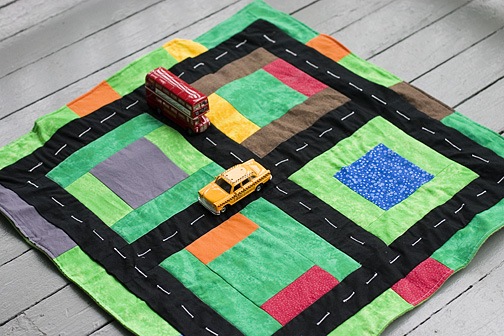 My son has two friends whose parents met in childbirth class, so their birthdays are quite close together. When they turned five recently, I made them each a playmat quillow: a quilt that folds up into a pillow. For the girl version, I designed it to look like the floor plan of a house, with a bed, tables and chairs. For the boy version, I went with a street scene.
I used the same basic block for both (I think it is called a framed 1-patch) and just altered the colors for the various blocks. I didn’t use batting or binding, just backed them with fleece, top-stitched around the edge and machine quilted around the squares. I used gray fleece for the pockets because I ran out of green.
I made my son a slightly larger train track version earlier this summer to take on vacation. It was perfect to keep him cozy on the plane, as a pillow in the car and a playmat in the hotel.
They were really easy to make, but of course I had some help.
-
Find your way to better vacation souvenirs
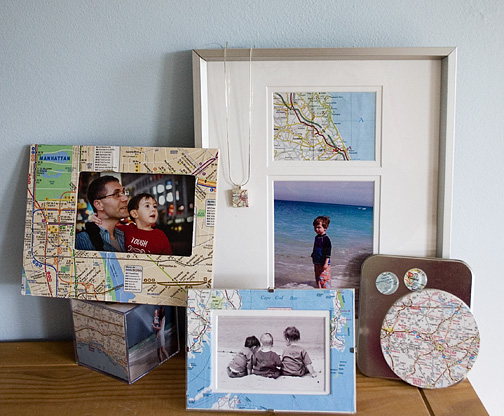
I love maps, but they make me sick. As my husband will confirm, I am as likely to cry out “I can’t look at this anymore!” as I am to say “Take Exit 32” when asked to help navigate during family road trips. I have tossed more than a few maps on the floor of the car in a fit of nausea, and even, I’ll admit, considered whether I could fashion one into a makeshift barf bag if necessary. (Now that’s crafty!) But back on firm ground, I’ve been using maps for home decor and accessory projects. They’re also an easy way to save money on souvenirs from your summer vacation by making your own.
Here’s an article I wrote for The Associated Press about crafting with maps. Click on the article link to see more photos, and a how-to on making Scrabble tile pendants.

