|
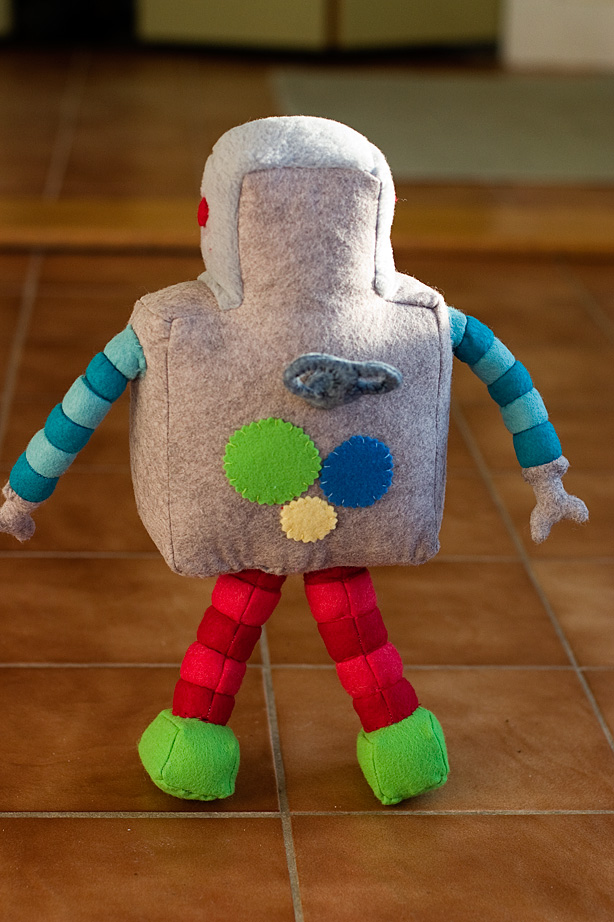
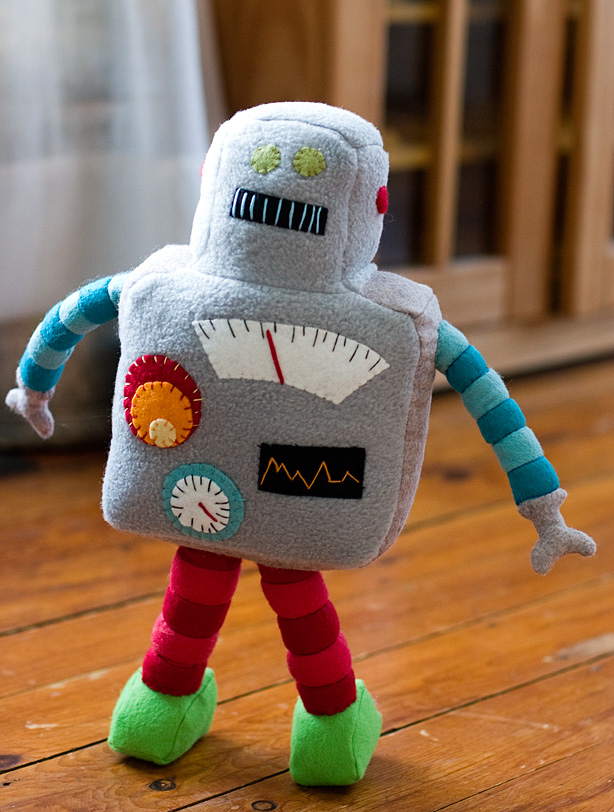
I made this plush robot for my 5-year-old son, who is getting his tonsils and adenoids out tomorrow in hopes of solving sleep apnea and other related problems. He has been crazy about robots lately, and loves to make his own with cardboard boxes and various craft supplies. My father-in-law, an electrical engineer, has promised to help him make a “real” robot, but in the meantime, this one will be better for post-surgery snuggling.
The pattern is the Retro Robot Plushie by Gulf Coast Cottage, who sells patterns for the most adorable felt food and other playthings. I didn’t have quite enough gray felt, so I used fleece on the front (didn’t have enough to do the whole thing in fleece of course). The instructions were super easy to follow. I detoured from them a bit by sewing it with the seams on the inside because I was using fleece instead of all felt, so I added the arms and legs after sewing the body together (leaving an opening for stuffing). That resulted in the body being a bit more rounded instead of squared off, but I still liked the result. I also made the arms and legs striped by sewing strips of felt together before tracing the pattern.
I can’t decide whether to give it to him before surgery or wait until he wakes up. Wish us luck!
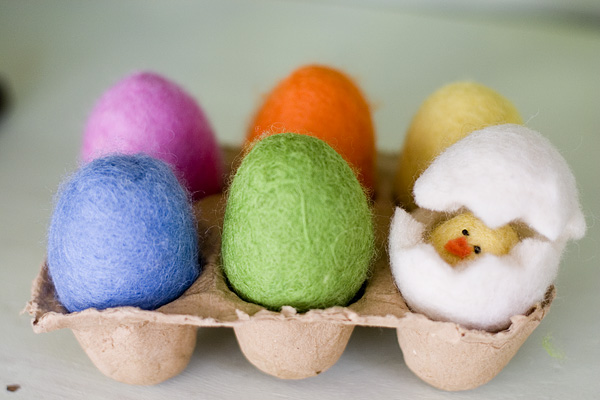
Even though I am a smidge more Irish than I am anything else, I’m going to let St. Patrick’s Day pass and move right along to Easter crafts. Here are some of the wet felted eggs I made last year. I used cheap plastic eggs as a base and felted over them. For the open egg, I carefully cut open the felted egg after it dried and removed the plastic.
You can find the article and step-by-step instructions I wrote for AP HERE, and an audio slideshow HERE. (Ack… I HATE the sound of my voice! And despite the appearance of my wrinkled hands, I am not 80 years old. All that hot water makes for less-than-photogenic hands)
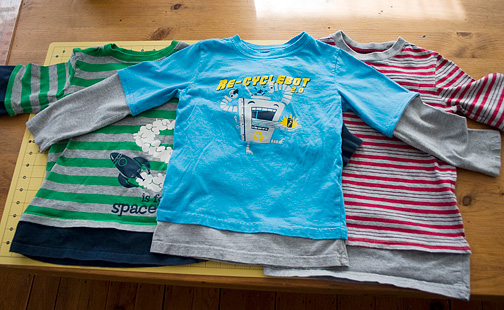
My son decided yesterday that 6:23 a.m. was the perfect time to go through his clothes and “find the stuff that doesn’t fit and use it to make clothes for my critters,” (i.e., stuffed animals). While I have yet to provide Fat Kitty, Skinny Kitty or Huckle with any new clothing, I did go through his clothes, find the stuff that doesn’t fit and turn some of his shirts and new-and-improved versions thanks to this tutorial by Betz White that I have been meaning to try for a long time.
Transforming two long-sleeved shirts into one faux-layered shirt was surprisingly easy. Part of me thought, “Is it really worth it to save shirts that I probably spent $4 each on at Target and could just pass along to my nephew?” But there was something very satisfying about this project, and I can always hand the shirts down once he outgrows them a second time.
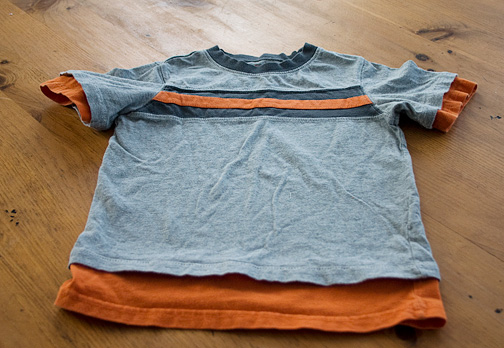
For the short-sleeved shirt, I used two short-sleeved t-shirts (duh) and used the technique for the bottom hem on the sleeves as well, since I wanted to keep the original hemmed sleeve of the outer shirt. Very easy!
I bought my friend and fellow-crafter One-Yard Wonders for Christmas, and she has been gracious enough to share it with me when we get together to sew! I think I might have picked the most complicated project in the book to start, the Origami Organizer, but 1) it just leaped out at me as a cool project and 2) it was written by Katherine of One Inch World, who was very helpful to me when I had no idea what I was doing setting up this blog!
I used some leftover fabric that I wasn’t crazy about for my first attempt, just in case I messed up. I found some of the diagrams a bit confusing, but once I figured it out, it was pretty amazing to see the boxes come together all at once.
I gave the organizer to my son, who is forever sorting little treasures he picks up and putting them in various boxes.
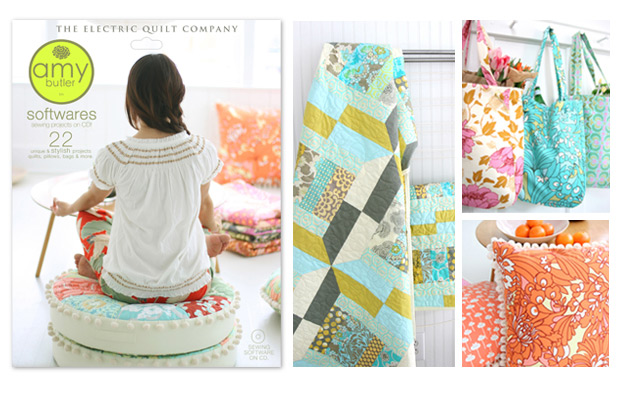
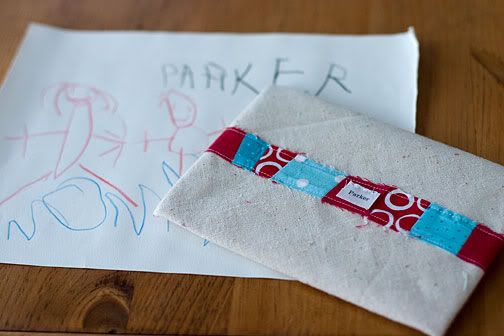
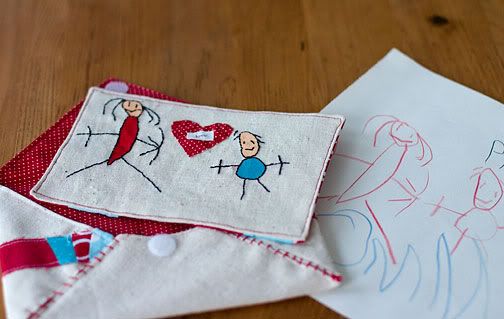
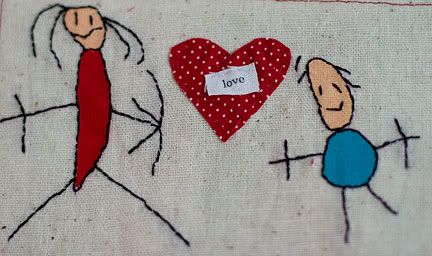
My last-minute Valentine I made for my son using one of his drawings won second place in the Sew, Mama, Sew! contest! My prize is actually the one I wanted most, a CD containing more than 20 Amy Butler quilting and sewing projects. At first glance, I thought it was just the patterns and instructions (which alone was impressive) but it actually includes software that lets you alter the designs, try out different fabric swatches, etc. I can’t wait to try it out!
photos from Amy Butler Design
For some reason, it has never quite occurred to my husband to get me chocolates for Valentine’s Day, even though I LOVE chocolate. Maybe he thinks its too cliche. (He did get me a nifty extension table for my sewing machine, which is also much appreciated). So this year I took matters into my own hands and bought both my husband and son small boxes of chocolate from Granite State Candy, our favorite local candy shop, in hopes that they would share. And I made my son this adorable hedgehog, using a pattern by Betz White. So cute! Next time I think I will wash the brown wool felt to make it a little fuzzier. I had an old felted tan sweater I used for the body, and have a bunch of grey pieces ready to sew together to make some of the mice also included in Betz’s pattern.
Happy Valentine’s Day!
AP Photo/Holly Ramer
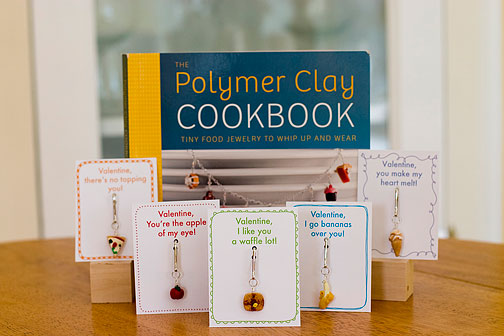
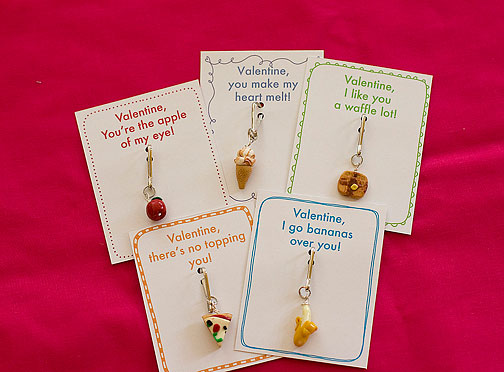
I know at some point I’ll have to let my son make or at least pick out his own Valentines, but while he’s still young enough to not have much of an opinion about it, I can’t resist taking over. I had been wanting to write about “The Polymer Clay Cookbook” for a while, so this was the perfect chance to try out a bunch of the projects. You can read my Associated Press article (and tutorial for making the ice cream cones) HERE.
AP Photo/Holly Ramer
Since my son’s school asks everyone to bring in signed cards that aren’t addressed to specific classmates, I tried to stick with the projects that would appeal to both boys and girls. I thought it would be hard to come up with silly puns for each item, but once I got going, it was pretty easy. My part is done, but it might take my 5-year-old longer to sign all the cards than it did to make the charms…
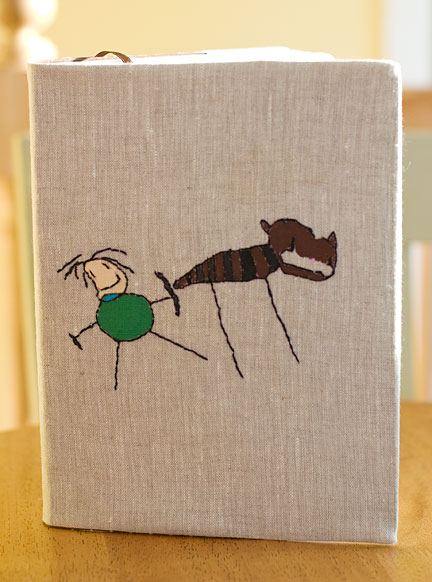
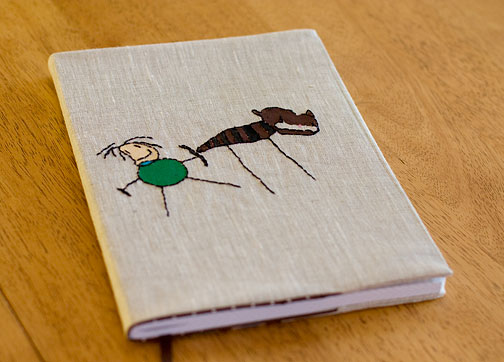
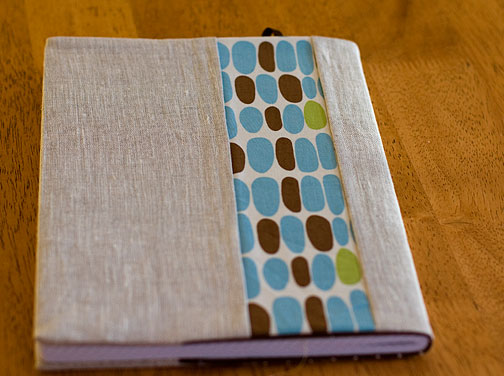
Happy Birthday to my impossible-to-buy-gifts-for husband! He hates surprises and tends to buy things for himself before I get around to it. Add in the fact that his birthday comes just over a month after Christmas and a week before Valentine’s Day, and I’m usually scrambling for ideas. But this year, I think I did pretty well. I got him a new sport coat for work, a subscription to “Backyard Poultry” magazine (unless I talk him out of it, he insists we are getting chickens in the spring) and this notebook cover I made at the last second by taking one of my son’s drawings (that’s Daddy and our cat, Sammy), transferring it onto linen and then embroidering and painting it. I’m sure it would’ve turned out better had I not started it a mere two days before the big day, and had I taken 20 minutes to go buy a better paintbrush instead of using one I swiped from my son’s art kit. And I really do not know how to embroider. But given the design, I think it’s ok that it looks like a 5-year-old made it.
It’s been so exciting to see my son’s first real attempts at drawing, and I’ve been so eager to incorporate his creations into some kind of project. I was inspired by the wonderful bookmarks Amanda Soule made with her children’s artwork, and probably should’ve stopped there, with just outlining the drawings with embroidery. But a few days ago I stumbled upon the painted embroidery by Melissa Crowe at Checkout Girl. Please take a look at her amazing artwork, and you’ll see what a pale, pale imitation my attempt is. I’m envious both of her talent and location (Portland, Maine), where I once lived and probably would’ve stayed had my job not been temporary. (Actually, Amanda lives in Portland, too. There must be something in the water!) To make the notebook cover, I followed this tutorial at Bloom And Blossom, though I ran into a bit of trouble. The directions called for cutting the fabric 1.75 times the width of the opened notebook, but that seemed like way too much, so I just ended up wrapping the fabric around the notebook and figuring out how much I needed to cover it and make the flaps. But I really like the tutorial overall, because unlike a lot of other notebook cover tutorials out there, there aren’t a lot of layers of fabric and bulky seams in this one.
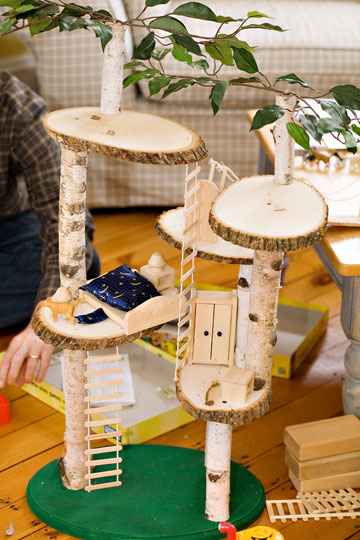
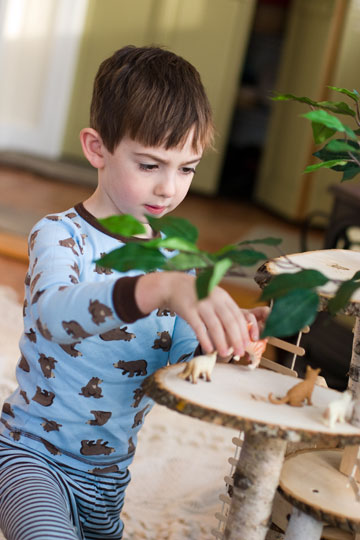
I’m finally getting around to posting what probably was my son’s favorite Christmas gift, and it is one for which I can take only the smallest sliver of credit. I suggested to my husband that our 5-year-old might like a mini treehouse like this one, but I was sure we could make one for far less than $130. (Of course I now see similar items on Amazon for about $60, but at the time there wasn’t much out there. And even $60 is a lot). He took some cut-up tree limbs and branches from a friend’s debris pile and bought the round cuts of wood and greenery at the craft store. My father-in-law cut the pieces to make them level, and my husband screwed them to the round cuts. The ladder is made out of popsicle sticks hot-glued to string.
I still want to do something to the base (I would’ve painted it to look more like grass … but was happy to leave the construction to someone else), maybe add some wool felt, or a felted stone wall. The wooden furniture is purchased dollhouse furniture. We’ve turned the armoire into a refrigerator, and filled it with some little charms like the ones I made for his girl friends and cousins, minus the jewelry findings.
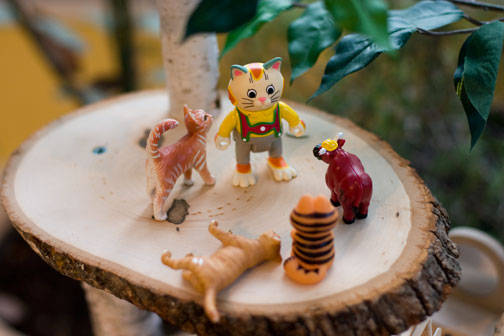
Santa also managed to find a little Huckle figurine on eBay, who is right at home with the other animals.
|
|