Calendar

November 2024
M T W T F S S
 123
45678910
11121314151617
18192021222324
252627282930  

Featured at:

craftsterBest of Craftster 2008

As seen on CraftGossip.com

Fan of:

the-long-thread-button

Fabric Flowers


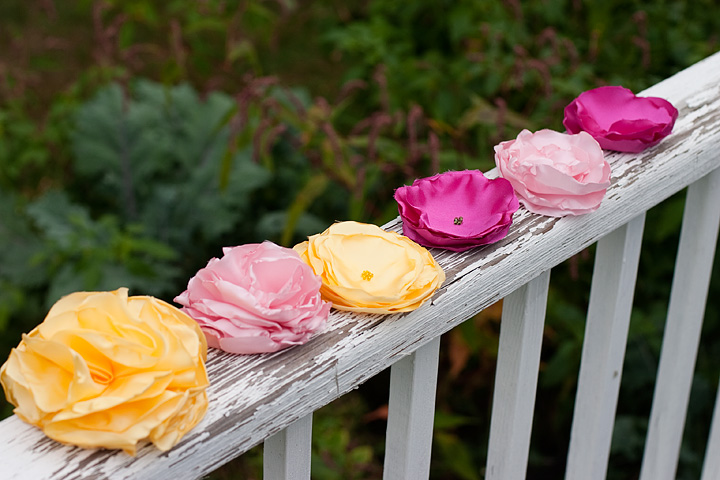
There are a mind-boggling number of tutorials out there on how to make fabric flowers. I made these recently using a pair of tutorials at Mary Janes & Galoshes, but there are dozens more I’d like to try at Oopsey Daisy. Here are my two cents, in the form of two tips:

1) Many of the tutorials that involve synthetic fabric call for using a candle flame to heat seal the edges. I found another easy and potentially safer method: an embossing heat gun. I bought a heat gun probably 15 years ago when my sister and I used to make stamped and embossed Christmas cards. (You use the heat gun to melt the embossing powder.) I’ve saved it all these years, and now I’m glad I did! I placed the flower petals on a large tile, held down one edge and waved the heat gun over the edges until they started to curl a bit. I was using rather large petals so wasn’t in danger of burning my fingers, but with smaller petals you could always use a chopstick or something to hold the flower in place.

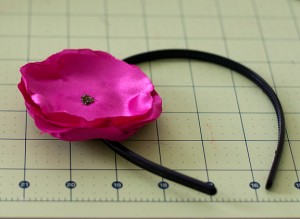
2) I was telling my sister about these flowers and suggesting we make some as gifts for her daughter and other little girls we know. When I suggested adding a pin back to the flowers that could also be pinned to  a  hair band she said, “That would look cute until someone fell and then got a pin stuck in their head.” Now, I think you’d have to fall pretty hard and in just such a way to have the pin open and then stab you in the head, but just to be on the safe side, I came up with an alternative.

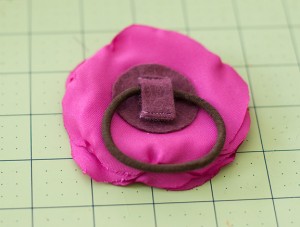
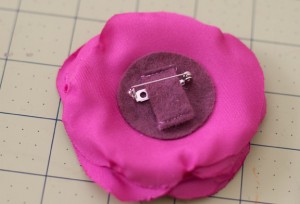
I cut a circle of felt and a small strip slightly narrower than the width of the pin back. I sewed one end of the strip to the circle, and added a tiny bit of Velcro to both the strip and the circle. (It is a little tricky to sew Velcro to such a small piece of fabric. This would be a good project for the iron-on Velcro.)
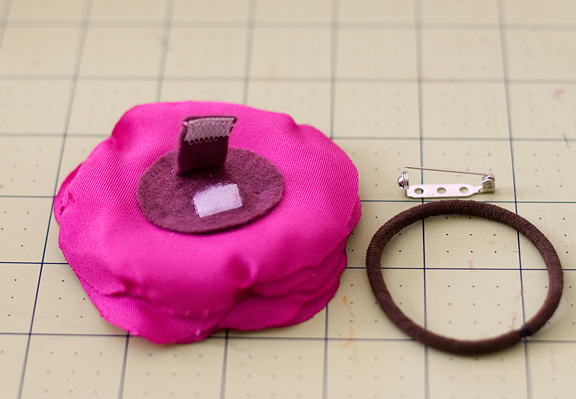
That way, the pin can be slipped under the strip of felt, or a hairband. At this point, I admit it did seem like a lot of work just to guard against the very slight chance of injury. Then I realized that by doing it this way, I could also slip the flower on a headband, which would not have been possible with just the pin back. (Not that I would ever wear a huge flower on the side of my  head, but I would LIKE to be the kind of person who could pull that off. But little girls can get away with that, right?)


(Edited to add: As my clever commenter Katherine points out below, it would be easier to just sew both ends of the felt strip to the circle, making a little loop that could be slipped over the pin or headband, and the hair band could be looped through there as well. Or a bit of elastic, which would be sturdier than a strip of felt. Or forget the extra piece and just make two slits in the felt? Sometimes I make things more complicated than they need to be!)
Preserving Autumn

The fall foliage here in New Hampshire  is spectacular. I hate that it comes and goes so quickly, though, so this year I’ve been expermenting with preserving leaves. It has not been a particularly satisfying experience! Here’s a rundown of techniques I tried:

  • ironing leaves between sheets of waxed paper, which was supposed to leave them coated with wax. Didn’t work at all.
  • coating dried leaves with Mod-Podge. I saw this technique at Gingerbreadsnowflakes but was put off by the directions to let the leaves dry for a few weeks. Who is that patient? I read somewhere else that you could speed-up that process by ironing the leaves, but I found that really darkened and dulled the colors. But, my leaves seemed plenty dry after only a few days, so I tried this again with a new batch of leaves. The Mod-Podge worked well, but it was time consuming because it takes quite a while to dry beteween coats.
  • Dipping leaves in wax. I didn’t actually try this technique because I couldn’t find any wax. All the tutorials I saw called for paraffin, the type used to seal canning jars, but my grocery store didn’t carry it, nor did Target or Wal-mart. Then I found some references to using beeswax, which looked beautiful, but again, I couldn’t find it. Michael’s had some, but it was something like $17 a pound. At that point, I was starting to feel like Beth at Remarkably Domestic, who has been working her way through Martha Stewart’s Encyclopedia of Crafts and describes the “fruitless shopping” involved in many of the projects.

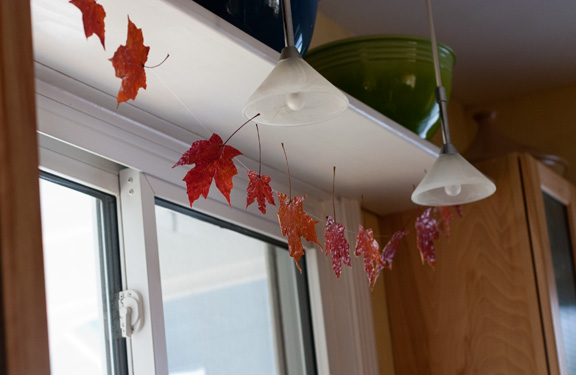
So,  I ended up with a rather pitful little garland of about a dozen leaves.

They are pretty, but I’m also quite fond of the newspaper leaves my son and I painted together (got that idea from Maya*Made). Especially when he said to me, “I like these nights when it’s dark and we can do stuff together, Mommy.”

Purse organizer and ornaments

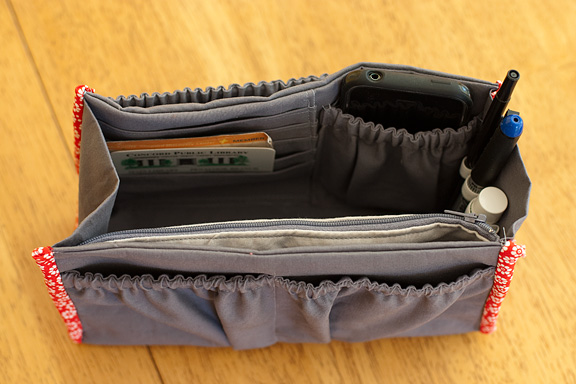
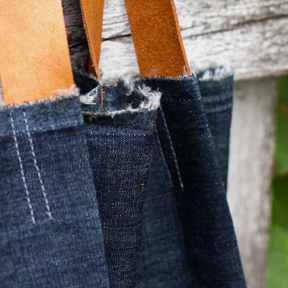
I made my sister a tote bag as part of her birthday present and since the pattern had no pockets, I made this purse organizer/insert to go with it. The idea is that you could easily switch from one purse or bag to another by removing the insert. I found the tutorial at the Fredericton Quilters’ Guild site (UPDATE: The pattern seems to have disappeared) and found it fairly easy to make except for the binding around the edges. It was really tricky to sew the binding around the U-shaped sides, and I cut my binding too narrow and had to really work to get it on there. I also think the slots for the credit cards are far too shallow. I followed the directions exactly, but I had a lot of fabric left over after folding it as specified, so perhaps there was a typo in the directions. If I make this again (maybe for myself!) I will make the slots deeper. It’s a little hard to tell from the pictures, but there are outside pockets with elastic edges and a long zippered pouch that sort of acts like a divider in the interior. The pattern doesn’t call for it, but I added a few loops of elastic on the side to hold pens or lipstick. I also forgot to add the little loops of twill tape for pulling the organizer out of a purse, but I think she’ll be able to figure that out without them.

Also, here’s a glimpse of my entry for this week’s “A Gift a Week ‘Til Christmas” challenge at Works in Progress. As usual, I’m posting it on my “hidden” blog so the recipient won’t see. Leave me a comment or send me an e-mail if you don’t have the address.

Candy Corn Cuteness

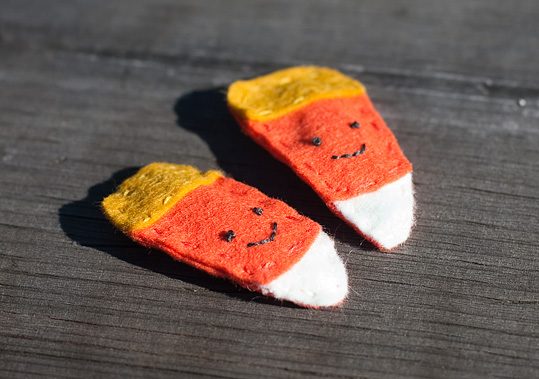
Even though I don’t have a little girl, and even though I don’t like the taste of candy corn, I am oddly drawn to all the cute candy corn crafts out there this time of year. Woman’s Day Magazine (which also has a huge spread on my husband’s cookbook this month!) had a bunch of decorating projects involving candy corn … though I know I lack the patience to glue individual candies to a wreath,etc. These cute little candy cane barrettes are MUCH quicker. I used this great tutorial by Katherine at One Inch World. Her technique for partially sewing the pieces together for the top of the cover and then sewing them to backing piece really streamlined things. So these little guys will be for my niece, who is generally the recipient of all the cute girly projects I try.

A Present a Week, Week 13

Here’s a glimpse of my entry for this week’s “A Gift a Week ‘Til Christmas” challenge at Works in Progress. As usual, I’m posting it on my “hidden” blog so the recipient won’t see. Leave me a comment or send me an e-mail if you don’t have the address.

“Army Guy”

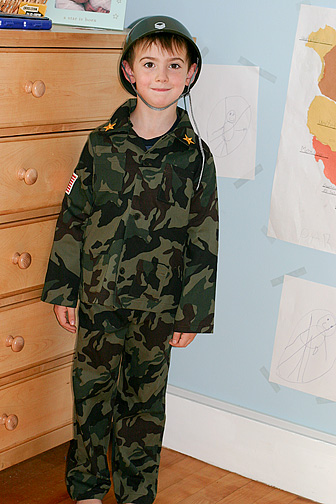
We visited the USS Intrepid Museum in New York in August, and since then, my son has been obsessed with “Army guys.” No matter how many times I tell him that there were “Navy guys” on the Intrepid. He insists that all other branches of the military fall under the Army, and therefor insisted on being an Army guy for Halloween.

I made his costume in record time (I actually finished it in late September!) using Simplicity 3997 and some twill camoflauge fabric I got for 50 percent off at JoAnn’s.  I made a size 6 based on his measurements, thinking the pattern probably ran large, but it actually just fits. I was hoping it would be a bit big so he could wear it after Halloween for a while for dress-up play. The pants were incredibly simple to make. The jacket was a bit trickier given my lack of experience with collars and facings, but overall not too difficult. The original design calls for short sleeves, but we live in New Hampshire where it is often FREEZING on Halloween, so I used the long-sleeve pattern from one of the other costumes instead. I’m hoping we can fit some long-underwear under the jacket if it gets really cold.

The helmet came from a Haloween/party supply store.

Overall I’m happy with the costume, but I don’t like it as much as the astronaut outfit I made last year by covering a thrift-store snowsuit with white duct tape.

A present a week, Week 12

Here’s a glimpse of my entry for this week’s “A Gift a Week ‘Til Christmas” challenge at Works in Progress. As usual, I’m posting it on my “hidden” blog so the recipient won’t see. Leave me a comment or send me an e-mail if you don’t have the address.

Summer Dresses

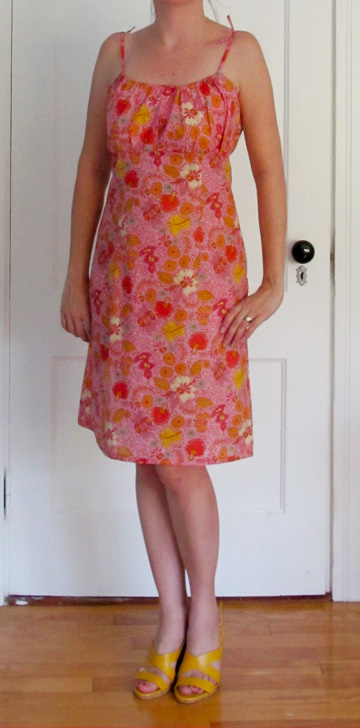
Now that it’s fall, I’m finally getting around to posting the two dresses I made this summer, both for the same wedding. The first was Burda 8071, the one I posted earlier asking advice on whether to add the flounce around the bottom. I did not end up going with the flounce, in large part because I wanted to be DONE with it, but overall I really like this dress. I ended up wearing it to two different weddings. I LOVE the feeling of the cotton voile, though it is quite sheer, so having to wear a full slip (basically a stretchy tube from bust to knees!) sort of canceled that out.

Here it is at the wedding we went to in Washington, D.C. There was the wedding and lunch, and then a hotel rooftop pool party later that night. I expected the evening event to be fancier but it turned out most people got more dressed up for the ceremony/lunch.

The second dress is from a pattern I bought at Burdastyle.com, #125 from the June issue of the magazine. This was a frustrating experience, not the sewing of the dress, but just getting the pattern. I wasn’t able to download it after I paid for it for four days, which I think is totally unacceptable. For once, I had some long stretches of time to work on it that weekend, but had to wait several days to actually get the pattern. My e-mails to customer support and comments left in the forums there were ignored for several days. That said, I was mostly pleased with the pattern once I got it. I made it from some polyester charmeuse that I bought for $2.50 a yard. I love the ombre effect, but the downside was that the fabric was an unattractive pale purple on the reverse side, meaning I couldn’t do a single thickness of fabric for the ruffle as the pattern calls for. I ended up cutting out the LONG spiraling ruffle piece twice and making the ruffle double-layered. That made it bulkier than I would have liked. On the other hand, I didn’t have to do a tiny narrow hem. After figuring out that I could pull the dress over my head, I also left out the back zipper, which saved quite a bit of time (I have never sewn a lining to a zipper, and maybe I never will!)

These are NOT the shoes I wore to the wedding. I have some pretty greyish/silver sandals that my sister later borrowed and hasn’t returned!

Here’s a shot from the wedding:

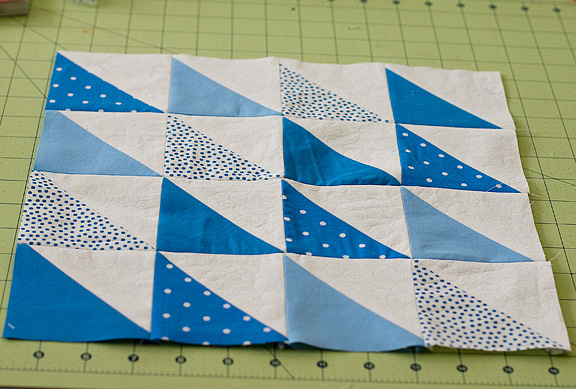
Earthquake Quilt Block

Deb from Works in Progress is collecting blue and red quilt blocks to make a quilt for victims of the recent earthquake in New Zealand, where she lives. I’ve been participating in her “Gift a Week ’til Christmas” challenge and have been lucky enough to win the weekly fabric prize several times, so it was the least I could do to contribute a quilt block.

I made the mistake of grabbing a priority mail envelope at the post office and had no idea just how EXPENSIVE it is to send a quilt block to New Zealand, but I figure it was for a good cause.

And here’s a sneak peak of my Christmas gift progress this week. If you’d like to see the rest, please leave a comment or e-mail me for the link to the “hidden” blog where I’ve been posting these projects.

The Birthday From Outer Space

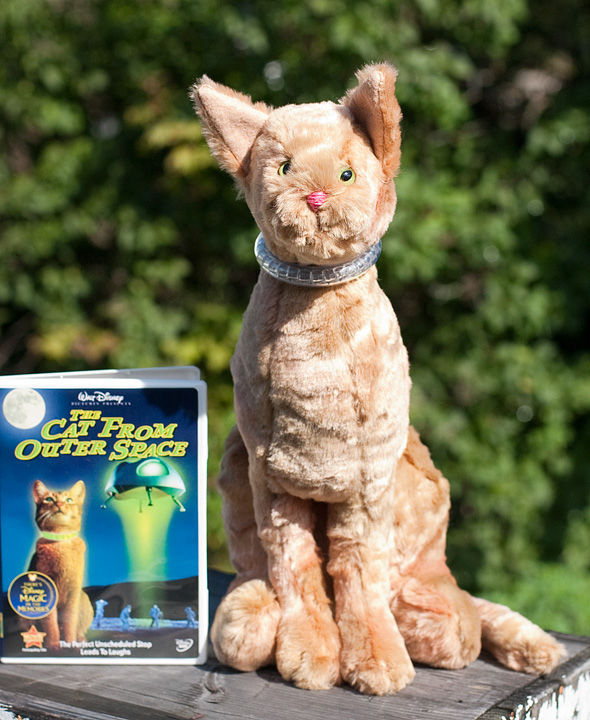
Parker turned six last week, and we celebrated with a small party with just his grandparents, aunt and uncle and cousins on Saturday. I think I was so relieved to not have to make 10 party favors like last year’s mass-produced Lowly Worms that I went a little overboard for the three children in attendance (the birthday boy and two cousins). The theme was “The Cat from Outer Space,” a 1978 Disney movie my husband enjoyed as a child and Parker has adored since we let him watch it earlier this summer.

Of course I had to make him “Jake,” the cat/star of the movie. I found a free pattern for a sitting kitten here by Runo Dollmaker, but that seemed too small and squat, so I enlarged the pattern in Photoshop so it was 150 percent taller. I think I could’ve gone with a bit less height since the end result is sort of oddly stretched out, but I was just glad all the pieces still fit together fairly well after I tinkered with the pattern. This was my first experience using plastic stuffed animal eyes (hence the crooked placement) and my first jointed stuffed animal (the head swivels).

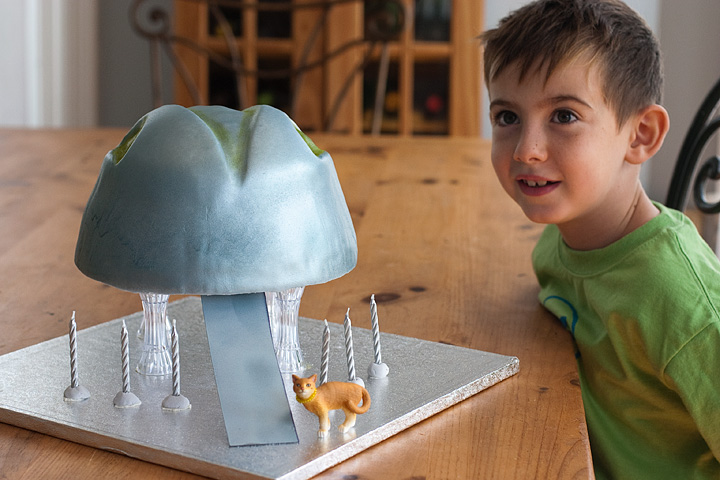
My husband, the food editor, was in charge of the cake. Though he generally does not like to bake, he goes all out for Parker’s birthday. (Last year’s Huckle cake used 4 dozen eggs!) This year’s cake was smaller, but just as impressive to the birthday boy.

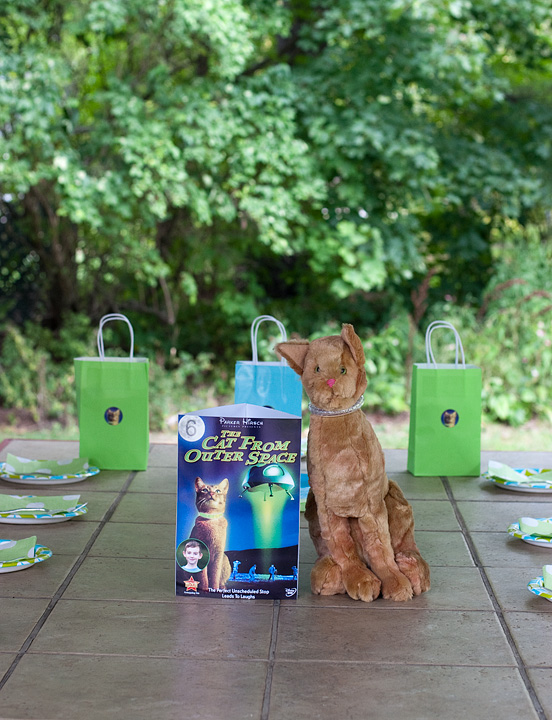
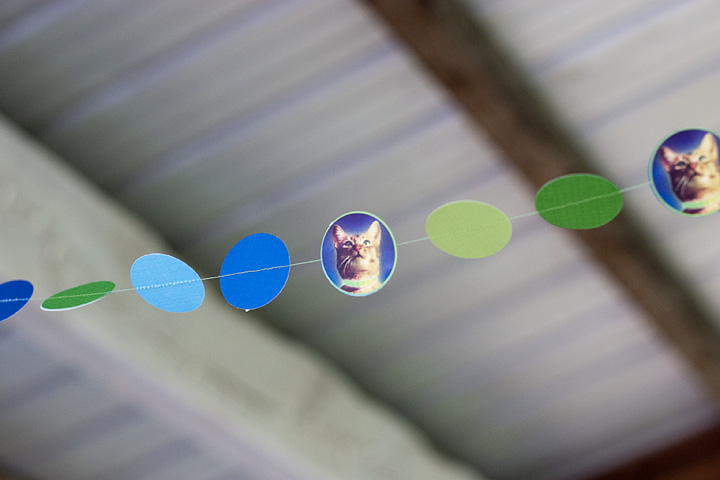
To continue the theme, I scanned the DVD cover and used the image to make invitations, stickers, a garland and a table decoration. I have a large Fiskars Squeeze Punch, I think it is 1.5″ in diameter, that I LOVE. It was so easy to punch out a bunch of circles to make the garland, then I just sewed them together using the sewing machine. To make the cat stickers, I formatted the picture of the kitty in Photoshop to make it the size of the punch, printed a bunch on one page and then punched them out and ran them through the Xyron 1.5″ “create-a-sticker.”

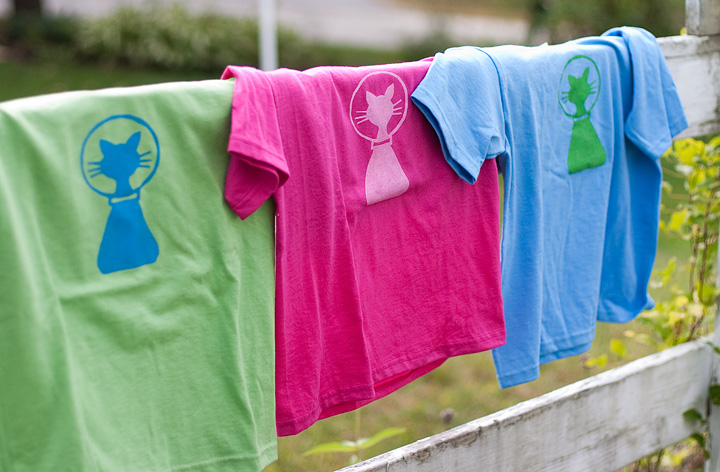
I also made freezer-paper stenciled t-shirts for the kids. I spotted a “Cat from Outer Space” movie poster online that had this cute cat graphic as part of the title, so I copied it and enlarged it to make the stencils for the shirt. I know a lot of freezer paper stencil tutorials say to print your design and then trace it onto to the freezer paper, but I just cut pieces of freezer paper to 8.5″ X 11″, taped it to a piece of copy paper and printed right on the freezer paper. Cutting carefully, I was also able to use the cut-away part of the stencil to make another shirt for Parker using the negative space. (Something to keep in mind if I ever am making 10 of these next year… cut carefully and get two stencils out of one image!)

For activities, I made the treasure stones I mentioned in an earlier post, but we called them “alien rocks.” Parker helped me pick out little trinkets to hide in them and helped me make the rocks. (the recipe doesn’t specify how many rocks you can make with one batch. We made three good sized stones). No pictures, because they were destroyed pretty quickly, but I think they liked them!

We also made sparkly necklaces and bracelets out of the extra vinyl tubing I had from making Jake’s collar. There are many tutorials out there, I followed this one at Family Fun, using tubing with a 1/4″ outside diameter for the bracelet and tubing with a 1/4″ inner diameter for the closure. For the necklaces, we used tubing with a 1/2″ outside diameter. These were really fun to make, though the bracelets were a bit trickier because we didn’t have a funnel that was small enough to fit in the opening. We improvised by using drinking straws to fill the tubes with water… holding a finger over the top of the straw while it’s in water and then releasing it into the tube.

I wasn’t sure if the boys would enjoy this but both Parker and my nephew liked it. Surprisingly the bracelets and necklaces haven’t leaked, but you could always add a bit of glue to be on the safe side. This is such a cheap craft, the tubing sells for about 22 cents a foot. I’m thinking of getting all the supplies and making a kit for my cousin’s four daughters for Christmas.

For more projects, check out the inspiring list at: