Calendar

November 2024
M T W T F S S
 123
45678910
11121314151617
18192021222324
252627282930  

Featured at:

craftsterBest of Craftster 2008

As seen on CraftGossip.com

Fan of:

the-long-thread-button

Holiday With Matthew Mead Winner

The winner of my magazine giveaway is Ann! Congratulations! I will email you to get your address, but probably won’t have a chance to get the magazine in the mail until Monday because we’re going away for the weekend.

Thanks for all the teacher gift suggestions everyone!

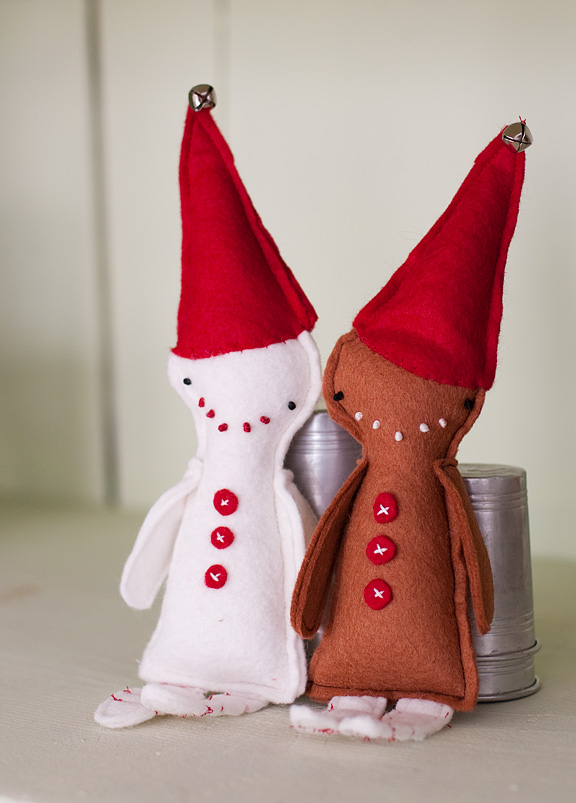
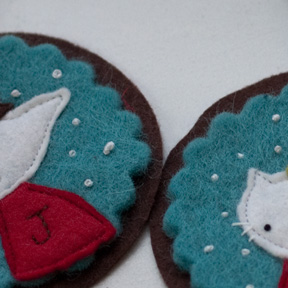
In other news, I made these little guys this week (from the book “Fa la la la Felt”) and can’t decide if they are creepy or cute? What do you think?

My husband thinks their mouths look like fangs.

Neck Gaiters: a pile of progress

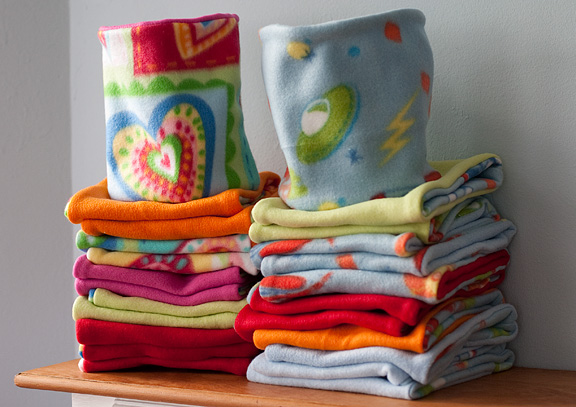
I sewed up a storm Monday but I’m starting to feel my energy wane as the week goes on… and it doesn’t help that I’m getting a cold. But here’s what I have to show for Monday’s effort: 24 neck gaiters/neck cozies. Those of you who read my “hidden” holiday blog will know that I made one of these last month and bought enough fleece (at 60 percent off!) to make about 40 more. The plan is to give them to a few of my son’s friends for Christmas, and donate the rest to a local charity. They are SO easy to make, and they really come in handy for the cold winters we have here. No long scarf to get tangled in!

I used the tutorial found here at the Gator Project (I’m going to stick with my spelling of gaiter though, after looking it up in the dictionary!), modified a bit because my fleece was only 58 inches wide, and to make a reversible version. So instead of cutting 1 20X20 piece, I cut two 19X9″ pieces and sewed them together, so I was starting with roughly a 19X17.5 piece. (I went with 9″ for the height because 1) it was for a kid and I didn’t think it needed to be tall enough to cover his whole face and 2) I could then get more out of a yard of fleece). I found 19 inches (which ends up being the circumference was big enough for my son, but it might be a bit small for an adult. If I tug on this, I can fit it over my head and it is not tight on my neck, though.

So, if you were making them out of one piece rather than reversible, you could get SIX gaiters out of one yard of fleece. I calcuated that if I actually make all 41, I will have spent 62 cents per gaiter. Not bad!

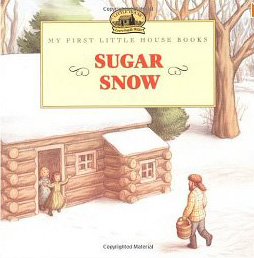
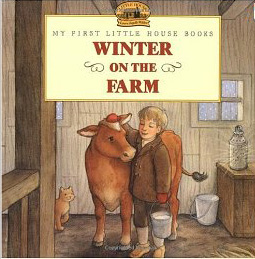
For my son’s friends, I’m going to pair each gaiter with a winter-themed book:

Hopefully the recipients will be happier than my little model:

(I know this wasn’t posted originally on Monday, but I’m linking to the “Made by You Monday” at Skip to my Lou. Lots of holiday gift inspiration!

Acorn Napkin Rings

AP photo/Holly Ramer

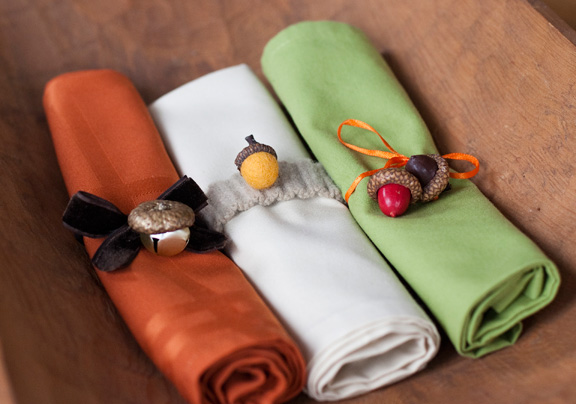
Does anyone actually use napkin rings? I have to admit, I don’t, though I came up with these three versions for a Thanksgiving craft story I wrote for AP.  The first version, with the bell,  is a bit fancier than the others, though it is probably the easiest to make. The second version is a felted wool ball sewn onto a strip of felted wool sweater. The third version is my favorite. Can you guess what the acorn is made of?  ……………. CRAYONS! I had seen a tutorial online for making beeswax acorns by creating a mold out of Play-Doh and then filling it with melted beeswax, so I decided to try it with crayons, and it worked!

You can see more pictures and get instructions for all three projects by clicking below:

Associated Press Acorn Napkin Rings

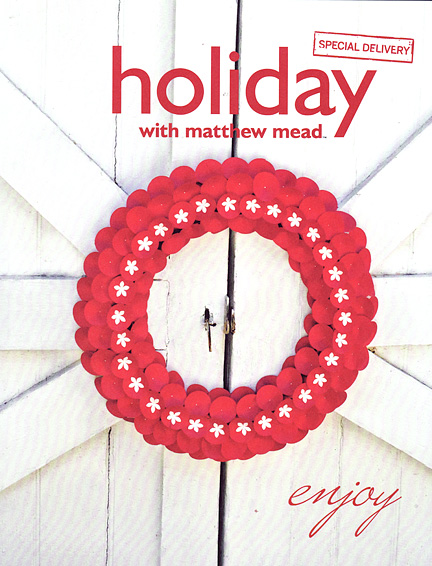
Also, don’t forget to enter my giveway for a copy of “Holiday with Matthew Mead.”

Holiday Giveaway

I have this week off from work and am determined to finish making most of the Christmas gifts I have planned. I’m already off to a great start, thanks to the weekly challenge at Works in Progress, but I really want to get a lot done this week so I can spend more time just enjoying December. To kick of the week and help get myself in the holiday giving spirit, I’m giving away a copy of “Holiday with Matthew Mead,” a 144-page “book-a-zine” full of beautiful holiday decorating ideas and recipes.

If you read “Country Living” or “Better Homes and Gardens,” then you’ve seen Matthew’s work before. We were surprised to learn a few years ago that he lives just a few towns over from us here in New Hampshire. Last year, my husband hired him to prepare, style and photograph all the recipes for his new cookbook and we were thrilled with the results.

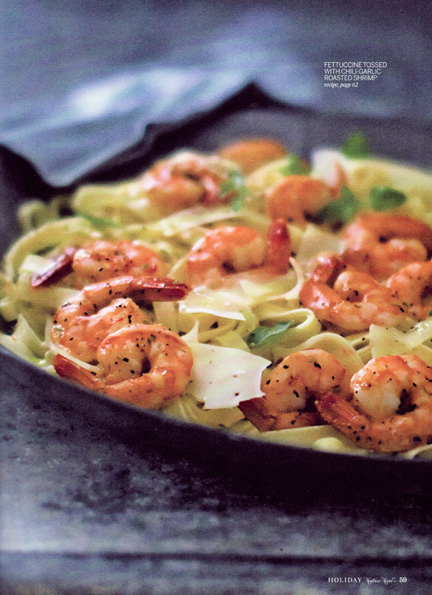
You can get one of my husband’s new recipes in the holiday magazine:

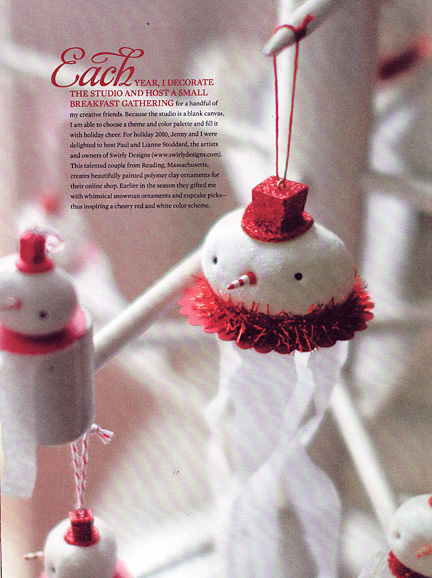
along with page after page of holiday inspiration (there’s only two pages of ads). Many of the features focus on one color, which I found really appealing. I think my own holiday decorating can get kind of cluttered. Trying a more monochromatic in various spots look might be the way to go. I was especially drawn to these cute little snowmen:

The magazine is only available through the Holiday With Matthew Mead website, or you might win a copy by leaving a comment below! In the spirit of the holidays, there are no hoops to jump through, any old comment will do! But if you’re feeling generous, I’m working on a craft article for AP about turning kids’ artwork into Christmas gifts, so if you have ideas, please share! Oh! And I am in desperate need of ideas for a handmade gift for my son’s (male) first grade teacher. “Teacher gift” ideas tend to be pretty feminine. This guy is an avid hiker and rides a motorcycle.

I’ll pick a winner Thursday morning.

Election Day hangover

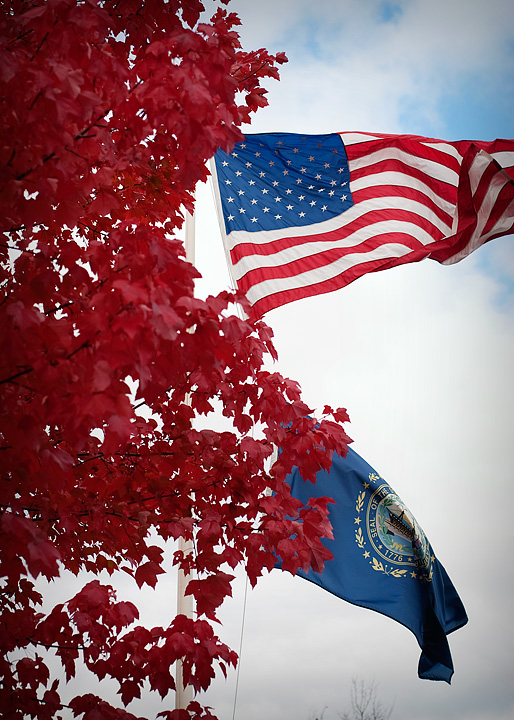
I snapped this picture last Monday after spotting these absolutely gorgeous red maple trees (in a dentist office parking lot of all places), and thought it was perfectly patriotic for Election Day.

I’m finally feeling almost back to normal after a very long Election Day … I got home from work at 3:45 in the morning Wednesday (after a long night spent analyzing and writing articles about the exit polls AP conducted for the election) and got up at 7 a.m. to get my son to school and get back to work. I was so tired I accidentally sent Parker to school with an empty lunch box (We have two of the same lunch boxes. The packed lunchbox was right next to the empty one I had left in my car the day before). Oops! Luckily he was quite happy with the emergency lunch his teacher threw together for him.

This morning, I spotted an ad in the paper for this very intriguing estate sale:

“Over 3,000 salt & pepper shakers, 7,000+ skeins of yarn, 300+bell collection, 100+ collectible spoons, 100+ postcards, thimbles, furniture, all kinds of craft material and other household belongings.”

SEVEN THOUSAND skeins of yarn? I don’t knit or crochet, but I kind of wish I did. Can you imagine what this woman (named Erma!) was like?

Here’s a sneak peak at my Christmas project for this week. As always, leave a comment or send me an email if you want the address of my “hidden” holiday blog.

Paintbox Quilt

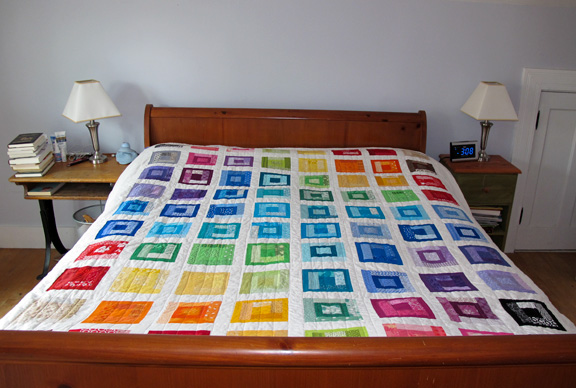
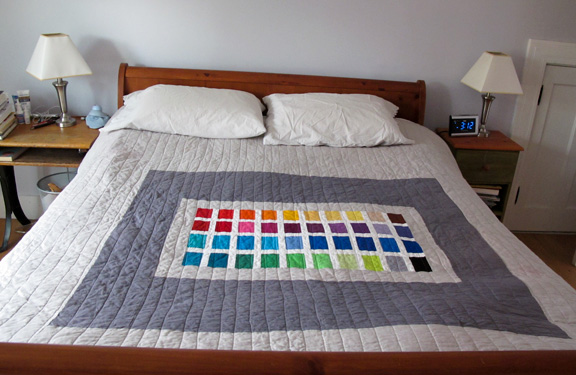
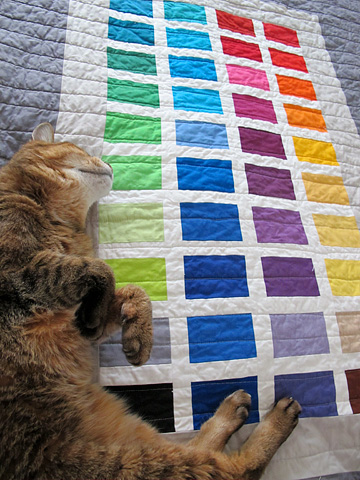
Wow. I can’t believe this quilt is finally done. This is the Paintbox Quilt by Oh,Fransson! that I started back in March. I basted it in June (first time using a basting spray. It worked very well. I can only imagine how much heavier this quilt would’ve been with a million safety pins in it), quilted about four lines in August and then put it aside until Wednesday, when I spent most of my day off doing all the quilting.  My intention was to quilt straight lengthwise lines about 1 1/2″ apart. Pretty quick, I realized that I am not very good at keeping the stitching straight on such a large quilt. But my lines are actually almost crooked enough to look deliberate, and once it was washed and dried everything crinkled up nicely.

The only thing I don’t like about it is that once I put my pillows on the bed, it covers up the top two rows, so you don’t really get the whole color spectrum effect. I wish I had thought to take that into account.

This is the first queen-size quilt I’ve made, and the first quilt I’ve made for my own bed. By my quick calculations, I used 160 different fabrics in this quilt, the vast majority from what I already had. A few friends gave me some of their scraps, and I did have to buy some fabric, but for those I just bought very small cuts of fabric (1/9 of a yard) to keep it affordable. The sashing is a cotton-linen blend.

For anyone considering making one of these, I did spot one error in the instructions. It’s not a big deal if you’re the type of quilter who likes to start with strips that are a bit long and then trim as you go, but I figured I’d post the correction here anyway. In the directions for making the scrappy-style blocks, it says: “From your 1 1/4″ solid fabric strips, cut pieces in the following lengths: 5″, 6″, 6″, and 6 1/2.” But it it should say: 5″, 5 3/4″, 5 3/4″ and 6 1/2″.

Again, not a big deal to just trim off that extra bit, BUT if you follow my method below to preserve more of the solid color “jellyroll” fabric this pattern uses, you need the exact measurement.

The original directions say:

“Begin by trimming the selvedge from your solid fabric strip. From one end, cut a square, 2 1/2″ x 2 1/2″ and a rectangle, 2 1/2″ x 3 1/2″. Cut the rest of the strip into two thinner strips, each 1 1/4″ wide.” (the square is for the center of each block. The rectangle is for the design on the quilt back)

But if you want to preserve as much of your 2 1/2″ solid fabric strip as possible for another project, here’s another method:

  1. cut the 2 1/2″ square and 2 1/2″ X 3 1/2″ inch rectangle from one end of the solid strip as directed
  2. cut another strip that measures 2 1/2″ X 11.5″
  3. cut that 11.5″ strip into two thinner strips, each 1 1/4″ wide
  4. cut one of the thinner strips in half lengthwise to make two strips each 1 1/4″ X 5.75″
  5. cut the other one into two strips, one 1 1/4″ X 5″ and the other 1/4″ X 6″
    A Present a Week, Week 16

    Eight weeks ’til Christmas! I just realized that I had a lot of vacation days carried over from past years, so I am taking a week off in November. Which means it is very likely I will accomplish my goal of finishing all Christmas-gift-related sewing and crafting in November, leaving December free for relaxation (ok, probably not likely) and FUN.

    I’m very excited for the return of Handmade Holidays at Sew Mama Sew!, since it was that series a few years ago that really got me into sewing.

    Here’s a sneak peak of my latest gift for Deb’s “A Gift a Week ‘Til Christmas” challenge. It’s not too late to join! (As always, if you want the link to the “hidden” blog where I’m posting these projects so the recipients won’t see them, just leave me a comment or send me an e-mail)

    Happy Birthday Ned-or-Evan

    Two of my son’s best buddies are a pair of identical twins named Ned and Evan. For a good six months after meeting them, he (and I) were unable to tell them apart. (I’m a twin myself, but look nothing like my sister). So Parker was always telling me stories about his adventures with his pals that went something like this: “Today, at recess, Nedorevan and I were playing knights, and then His Brother came over and….”

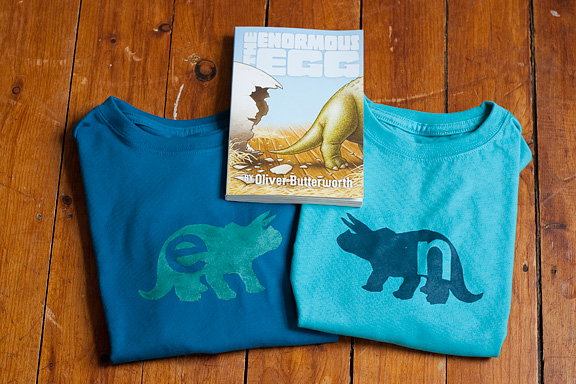
    So, in honor of Nedorevan and His Brother’s sixth birthday, I put together another book-and-homemade gift combo: freezer-paper stenciled shirst and a copy of  The Enormous Egg. It is a very sweet story about a boy raising a baby triceratops that’s all the more special to us because it takes place in New Hampshire, where we live.

    Their party is Saturday, in the middle of a very hectic few days that will include a Halloween parade, trick-or-treating at Main Street businesses in our hometown, a bonfire, fireworks and MORE trick-or-treating with Parker’s cousins. Oh, and the election on Tuesday which will mean a very long night of work for me!

    Halloween Crafts

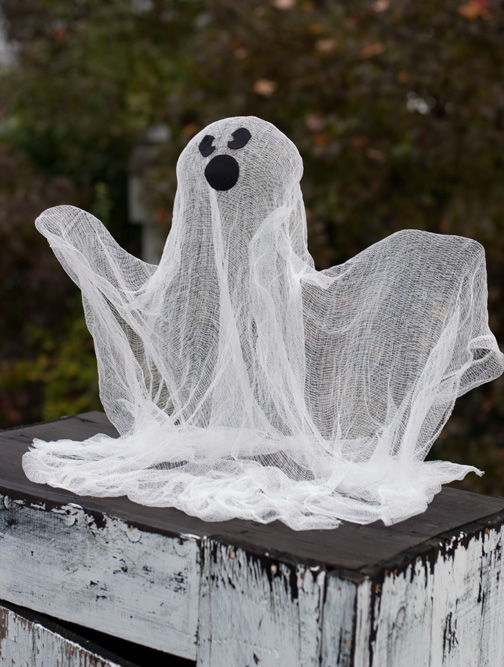
    I’m finding myself in the odd position of having churned out dozens of Christmas ornaments in the last month or so, yet have made almost nothing for Halloween. I finally convinced my son to help me make this cheesecloth ghost last weekend, but I think that’s about all we’re going to get done. I used this tutorial at Every Day is a Craft Day, though I used a wine bottle instead of a 2-litre plastic bottle because, uh, I guess we drink more wine than soda. Looking back at the cute examples from the tutorial, I’m thinking of ripping off the nose and mouth and replacing them with just two little round eyes. I’m not sure if there is a difference between the starch you’d buy in a jug or what comes in the spray bottle. I used the spray stuff (not the aerosol, but similar, in a squirt bottle) and this didn’t actually get all that stiff.
    Here are some projects I did last year, in case you weren’t one of the three or so readers I had back then! (Click to go to the original posts)

    Pantyhose Pumpkins

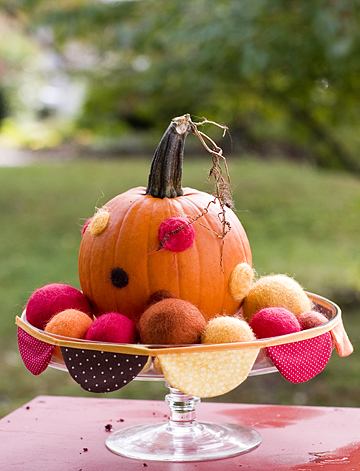
    Needle Felted Pumpkin

    Halloween "Snow" Globes

    It isn’t easy being (married to someone) green….

    When I first met my husband, I thought maybe he was color blind. Either that, or he wore the same thing every day. Everything he wore seemed to be the same dark Army-green color. Eventually, I convinced him to branch out a bit and try some blue. After all, he has beautiful blue eyes! He then wore nothing but blue for the next 10 years or so, until recently, when he has been shaking things up a bit for the television appearances he’s done to promote his cookbook. (sweater vests! yellow! purple!) But when we had a yardsale this weekend, I realized just how much green clothing he still had. Here’s just a sampling of what I decided to keep:

    So tell me, what would you do with this stack of green shirts? They include heavy fleece, knits and a few t-shirts. Surely they could be transformed into some kind of Christmas items?