Calendar

November 2024
M T W T F S S
 123
45678910
11121314151617
18192021222324
252627282930  

Featured at:

craftsterBest of Craftster 2008

As seen on CraftGossip.com

Fan of:

the-long-thread-button

The family that works together…

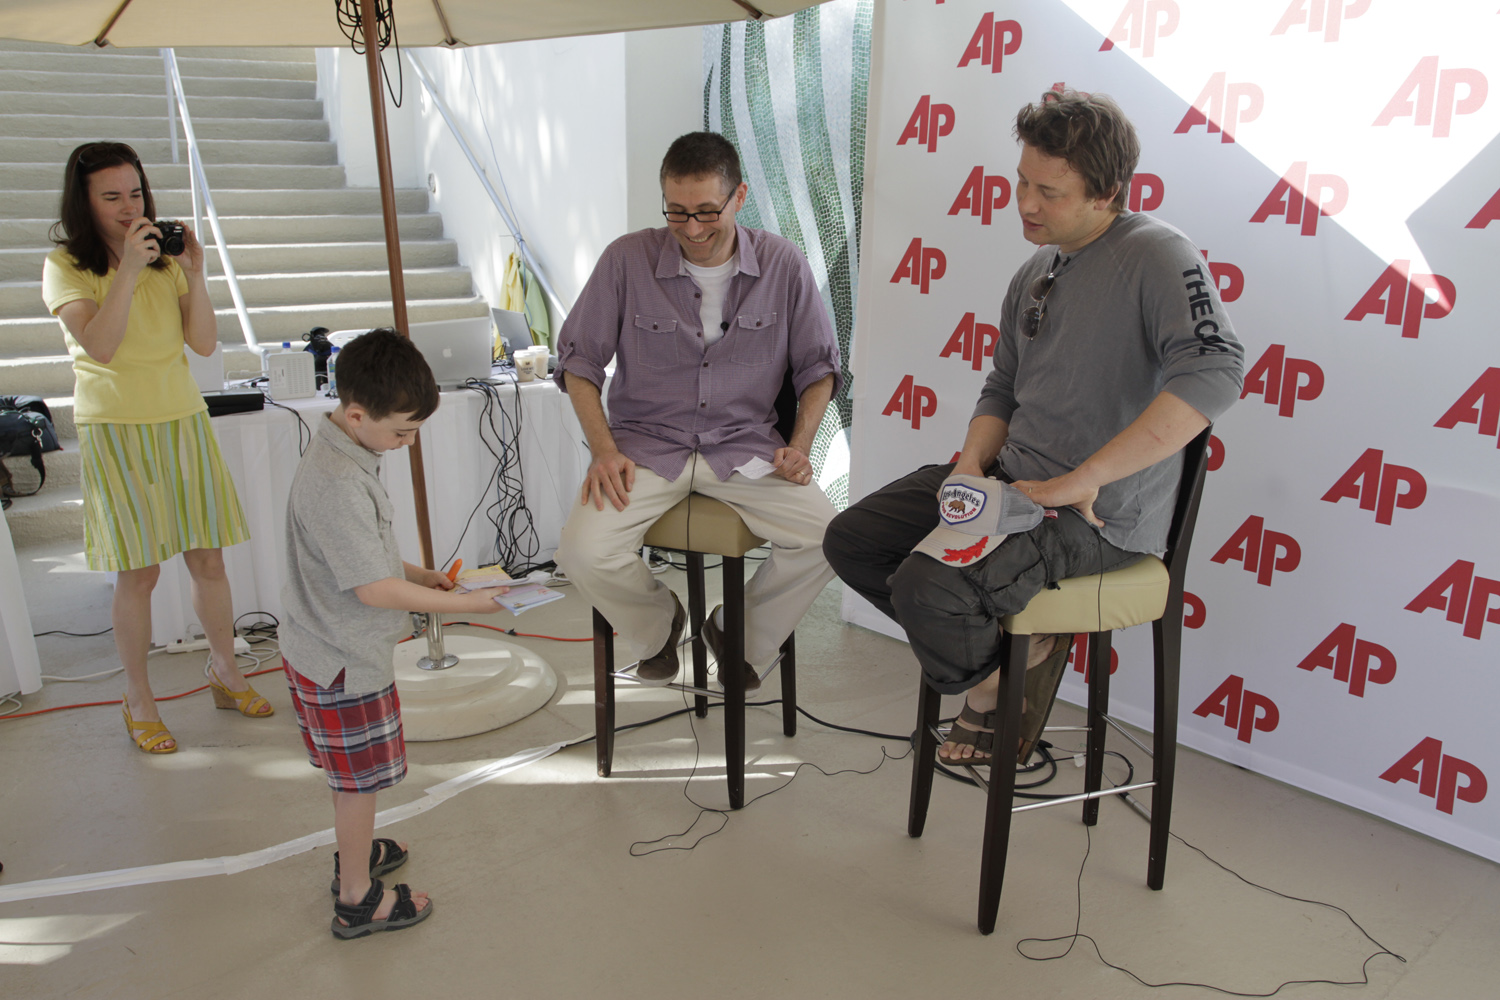
AP Photo/J Pat Carter

At first glance, this picture may appear out of place on a sewing and crafts blog, but I did make the skirt I’m wearing!  This is me, my husband and my son… and Jamie Oliver. We spent the weekend at the South Beach Wine and Food Festival. My husband covered the festival for AP. He did video interviews with about 15 food celebrities over two days, and I wrote stories to go along with them. My mom came with us to watch Parker, who stopped by at one point and decided he wanted to “help” so we let him interview Jamie Oliver before the real interview. He did a great job writing out a little script. (Parker: “Food keeps us healthy and strong. What do your kids eat?” Jamie: “Anything with pasta. Or chocolate.”)

AP posted the first five minutes of each interview on YouTube. You can also find them all on my husband’s blog here. Of all the stories I wrote, I think the one in which Jamie Oliver called Sarah Palin a “froot loop” got the most attention:)

(Editing to add a few links to the stories in addition to the videos. We wrote 10 total, so I won’t list them all! But I found Melissa d’Arabian’s ideas for getting kids involved in “cooking” behind actual cooking very interesting, particularly her comments about treating cooking like an arts and crafts project. If you’re interested in reading more, just Google my name, Holly Ramer, and “Wine and Food Festival”)

Jamie Oliver: food for kids a civil rights issue

Ted Allen: food fights shouldn’t be political

DiSpirito: ditch the calories, keep the sin

d’Arabian stretches definition of kids’ cooking

Ski shirt

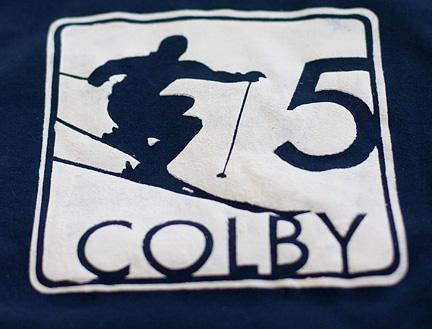
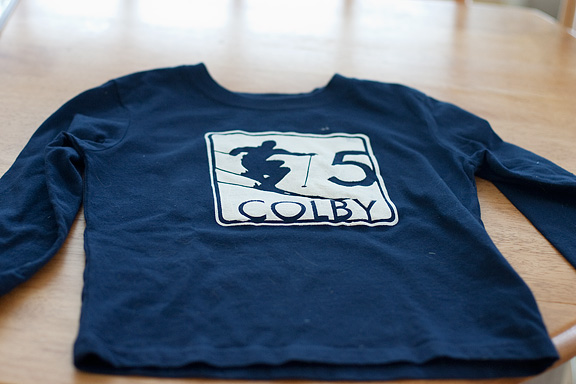
One of my son’s friends turned five recently, and he had his party at a local ski area. (Lucky for me it was my husband’s turn to play chaperone… he got to stand outside while the kids went snow tubing). I made this shirt for the birthday boy, again using my Silhouette machine to cut the freezer paper stencil. The original design had the word “SKI” at the bottom, but I figured out how to remove that, add his name and add the number 5. I used a fabric paint that is supposed to look flocked but it really just ended up looking a bit messy and bumpy. It was hard to get good coverage over such a dark shirt, but I figure that’s OK, it’s sort of like real snow.

Happy Valentine’s Day!

I’ve seen a lot of blog posts and Facebook updates today in which people complain about not being “into” Valentine’s Day or about it being a “Hallmark holiday.” But I like it, and I don’t think there’s anything wrong with that! Now, I can see how if you are lonely it must be painful to have this holiday where romance is shoved in your face. But if you’re in a good relationship? Why not use it as a chance to show a little extra love, in whatever way you deem appropriate? To those who say  “Why do I need a holiday to tell me to show my love? I can do that any day of the year?” I say, if you’re the type who DOES regularly do nice little things for your mate or surprise them with small tokens of affection, then fine. But if you’re NOT, what’s so wrong about doing it on this day? I mean, I can show my son love every day and buy and make him stuff all year, but I still celebrate his birthday…

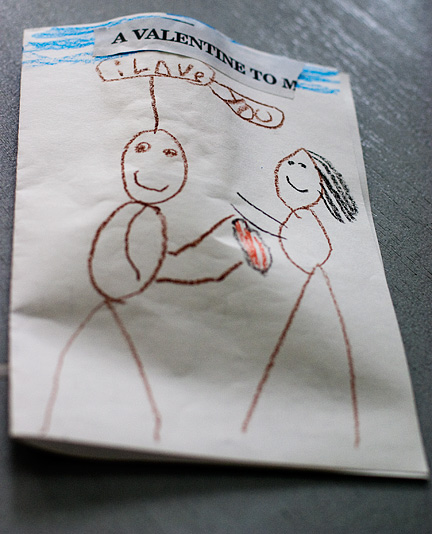
Anyway, I will step off my soapbox now and share this adorable little card my son made me:
My husband surprised me yesterday by taking Parker to a birthday party (outside! Snow tubing… brrrr) and leaving me a very sweet card that included this line: “There’s a fire in the woodstove, dinner and dessert are in the fridge and the curtain rods are up.”

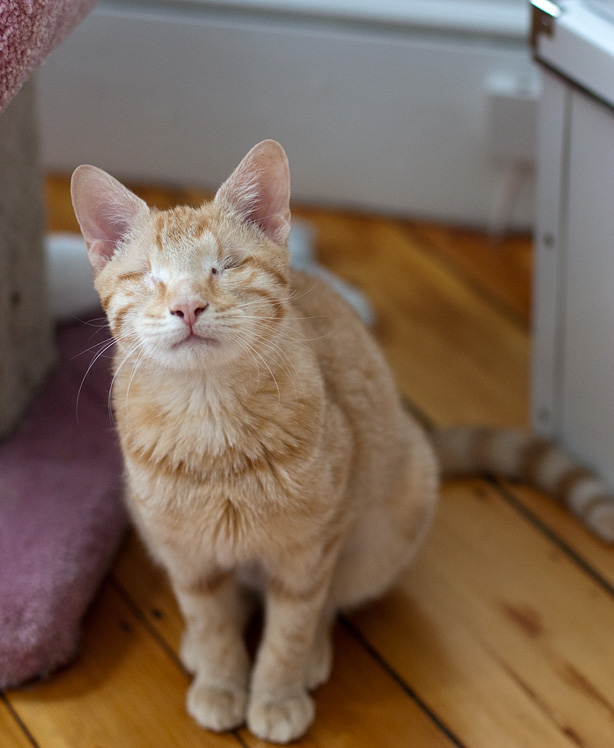
(That last bit refers to some new curtain rods for our dining room that have been sitting on the floor for weeks). I was thrilled. It was the perfect little gift. I snuggled up in front of the fire with a magazine, and our new kitty, Tangerine. (a blind, eyeless, adorable little thing we adopted from a shelter this weekend). Our 16-year-old cat, Sammy, passed away recently and we all have been grieving for her quite a bit. Tangerine (and uh, the other two cats we’ve also adopted this year) is no substitute, but she is awfully cute.

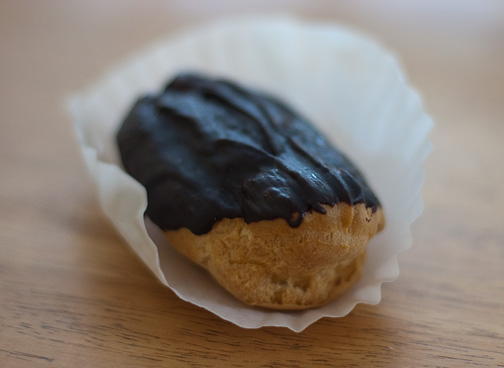
And the dessert was my favorite:

Introducing “The Shruggie”

My husband looks like a big fluffy Muppet, and he is SO happy about it.

Background: He always reads before falling asleep, but his arms, shoulders and neck get cold because he wears t-shirts (and refuses to wear long sleeves). So he had been wrapping a blanket around his shoulders but that apparently was unsatisfactory because it slipped around and he always had to adjust it. (And he looked like an old lady wearing a shawl, at least in my opinion)

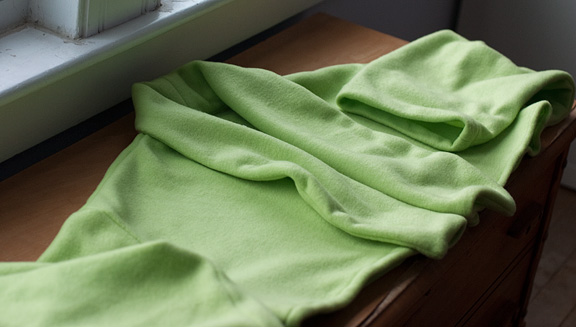
So for his birthday last week, I made him a fleece bathrobe, with all but the shoulders, arms and chest cut off. Sort of a combination shrug/Snuggie. I used Simplicity 5931, size large. The sleeves came out HUGE, like huge enough for one of the cats to crawl in next to his arm, but my husband actually likes that. The only large piece of fleece I had on hand was this bright green color, hence the Muppet-esque result.

But, he LOVES it. So much so that every night since his whole face lights up when he comes up stairs and remembers it’s there. Seriously, it makes me doubt whether he really ever liked anything else I’ve ever given him since I’ve never seen this kind of reaction from him.  

Unfortunately for you, he would not let me photograph him wearing it.

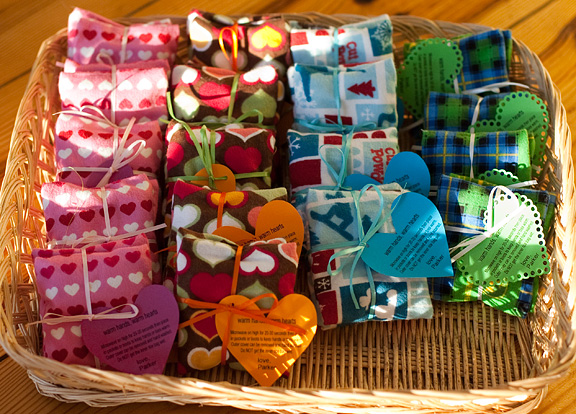
In other news, here are my completed pocket warmers, ready to be sent in to school for my son’s Valentine’s Day party. I tested one of them out this morning, and it stayed warm in my coat pocket for about an hour. (click here if you missed my earlier post with the tutorial).

In making the tags, I still couldn’t get the “e” to work in my Silhouette software (apparently others have had this problem, too) so I cut and pasted the text from Photoshop. I had planned to make all the tags fancy like the green version, but gave up after having to manually finish punching out about half of the little holes. First-graders are not worth that kind of effort!

Valentine Pom-Poms/Cat Toys

Here’s my latest craft story for The Associated Press: heart-shaped pom-poms for Valentine’s Day.
I was inspired by the t-shirt pom-poms at Craftaholics Anonymous. I should have made mine bigger but I was pressed for time, and I didn’t have much wool roving to work with. They do look pretty hanging from my stairs, though my cats have already discovered them and I’m finding bits of red yarn all over the floor.

I really need to get better about not waiting until just days before a holiday to post my projects from previous years! But here are my Valentine’s Day projects from the last two years:

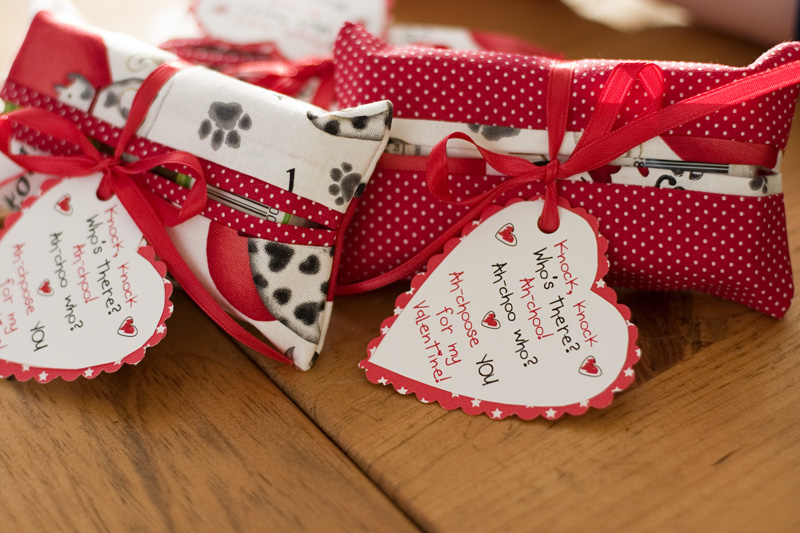
Valentine Tissue Cozies

AP Photo/Holly Ramer

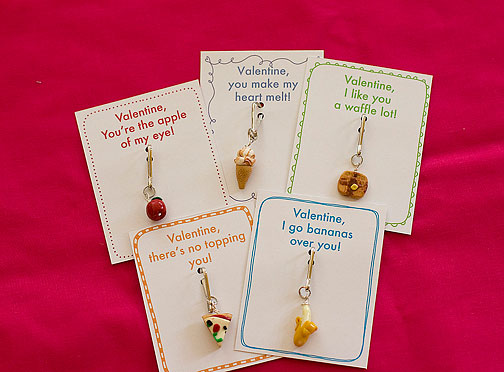
Polymer Clay Charm Valentines

Valentine Pocket Warmers

My son started attending a new school in January, one that is very big on outdoor recreation, even — perhaps especially — in winter. They have a ski program, a pond for skating, sledding hills, etc., and they never cancel classes for snow. So I decided to make something that goes along with that hearty New England spirit for his Valentine’s Day party: pocket (or boot) warmers. These are little cotton bags filled with rice and covered in flannel that can be microwaved and then popped in a pocket. I’m sure you’ve seen larger versions (which are great for warming up beds on cold nights!) and there are tons of tutorials out there for making them in all sizes.

This tutorial is a bit different in that I tried to find ways to streamline the production process to make a lot at once. This is ideal for making them for a class party, but also for stocking stuffers at Christmas, or if you just want to have a bunch extra on hand. I bought flannel on sale for $2.50 a yard, and it takes less than 1/3 of a yard to make five pairs of pocket warmers. It would be even cheaper and faster to just use the flannel to make the little beanbags and not bother with a cover, but I know how grubby my son gets even playing in snow, so I figured a removable, washable cover made more sense.

MATERIALS: (for 10 pocket warmers, or 5 pairs)

1/3 yard cotton flannel

1/4 yard cotton muslin or any cotton fabric

white rice (4 tablespoons per bag)

INSTRUCTIONS:

1) Cut a piece of flannel 10″ wide X the width of fabric (usually 42-45″)
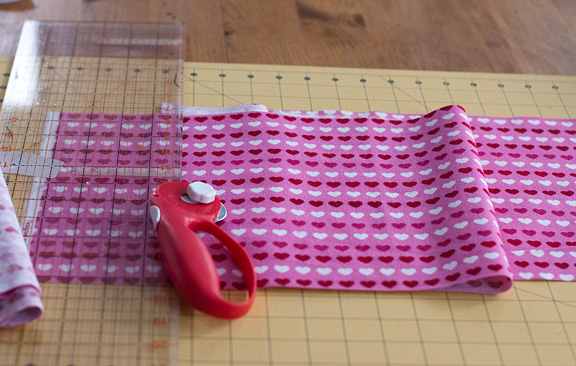
2) Fold the right side of the fabric over 1/4″ along both long edges and press. Fold over again, making a double fold hem, and press.
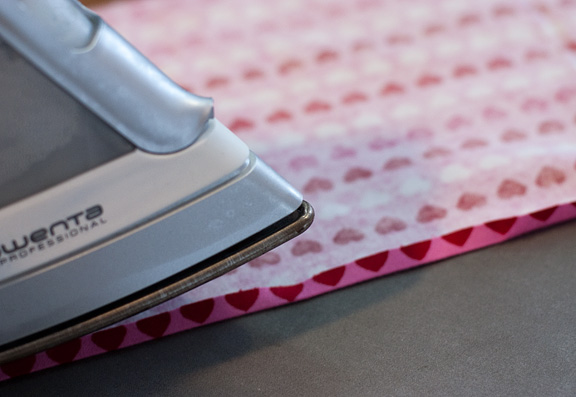
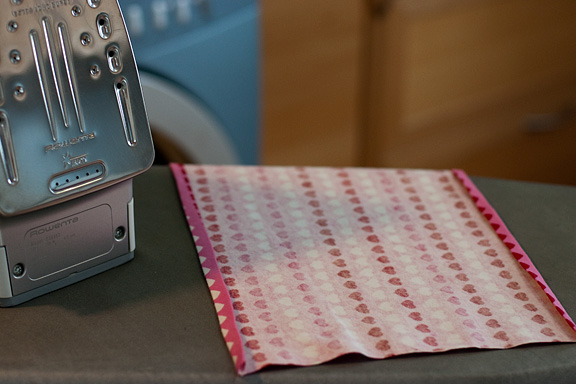
3) Sew along both hems close to the folded-over edge.
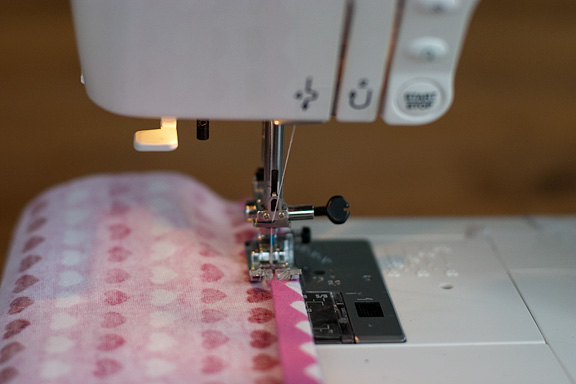
4) With right sides together, fold the fabric lengthwise, overlapping the hemmed edges by about 1/2″, so you end up with a strip that is about 4″ wide. Place a few pins to hold the hemmed edges together, and then press along the folds.

5) Cut the folded strip into 4″ wide pieces.
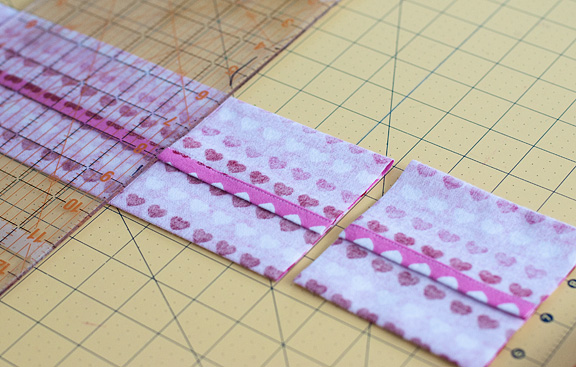
6) Using a 1/4″ seam allowance, sew along the short sides of each piece. Chain piecing (feeding the pieces through the machine one right after another without stopping to cut the threads) makes this step go faster, just remember to backstitch at the beginning and end of each piece.
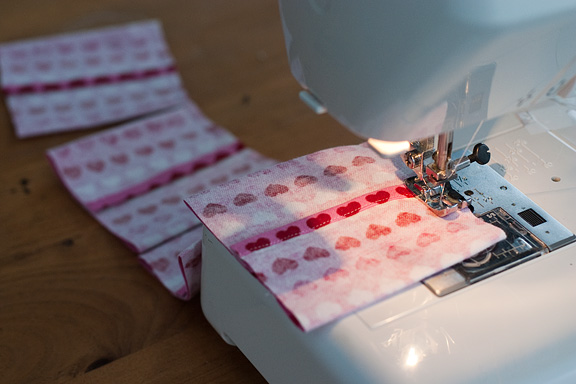
7) Trim the seam allowance with pinking shears to prevent fraying.
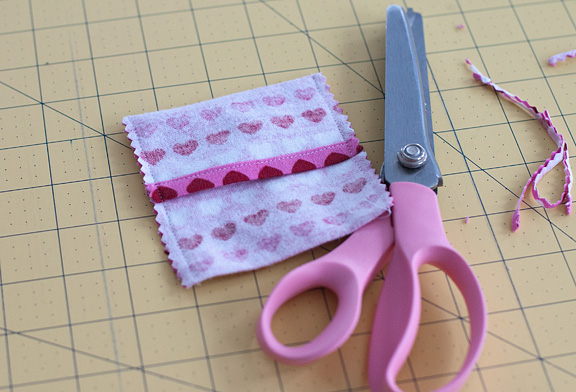
8) Turn the cover right-side out.
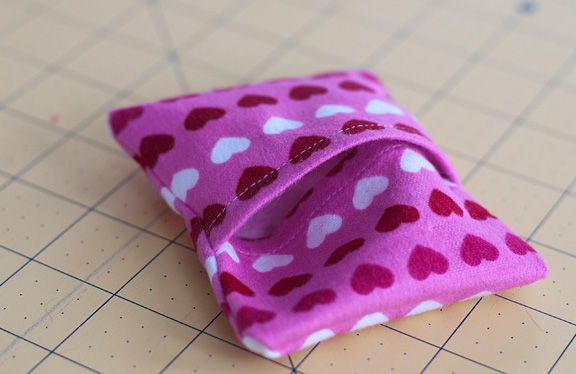
9) To make the insert, cut a piece of muslin or other cotton fabric 7″ wide X the width of fabric.

10) Fold the fabric in half lengthwise and press. Then fold down each raw edge toward the outside 1/4″ and press. This will make it easier to close up the bags of rice later because you’re creating a folded-under edge that will become the top of the bag.
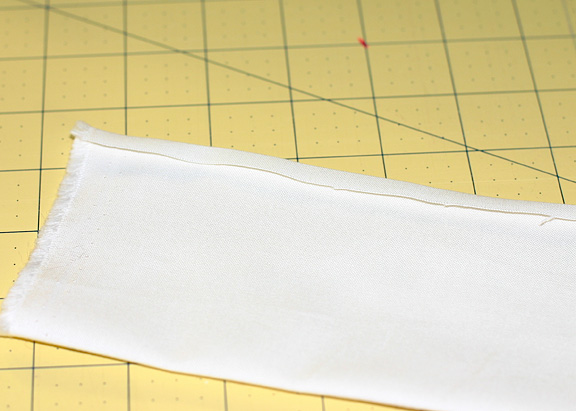
11) Cut the fabric into 4″ lengths and then sew down the two sides, chain piecing them to save time. You should end up with a little bag, with the open side having the folded-down edges.

12) Turn the bags right-side out and fill with 4 T. of rice. Push the rice down into the bottom of the bag and pin it shut.
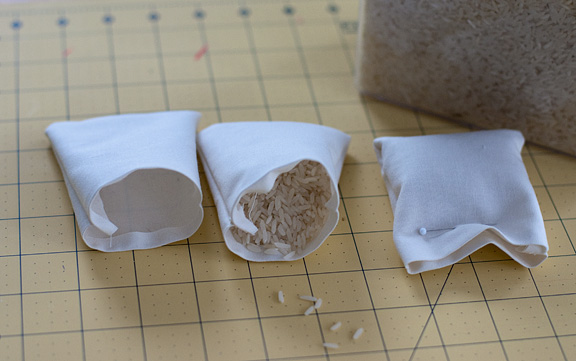
13) Sew across the open edge of each bag, then insert it into the cover.
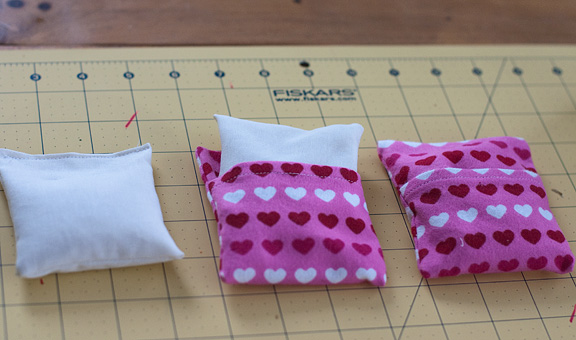
Of course, no self-respecting first-grade boy would be caught dead carrying around a little pocket warmer decorated with hearts, so I had to make more masculine versions as well. I used some leftover John Deere flannel for some, and this cute (yet boyish!) print, which has skiing and snowboarding designs.
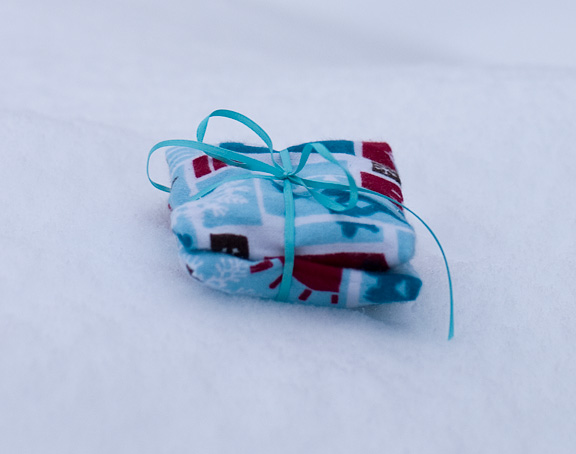
(You’ll have to imagine the cute little tags I was planning to make using my Silhouette machine. I tried last night to use the text feature to make a heart-shaped tag with heating instructions that I could then run through my printer and then the Silhouette. Except for some reason, the Silhouette software would not let me type the letter ‘e.’ Infuriating! It wasn’t my keyboard — I could type it fine in any other program.) Anyway, the tag will say: “Heat in microwave for 20-30 seconds. Flannel cover can be removed for washing. Do NOT wash inner bag of rice.”
So-so Silhouette


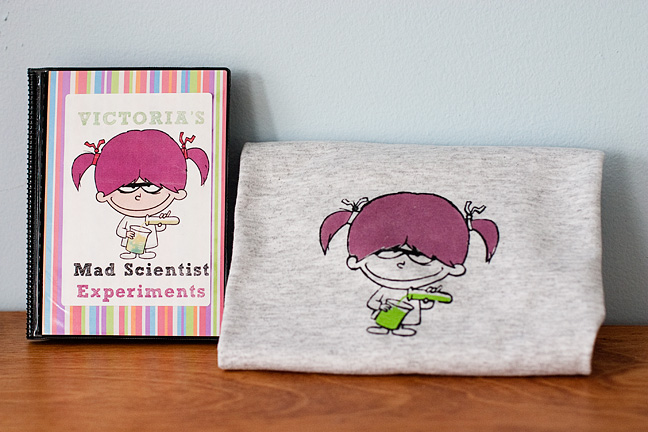
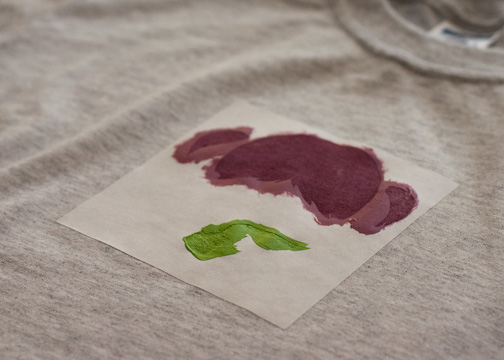
I made this cute t-shirt and “experiment” book for my son’s friend, Victoria, who is a fan of the “Franny K. Stein” mad scientiest books. The book is full of easy science experiments collected from different websites and assembled in a great free download at A Lemon Squeezy Home, so all I had to do was print the pages and stick them in an inexpensive photo album.  The t-shirt is painted using freezer paper stencils I created with  my new Silhouette digital cutter.

Confession: I might be the only person in the crafting world who does not love the Silhouette. I WANT to love it, but so far, I don’t.

When I first started seeing them pop up on all the craft blogs last year, I was intrigued, and entered probably dozens of giveaways without luck. I then hinted a bit to my husband, and he and my in-laws generously purchased one for me for Christmas. Now, I admit I have not used it a ton, but that is part of the problem. I feel like it is not holding up well despite the limited use it’s getting.

Within a few days of trying it out, I was finding that paper I was trying to cut was sliding around the sticky mats, resulting in it coming out of the machine totally mangled. When I tried to cut a page full of intricate snowflake designs, it didn’t cut all the way through. Very frustrating. I contacted customer support and was sent a new blade and a new mat. The new blade seems to be helping, but I do think that the mats shouldn’t lose their adhesive properties after less than half a dozen passes through the machine. I’ve read some suggestions about cleaning the mats and spraying them with repositionable adhesive, so I may give that a try.

I do like that you don’t have to buy expensive cartridges like you would with a die cut machine (which I’ve never used) and can pay 99 cents to download designs. You also can use your own designs and images, though there is not much in the way of detailed descriptions on how to do that. By trial and error, I think I’ve figured out how to take a shape, from say Photoshop, get it into the Silhouette software and cut it out. There is a “print and cut” feature that allows you to print something on a separate printer and then cut it out using the Silhouette. Again, not much in the user manual on how to do this, but I finally figured out that you have to make sure none of the image you’re bringing in covers up the registration marks on the Silhouette software screen (even if it’s the “white” background).

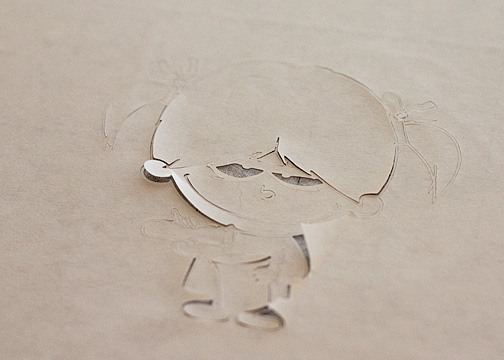
I haven’t tried cutting vinyl yet, but in addition to a few paper projects, I have used the Silhouette to cut freezer paper stencils. After the machine mangled my first attempt, I figured out that it works better to put the freezer paper shiny side UP. Overall, I WAS impressed that I could cut out such a detailed design, which I never would have attempted by hand. What I didn’t really realize was that I would have to pick out all those tiny little details and iron them to the shirt, but that wasn’t the Silhouette’s fault.

Baby Gifts

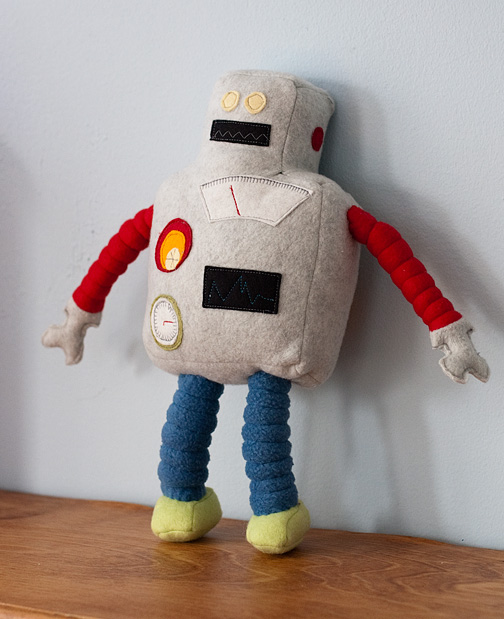
I love this Retro Robot Plushie pattern by Gulf Coast Cottage. The first time I made it was last spring, as a gift for my son when he had his tonsils out. That time, I enlarged the pattern a bit, and used different colors of felt to make striped arms and legs. This time, I made it for a colleague who is having a baby boy soon. With a baby/toddler in mind, I made it all out of fleece instead of felt, and made it so all the seams are on the inside (the original is handsewn on the outside). I also machine stitched all the decorations on instead of hand-stitching. I actually didn’t like how it looked right up until I attached the arms, and then I thought he looked pretty cute! Predictably, when Parker saw it, he asked me to make him one. When I reminded him that I already had, he quizzed me on each feature. “Does mine have this button? This dial?” So we fished his out from the pile of stuffed animals in his room and he finally was satisfied.

I actually had intended to make the “Katie Kitty” stuffed animal from the new “Wee Wonderfuls” book, and was planning on making it a boy cat instead of a girl. But I could not for the life of me figure out how to sew the head pieces together. I did it twice and both times ended up with very odd shaped heads. After looking at the Flickr group for help, I think I’ve figured out what I was doing wrong. I’ll have to try it again!

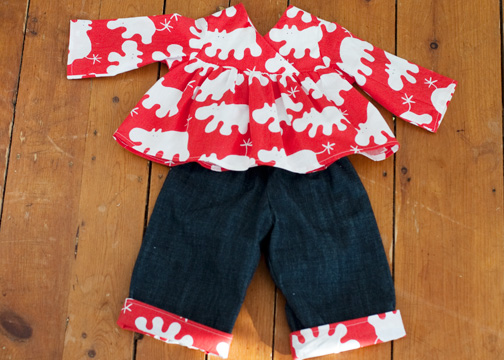
I still need to deliver this little outfit for another friend’s new baby girl. I used patterns from Making Baby’s Clothes by Robert Merrett. I love the little top, which was suprisingly easy to make. I altered the pants a bit to make them reversible, and a bit warmer. The outside is a dark denim, and the inside is the same hippo print (from IKEA).

Christmas in January

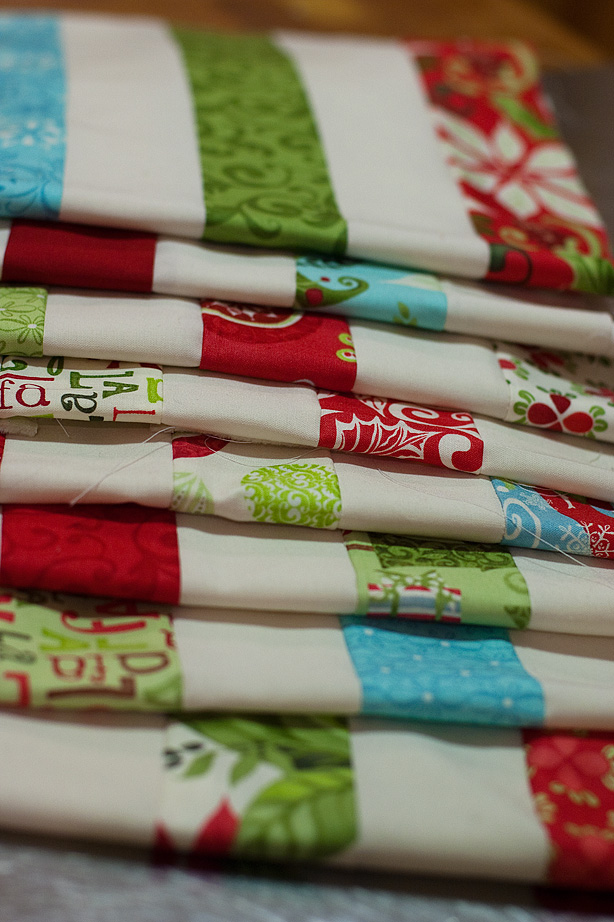
On my to-do list: three slipcovers for my newly-painted living room, a duffel bag to hold my son’s karate sparring equipment and a gift for a friend’s baby due in a few weeks. So what am I working on instead? A quilt. A CHRISTMAS quilt.
Every year I see all the new Christmas prints and think about making myself a quilt. But I never do it, and I never have time in November or December. So when I saw the Postage Stamp Quilt-a-long at P.S. I Quilt, I decided to jump in. She offered a discount at an online fabric store, and there just happened to be a jelly roll of the “12 Days of Christmas” fabric by Kate Spain already on sale as well. So I took that as a sign that I should just do it, even though part of my New Year’s resolution was to use fabric I already have for as many projects as possible.
Here’s my progress so far:

The only downside to finishing a Christmas quilt this early is that I will have to put it away for so long before next Christmas!

Birds, angry and otherwise

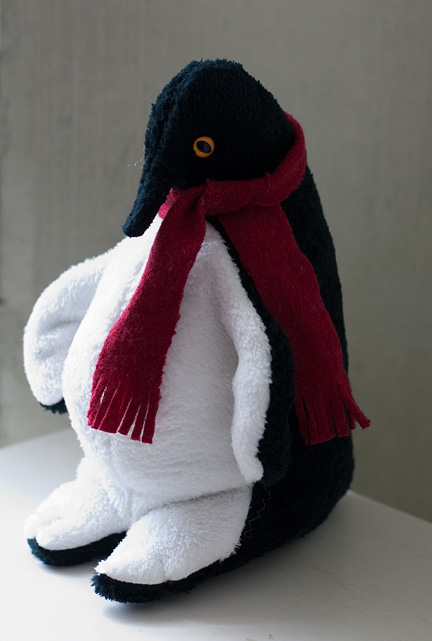
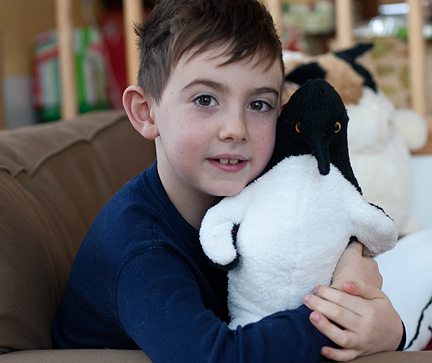
Another Christmas gift post! I realized I mentioned but neglected to share photos of the stuffed penguin I made for my son for Christmas. He has a small one (that cost a small fortune) from the New England Aquarium, so this one is “Penguiny’s Mommy.” (pronounced Pen-GWEEN-ee in case you were wondering).
The pattern is McCall’s 5780, which only has two pattern pieces. That didn’t mean it was simple, however. Most of my trouble was due to the very soft but sheds-like-crazy fabric I used.

Christmas morning:

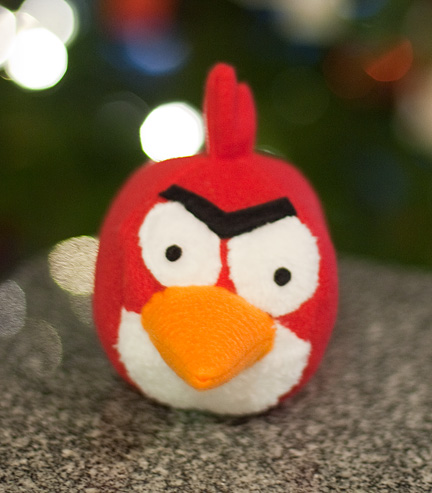
The other bird I made was for a friend of mine who is obsessed with playing Angry Birds on his iPad. I’ve never played it, but when I saw this tutorial at Obsessively Stitching, I knew I had to make one of the birds for my friend. It was a big hit. Within hours, he had changed his Facebook profile picture to a photo showing the bird sitting on his shoulder. Something was wrong with my camera the day I took this picture, so please check out the link above for better pictures!