Calendar

November 2024
M T W T F S S
 123
45678910
11121314151617
18192021222324
252627282930  

Featured at:

craftsterBest of Craftster 2008

As seen on CraftGossip.com

Fan of:

the-long-thread-button

Fort Kits

REMINDER: You have until the end of the day to enter to win a free copy of Summer with Matthew Mead magazine. Click HERE to go to the giveaway post!

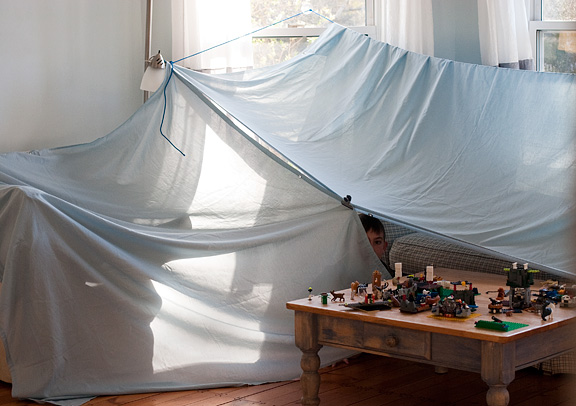
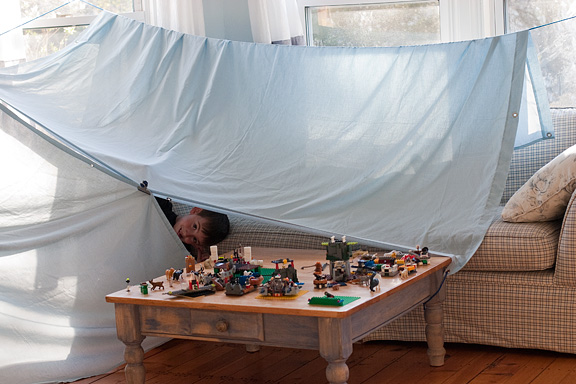
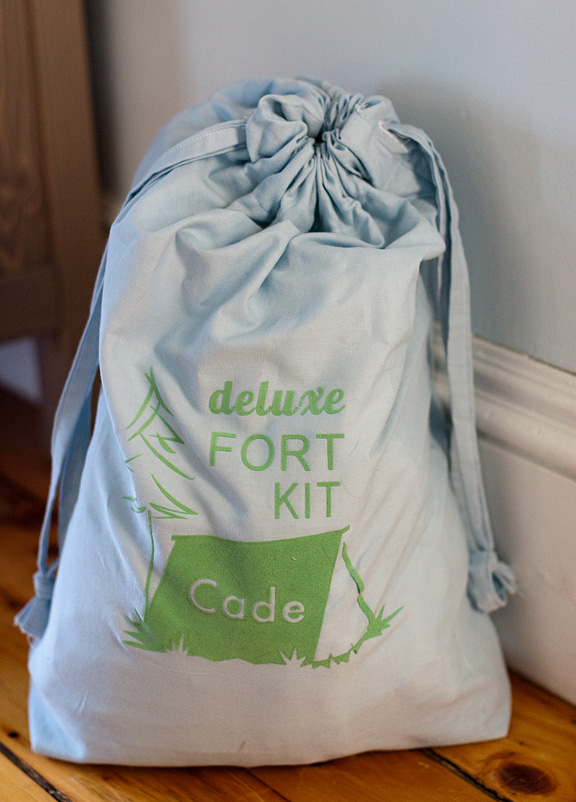
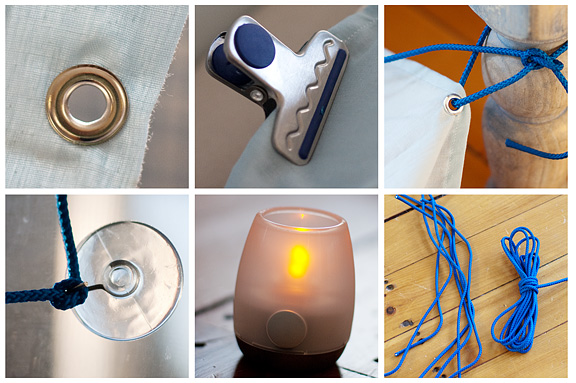
I think this might become my go-to gift for little boys (and girls, maybe!): a fort-building kit! I first saw this idea at Saltwater Kids and have added a few tweaks. The original has ties sewn to the corners and sides of flat sheets, but I decided to use grommets instead, so rope could be strung through the grommets. It turns out, though, that grommets are really hard to insert if you have weak little hands like mine, so after finishing one sheet, I switched to large eyelets instead (1/4″ opening), and that was much easier. But now I’m thinking that I could’ve just made button holes and that would’ve worked just as well.


I bought a twin sheet set on sale at Target for $7.50 and removed the elastic from the fitted sheet to turn it into a flat piece of fabric. This required cutting off some of the sheet, which I then I had to hem, but I think it was worth it. I used the pillow case to make the bag, and the leftover fabric that I trimmed off the fitted sheet to make the drawstring ties. I used my Silhouette machine to make the letters and design out of iron-on flocked vinyl. I know I have been slow to warm up to the Silhouette, but I have to say, this was pretty amazing and I love how it came out!

I was a bit skeptical that this would really be any better than how we usually make forts _ just dragging out some blankets and draping them over furniture. So before sending this off to the recipient, I had my son test it out. Well, it was a big success, and in fact, there is still a fort set up in my living room right now. We found that the suction cups only stuck to windows (not the coffee table or walls, etc.) but that worked great for stringing a line across the room so we could hang the sheet over it. In addition to the long rope, I’m going to include some shorter lengths that can be used to tie the sheets to table legs, etc.

Aside from making the bag, there was more shopping than sewing or making stuff involved in this gift. I got some good deals _ the clips are from the dollar store, the suction cups were on clearance for 74 cents at Target, the little lights were $3.50 for four. The rope was $3 for 50 feet, and I have more than enough for two or three kits, which is good, because a certain 6-year-old in my house would like one.


A whale of a giveaway!

“Summer with Matthew Mead,” a magazine I was thrilled to contribute to, will be heading to mailboxes in the next few days. (It is available only via this website) I can’t wait to see it!

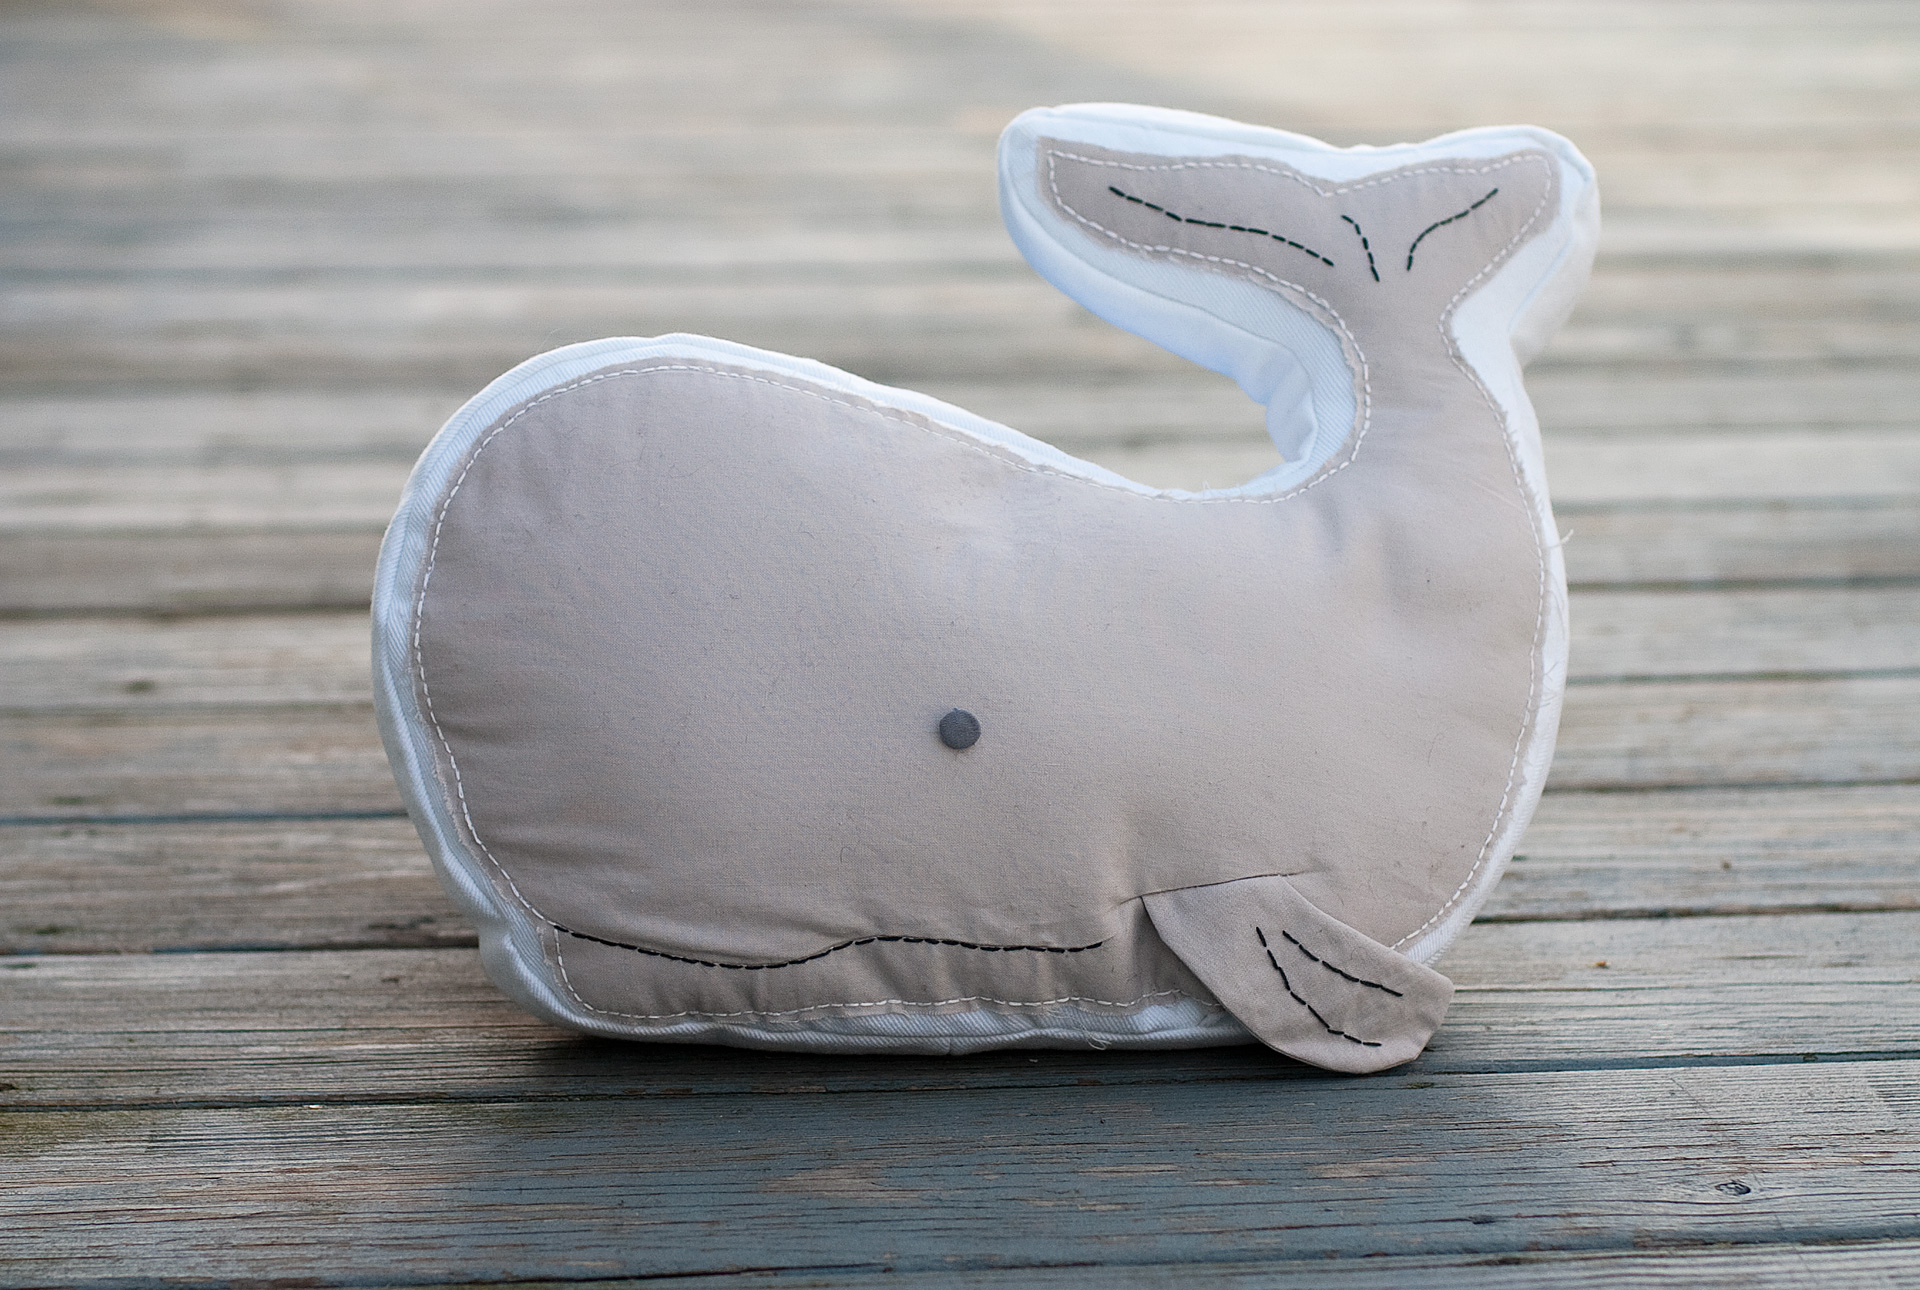
In the meantime, here’s a sneak peek at my project: a pillow shaped like a whale. I’m sure the photographs in the magazine will be better, this is just a snapshot on my deck, but it gives you the idea…

If you’d like to make one, I’ve put together a PDF with the pattern and some directions: stitchcraftcreations_whalepillow

And… if you’d like a copy of the magazine, I’ll have an extra one to give away. Just leave me a comment below. To earn an extra chance, let me know that you subscribe to my blog or follow it. I’ll pick a winner on Monday.

***THIS GIVEAWAY IS NOW CLOSED. THANKS! ****


Scrambled Eggs

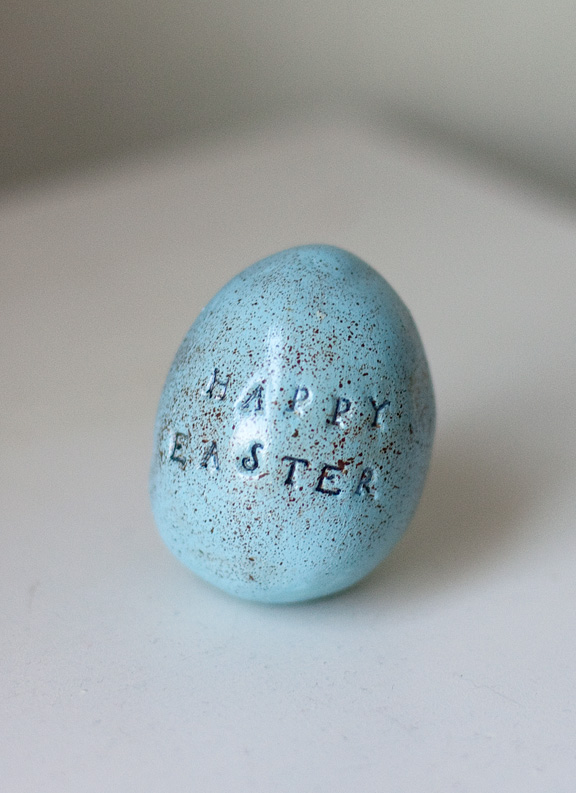
I’m not sure why I feel so drawn to Easter crafts given that my family really does not do much to celebrate Easter… I guess it is the pretty spring colors. Here’s my latest attempt, and much like the Silhouette eggs, this project was not quite successful.

My main inspiration for this egg was a tutorial on the Rachel Berry Blog. She made egg shapes out of aluminum foil and then covered them with clay, but then I read about how it is possible to cover REAL eggs with clay.

I really wanted to try these amazing polymer clay-covered eggs by Liz Smith, as seen on the Martha Stewart show, but figured I would start with what I hoped would be the simpler process of covering a a blown-out egg with a solid sheet of clay. Problem number 1: curious cats. After I blew out five eggs, I left them to dry on our kitchen cutting board. I walked by later and all five were gone… scattered around the house by our cats. I eventually found them all (one had made it all the way downstairs and was under our woodstove) but all but one had been broken. Ugh.

Problem number 2: My experience with polymer clay has been limited to making teeny-tiny charms. So I really had no idea how difficult it is to condition/soften a huge hunk of clay. I am a weakling. After many minutes of trying to blend some blue and white clay, I decided to go for a swirly, marbled look. But since I do not have a pasta machine for clay, rolling it out evenly and large enough also was much more difficult than I had anticipated. By this time, I was pretty sick of this project so I slapped the clay on rather sloppily. There were a few bumps that I tried to smooth out, but it was hard.

Problem number 3: My son sometimes uses my alphabet stamps and doesn’t always clean them well. So when I went to stamp the letters, some ink got on the clay. I decided then that I would paint the egg afterward.

In the end, I painted the egg this light blue, used a Sharpie to color in the letters and then used brown paint and a toothbrush to add the speckles. Finished it off with a coat of spray-on on gloss.

I don’t hate it but it was a lot of trouble. Maybe next year I’ll just paint some wooden eggs.

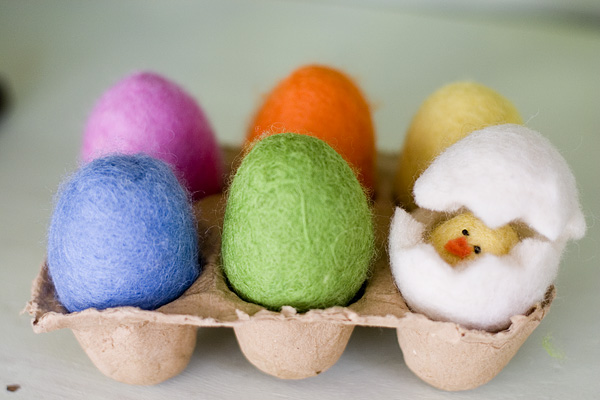
I do still love the felted wool eggs I made a few years ago: (Click HERE for my audio slideshow/tutorial)

Felted Eggs

My Silhouette eggs also were featured with lots of pretty ideas at Pure Joy Events.

Birthday bucket hat

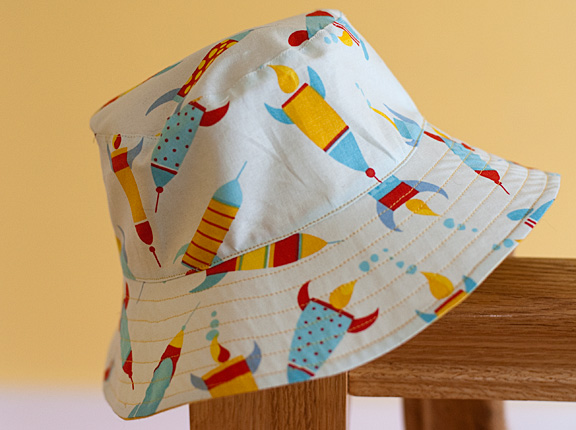
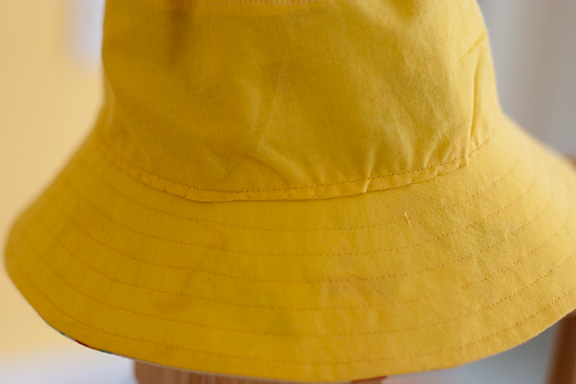
Another project from “Oliver + S: Little Things to Sew”. This bucket hat is for my son’s friend, Ally, who is having a space-themed birthday party at our local planetarium tomorrow. (Don’t tell my son I bought this fabric a while ago to make him something… and then never did anything with it!) This was a fast, easy project until the very last step. The way the hat is put together, you sew the cap of the lining on by hand, and then turn the hat to the right side and top stitch near where the side meets the brim. When I did that, this it what happened in the inside, it’s all wonky and uneven.

So I don’t think this truly works as a reversible hat but hopeful the birthday girl will like the rockets enough to prefer that side.

I’m thinking that if I make this again, I’d make basically two separate hats and then sew them together around the outside edge of the brim, leaving a few inches open to turn it right side out. I’m not sure how well that work, or if I could then topstitch and have it look better…. we’ll see.

Summer, Someday

It is hard to imagine spring, let alone summer, will ever arrive given that there are still a few stubborn clumps of snow in my yard. Though when it got up to about 70 degrees this weekend, my son was ready to haul out the sprinkler. I was a mean Mom and nixed that idea, though I did let him fill up a few water balloons and lob them at my car. But, here’s one thing that is making me think of summer: The Summer issue of Matthew Mead’s “bookazine.”

You might remember that I featured the December/Holiday version. That issue featured one of my husband’s recipes, but this time, it’s my turn. I just might have a little project in there! So exciting!

Click on the button above to see a sneak peak or order your copy.

Bear Carrier

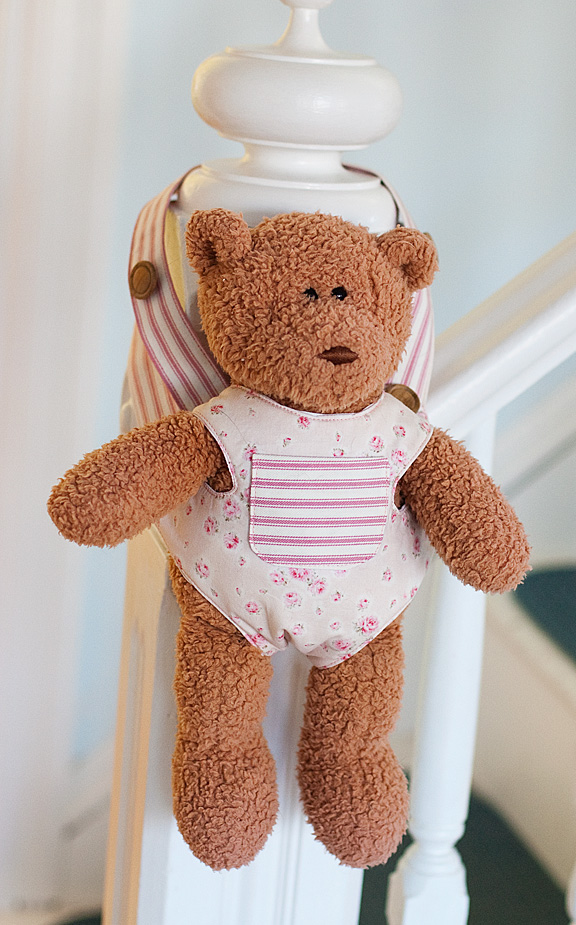
This adorable bear/doll carrier will soon be on its way to my friend’s 4-year-old daughter, whose birthday was last week. (I like to extend the celebration by sending gifts late, ha ha). This is a project from a review copy of  “Oliver + S: Little Things to Sew” that I recently received. The instructions were very clear, and this was an easy project. Keeping the three layers together (front, lining and batting) together was a bit tricky when sewing around all the curves,  and if I make it again, I might just pin rectangles of fabric and batting together, trace the pattern (minus the seam allowance) on the top layer with an erasable pen and then sew on the line. But overall it was not difficult. And I was able to make it using fabric and supplies I already had. The front and lining fabric actually were leftover from a quilt I made for the birthday girl when she was born, and the straps are from some ticking fabric I cut from an old body pillow cover my mother-in-law made and we used to have in our guestroom maybe 10 years ago. I knew I’d use it someday!

The carrier attaches on the top with buttons (I used two sets to make it adjustable) and on the sides with Velcro. I added three strips of Velcro because I wasn’t sure how big or little either the recipient or her favorite dolls are. I had my son try it on. His first reaction was “People will laugh at me, it’s pink!” (even though no one could see us except our cats). But that was quickly followed by a request that I make him one as well for his stuffed animals, in a different color.

Silhouette Easter Eggs

While I still believe that I’m the only person with a Silhouette machine who does not absolutely adore it, I can’t blame the poor results for this project on the machine. Instead, I’ll blame my six-year-old. OK, to be fair, I’m not sure these eggs would have turned out THAT much better had I been working alone, but that’s what I’m going to tell myself.

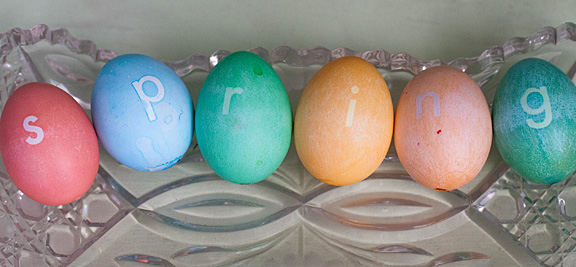
Once I decided to try using the Silhouette to cut some vinyl letters and shapes to use on my eggs, I also decided to blow out the eggs, because if I was going to create gorgeous, fancy eggs, I wanted to be able to keep them. The blowing out part was fine. I followed Martha Stewart’s directions, except I used a large needle to make the holes instead of an X-acto knife. (Though this method does leave you with noticeable holes in the eggs… not sure what you’re supposed to do about that? Cover them with bits of paper?)

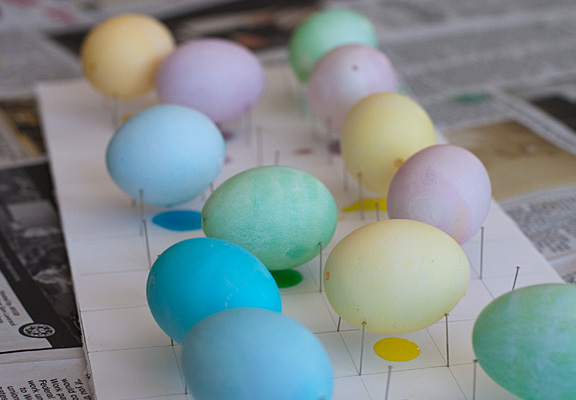
Parker and I then dyed the eggs in various pale shades, which was a bit tricky because the hollow eggs want to bob on the surface of the dye.  This was also the first time I tried Martha’s idea for a drying rack, which would have worked great had I put my pins just a bit closer together. After a while I noticed that the eggs were REALLY drippy. That’s when I realized that because of the holes in the eggs, a lot of the dye had gotten into them, so I had to blow out some of the water and dye again.

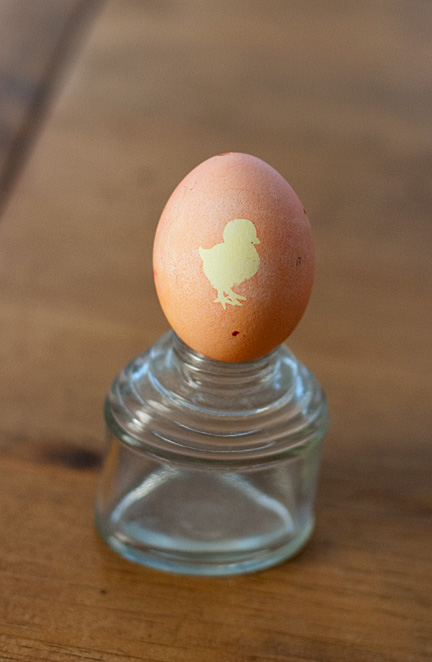
I then used the Silhouette to cut out various letters and shapes out of vinyl. For once, I was impressed with the Silhouette. It cut the vinyl beautifully, and because you don’t have to use the carrier sheet —  you just feed the vinyl into the machine — I didn’t feel like I had to hover over the machine worrying that the cut pieces would be sliding around and getting mangled while it was cutting.

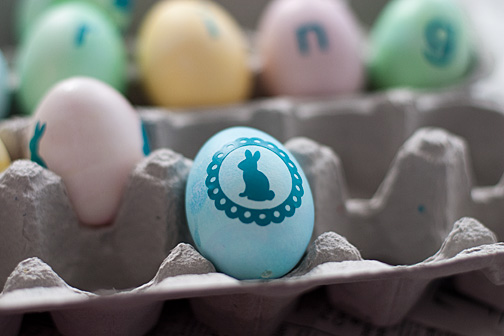
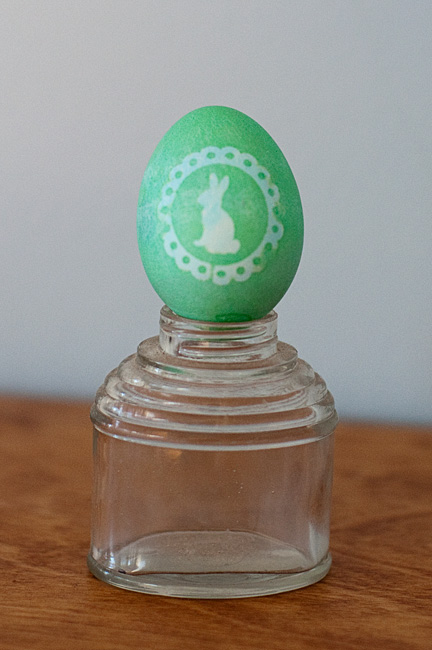
I did realize that some shapes weren’t ideal. As thin as the vinyl is, you still can’t wrap larger shapes around the curved surface of the egg without it getting wrinkled. For the scalloped border, I had to cut off two little scallops and make it more of an oval shape instead of the circle I started with. I could have re-cut the vinyl into a better shape but I was already sensing at that point that these were not going to be the family heirlooms I envisioned.

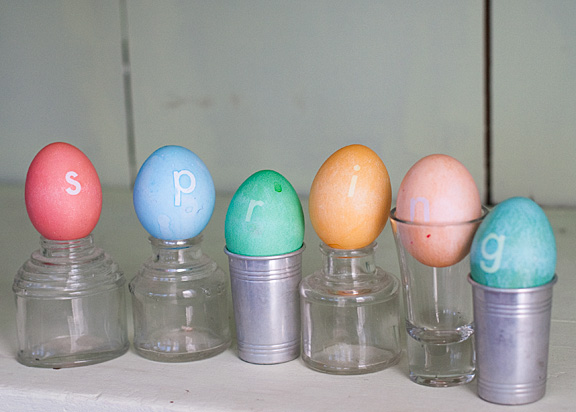
Once the vinyl was stuck to the eggs, we dyed them again. I think our big problem here was not letting them sit long enough in the dye. Some came out great _ the “S” in spring is nice and crisp _ but others were too light so there wasn’t enough contrast. And on some, the vinyl must not have been stuck as tight because the dye seeped under it.

So,  while these aren’t horrible, they’re also not something that you’d stop and exclaim over how amazing they look either. IF I did it again, I think maybe I would use the vinyl as a stencil to paint the eggs instead of dyeing them. Or maybe use white vinyl and just use them as stickers. Or maybe we’ll just go back to dyeing hard-boiled eggs and leave it at that.
Giraffes for Christchurch

Wee Wonderfuls Giraffe
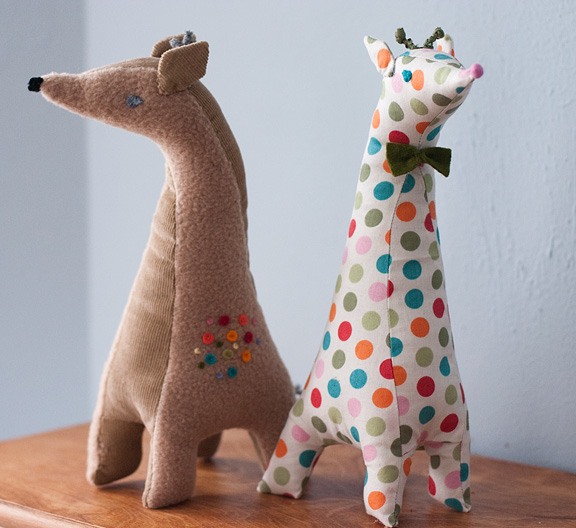
These two guys are on their way to New Zealand, where they will be given to children affected by the recent earthquake there. I have had a penpal in New Zealand since I was in 7th grade (We have met twice as adults — once in New York and once in London. Someday I’ll get to New Zealand!) After I made these, I realized I should have made stuffed squirrels. When my friend came to New York, she was fascinated by the squirrels in Central Park because she had never seen them before!
I used a pattern from Wee Wonderfuls: 24 Dolls to Sew and Love.. The spotted guy is made from fabric I won through Deb’s “Present a Week” challenge I did last year at Works in Progress. Deb lives in Christchurch, so I thought it was only appropriate to use some of the fabric she sent me to give back to her community. The other giraffe is made of fleece and corduroy because I wanted to make a more cuddly version. I used some light-weight fusible interfacing on the fleece to keep it from stretching too much.
Leonie at Kiwi at Heart is organizing the effort to collect handmade stuffed animals and dolls. Click below for more information:

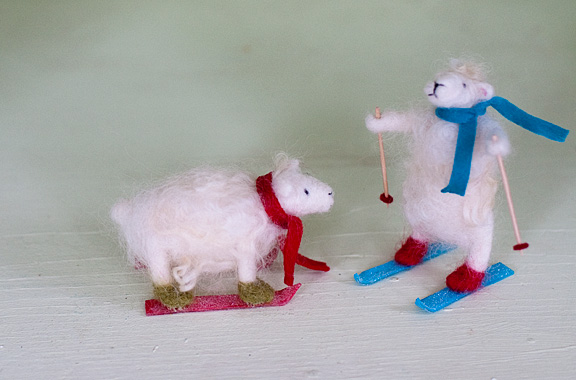
Skiing Sheep

Needle Felted Sheep from "Wool Pets" book
My parents took a trip last fall to Prince Edward Island, which made me quite jealous because I adore “Anne of Green Gables” and have always wanted to visit L.M. Montgomery’s home. In addition to bringing me a pretty mug and coaster with Anne’s picture on it (it makes me feel slightly fancy when I use it at work), my mother bough a large bag of curly wool roving at a farm they visited. “I figured you could do something with this,” my mother told me. So, I decided to not stray too far from the wool’s original form and turned some of it back into sheep, skiing sheep, to be precise.

My inspiration was the ski sheep kit by Wool Pets. Since I already had the materials, I decided to buy the Wool Pets book instead of the kit. The instructions there were for the sheep standing on all-fours, but it was easy enough to adapt to an upright position.

I didn’t have any mini popsicle sticks to use for skis, so I made mine out of shrink plastic. Ever wondered how to make tiny skis out of shrink plastic? No? Well, someday you might, so here’s how I did it.

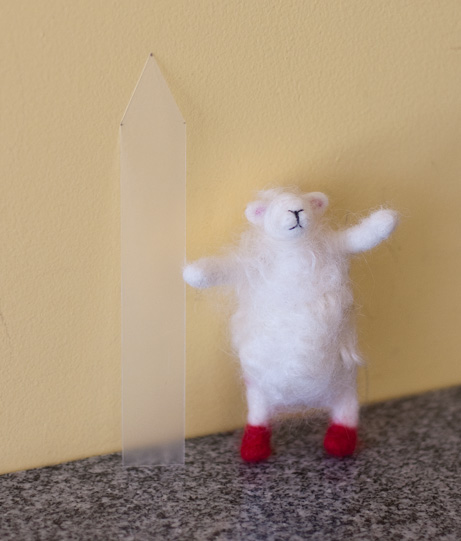
I cut two pieces of shrink plastic that were 7/8″ wide and 6 inches long, then cut a point at one end (the point is about an inch long). This resulted in the blue skis that are about 3/8″ wide and 2.5″ long after shrinking. I happened to have shrink plastic that you can run through an ink jet printer (so I suppose I could have added fancy logos!) but any shrink plastic would work since I ended up painting it anyway.
I used an old heat embossing tool I bought years ago for stamping projects, but you can also use an oven. After the ski had shrunk and flattened, I squashed all but the tip under a heavy tile, then curled the tip upward before it totally cooled off.
I painted the skis with acrylic craft paint, then brushed them with white glue and sprinkled on some clear glitter.

I’m going to put these guys away until Christmas, and try not to feel smug about finishing a holiday project in March. Do you think I should make them ornaments by adding loops of embroidery thread at the top?

I’m also going to add them to my dormant holiday blog, just in case anyone’s still subscribed over there. Obviously, these won’t be a surprise, but future projects will be stashed there so any friends and family who read this blog won’t see them. If you need the address for that, just leave me a comment.

Once Upon a Thread

I just stumbled upon “Once Upon a Thread” at “No Big Dill,” a month of sewing projects inspired by children’s books. If you’ve been reading this blog for a while, you know that I often make gifts for birthdays and Christmas that go along with books, so I can’t wait for even more inspiration! I went a bit overboard and added a bunch of my projects to the Flickr group that goes along with the project.