Calendar

November 2024
M T W T F S S
 123
45678910
11121314151617
18192021222324
252627282930  

Featured at:

craftsterBest of Craftster 2008

As seen on CraftGossip.com

Fan of:

the-long-thread-button

Pretty Pictures

We are getting ready for our annual weekend in Miami, where my husband covers the South Beach Wine & Food Festival. This year, I’m helping out by shooting video of some of his interviews, instead of doing the writing like I did last year. I am a little nervous about that, but looking forward to the warm weather!

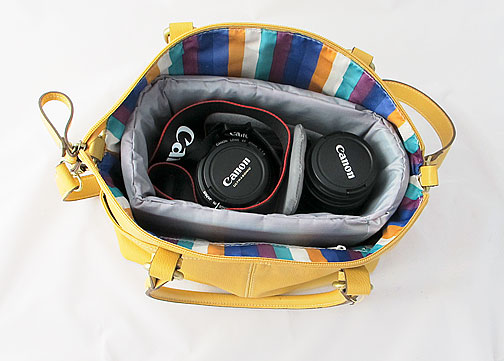
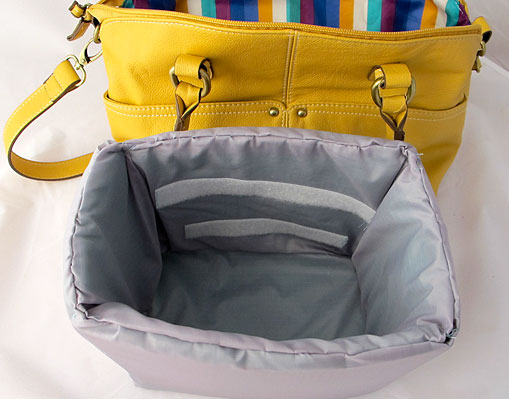
Just in time for this trip, I finished a project I’ve been wanting to do for a while _ make a padded insert for a large purse (from Target)  to protect my camera. Initially I decided to follow a tutorial at Lil Blue Boo, but even though I measured my bag and shortened the dimensions from the tutorial accordingly, it still turned out way too big. Totally my fault for not measuring accurately. So, I started over, and rather than do what seemed like complicated math at the time, I decided to just make a lined fabric box, with foam/cardboard in between the layers. I did not follow a tutorial, but this tutorial at Crazy Mom Quilts will give you an idea of the construction (obviously, my box is rectangular, not a cube, but close enough). And this time I was smart, I measured the inside of my existing (ugly) camera bag  to get the right dimensions.

The Velcro on the sides holds a little padded diveder in place. I didn’t make the divider, since I already had one from my old camera bag. This was a pretty easy project, and cheap, since I already had the ripstop nylon (purchased when I had some vague notion of making a bunch of shopping bags… back before it seemed like every retailer started giving them away).  The only time-consuming part was sewing the lining to the outer fabric around the top by hand at the end. But I was pretty sloppy with that step… this will be mostly hidden in a bag anyway.

Now I can carry my camera around to all the fancy food festival parties!


Skip To My Lou

Lucky Boys

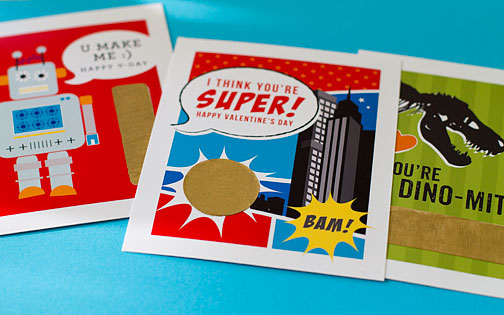
With my husband’s birthday being just a week earlier, I have to admit I don’t do much for him for Valentine’s Day. Plus, he’s not very sentimental! Sometimes I make him little coupons for little things … I’d like to say little romantic things but they’re usually boring, yet appreciated, things like “take a nap while I play with Parker” or “go get a fancy coffee at the bookstore and browse for an hour.” This year, I tried to make things a little more interesting by turning the coupons into scratch-off lottery cards.

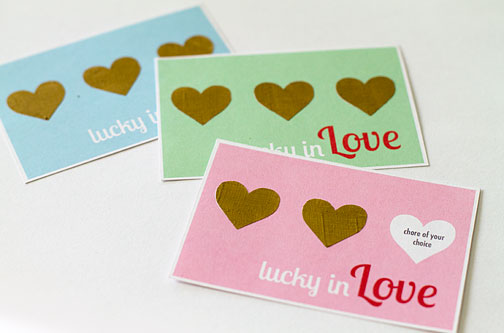
I made him three cards. Each one has three hearts, with three different “prizes.” The idea is, he can scratch off one heart, and then has to decide whether to accept that prize or go for another one. But whatever he scratches last is what he gets; he can’t go back and take the first (or second) prize. And since I was having trouble coming up with nine prizes (hmmm…. what does that say about me?) I threw in a few “chore of your choice” spots.

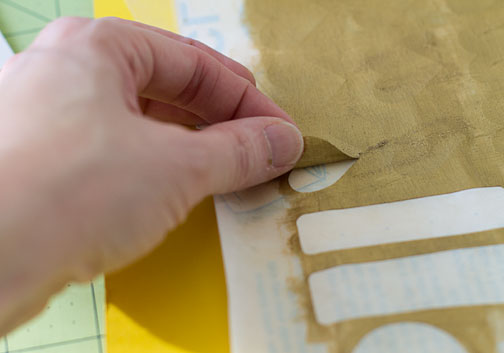
I’ve seen this idea a bunch of places. Martha Stewart has a version for “save the date” cards, but hers involve painstakingly painting each card free-hand. Cindy at Skip to My Lou made awesome Valentines, and used a stencil to make the painting eaiser. My version is closest to this idea by Lindsey at Our Home Grown Spud, who painted on clear contact paper and then used a scallop punch to easily cut out the shapes. My twist is that I used my Silhouette machine to cut the contact paper first (it doesn’t cut through the backing paper, so you basically have a sheet of stickers that you can peel up afterward) and then I painted over the top of the shapes.


I also made a few cards for my son, though for him, each card just has one scratch off prize. (example: “watch a movie,” or “stay up as late as you want reading in bed.”) I’m going to let him use one a week for three weeks.

I got the free downloadable cards from One Charming Party, and just tweaked them a bit in Photoshop to cover up the “From” text on the cards.

Shruggie II

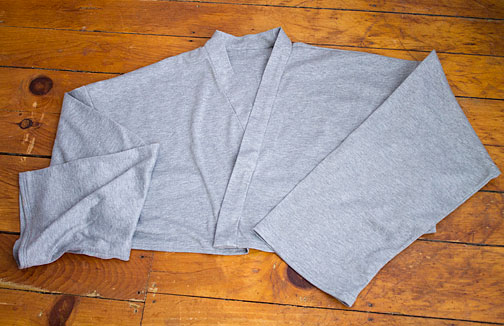
As my husband’s birthday approached, I knew I could not top last year’s gift, The Shruggie, a fleece shrug-like garment that keeps his arms and shoulders warm while he reads in bed. He is no fan of winter, but the arrival of cold weather was made more bearable when he realized it was time to start wearing it again. It is ridiculous, really, how much he likes that thing.

But, I managed to come up with something that is almost as good. The Travel Shruggie.

My husband is the national food editor for The Associated Press, and frequently travels to New York for work. Now, he’ll be able to bring this lighter-weight Shruggie with him. Or use it at home when it warms up a little bit.

I used McCall’s 9638  (my pattern says 9638, but the link says 6236) and again, cut it off across the chest. My seams are a little wonky around the armpits but otherwise this was a quick and easy project. I used 1.5 yards of a jersey knit from Jo-Ann fabrics.

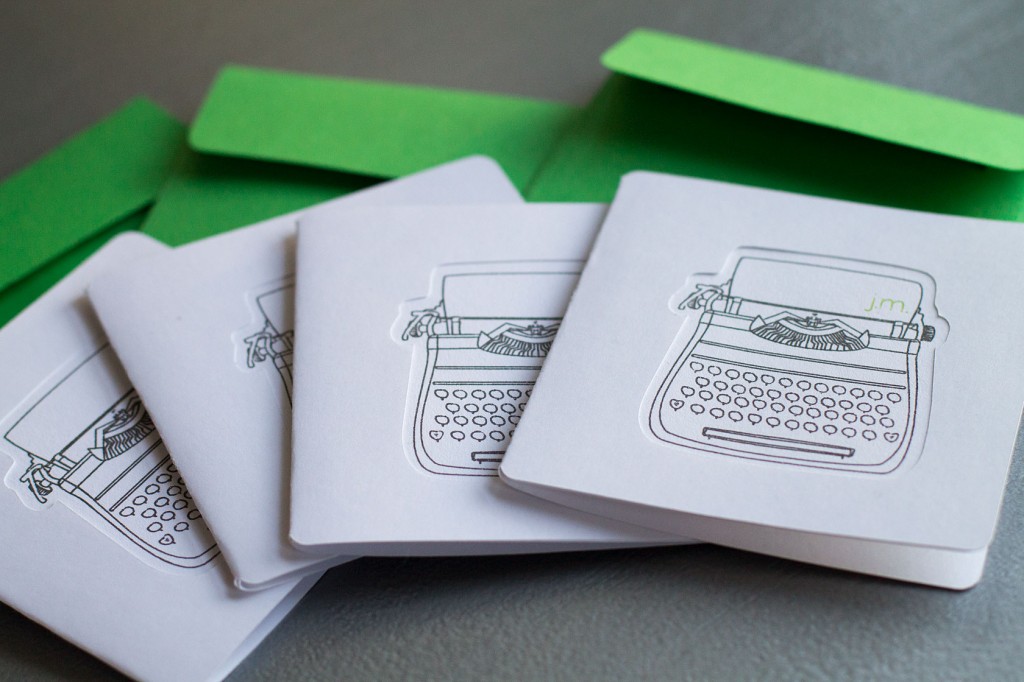
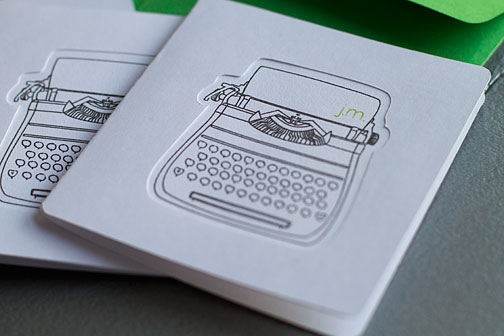
I also made him a little set of notecards using the sketch pens with my Silhouette. He often has business meetings and lunches when he’s in New York, so now he can send follow-up notes afterward.

The typewriter design is from the Silhouette store. At first, I couldn’t really see the point of the sketch pens, which basically draw instead of cut when used in the machines. Why not just use a printer? But, I bought some of the “glitter” pens, which I can see using since obviously my ink jet printer doesn’t have glittery ink. And I think it would be useful if you wanted to use a light color ink or even white on darker paper, which is impossible with a printer.

For the girls

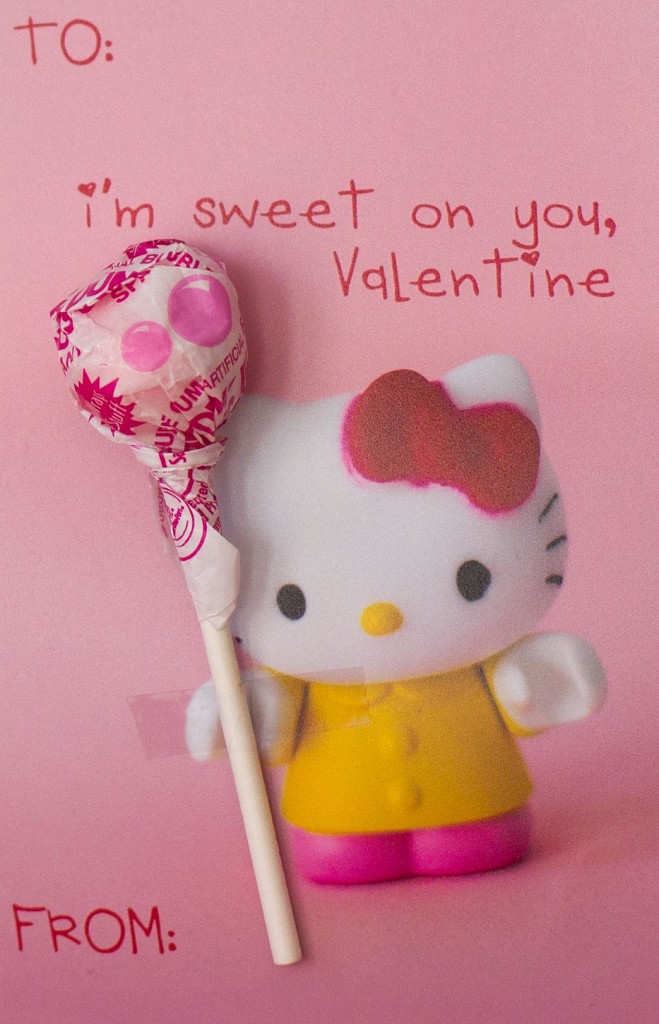
My editor at AP asked me to write a brief article about how I made my Star Wars light saber Valentines, so I decided to make a few girly versions as well. I’ll post a link once that story is out there, but here are some printables using my niece’s Hello Kitty figurine and a lollipop instead of the LEGO Star Wars guy and a glow stick.

I made these with the idea of sticking a lollipop through the card. But since Kitty’s hand is actually open, not a fist, that sort of looked weird. (OK, maybe no one else would notice, but I did!) So for these, it was best to just tape the lollipop stick over the hand. (The tape actually doesn’t show up as much as it does in this photograph.)


Here are two printable versions:

PINK HELLO KITTY VALENTINES

WHITE HELLO KITTY VALENTINES

Forceful Valentines

PLEASE READ this carefully before asking me to email you the printable files!

(Welcome new readers! I also have a round-up of other Valentine ideas HERE. )

If you’re a frequent reader of craft blogs, you’ve no doubt seen those cute Valentines that feature a photograph of a child with an outstretched fist, and a lollipop stuck through the picture so it appears as if the child is holding it. (There’s a great example HERE at 24-7-365).

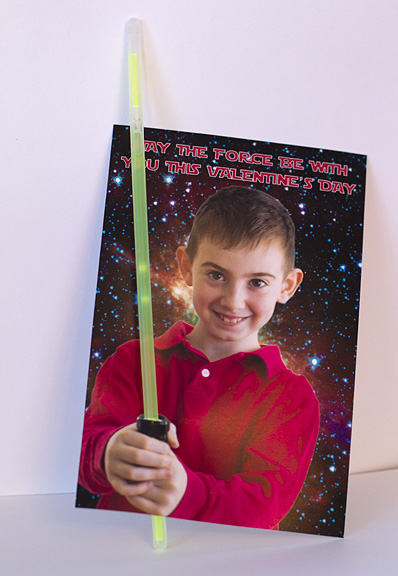
If you’re a frequent reader of craft blogs AND you have a LEGO Star Wars obsessed child like I do, you might also have been excited to see THIS Valentine by Meg at Brassy Apple, which uses a glow stick stuck through the card to look like a light saber. I love this idea, especially because it doesn’t involve more candy. And everyone loves glow sticks, right?

Both of those ideas were floating around in my head when inspiration struck. Why not combine them?

I took a picture of Parker holding a flashlight, then used Photoshop to get rid of the background. I replaced the background with an image I downloaded from the multimedia section of the NASAwebsite, and added the text. (The font is a free font called Star Jedi)

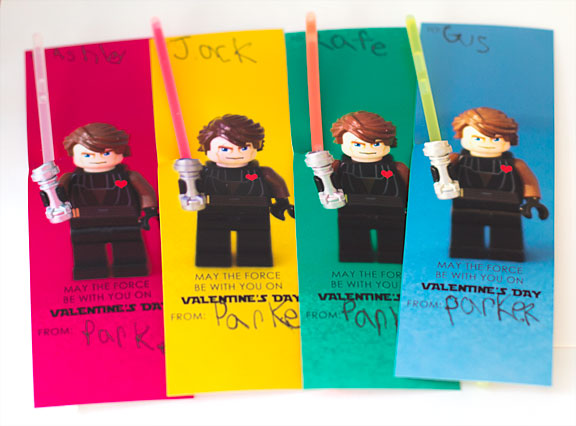
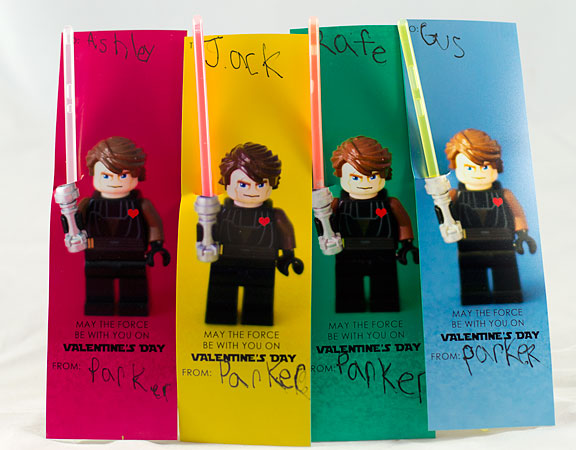
I also experimented with taking pictures of one of his Star Wars LEGOs, and it turns out, Parker liked that better, so we will probably use those for his cards.


If you’d like to make your own, I created two printable PDFs. One has four cards on it, each with a different background color. The other has four cards, all with white backgrounds, so it won’t use up as much ink to print.

LEGO STAR WARS VALENTINES (COLOR)

LEGO STAR WARS VALENTINES (WHITE BACKGROUND)

PLEASE READ THIS CAREFULLY before you ask me to email you the files and make sure you have tried both methods. Either click on the links above or:

If those links don’t work, try these. (it will take you to another page on my blog, and then click the SECOND of the two lines… the top one isn’t a link, the bottom one is, but I can’t figure out how to get rid of the top one). I know some folks are still having trouble, but I think it just depends on what kind of computer you’re using, which browser etc. Sometimes I have trouble with Explorer, but if I switch to Chrome, it’s fine. I’ve been emailing the files to those who’ve asked, and hopefully I haven’t missed anyone.

LIGHT SABER VALENTINE (COLOR)

LIGHT SABER VALENTINE (WHITE)


Still snowy

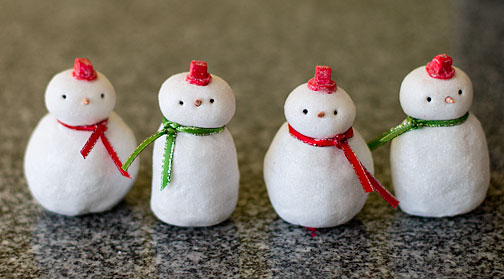
My son wanted to play with clay last weekend, so I used that as an opportunity to finish up a project that had been in the back of my mind for more than a year. I had several leftover snowmen heads from making THESE little jar toppers in 2010, and I couldn’t decide what to do with them. So last week, I turned them into little snowmen figurines.

I started by crumpling/rolling sheets of aluminum foil into ball shapes and then covering them in thin sheets of white polymer clay (run through a clay pasta machine). The heads actually are solid balls of clay, but I used the foil for the bodies because that way, I could use much less clay. As you can see, some of the bodies are rounder than others. In the end, I liked the rounder look better.

Once the bodies were baked and cooled, I painted them white with acrylic craft paint (mostly because my clay had picked up bits of other colors and fingerprints and was no longer completely white. You really could use any color of clay since you’re painting afterward). I then glued the heads on, and applied glitter to the bodies to match the heads. The scarves are just bits of ribbon.

Now I’m WAY ahead for little gifts to give next Christmas!

You can find the tutorial for making the snowman heads HERE, in the free 2010 Inspired Ideas Christmas magazine from Inspire Co. Did any of you buy the 2011 version? I had too many projects in the works when I saw it in December, but I might buy it now, since I seem to be carrying over my momentum into the new year!


Gratitude

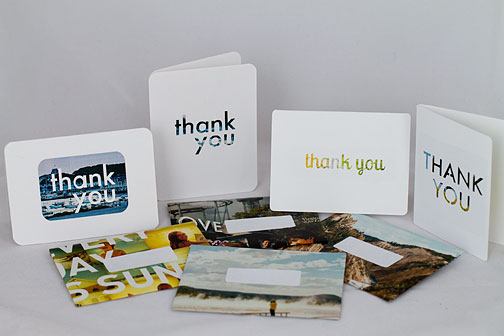
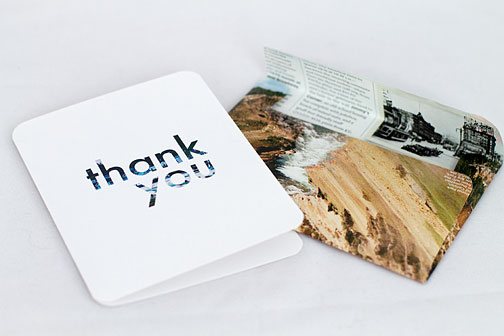
We’re a little behind on finishing our thank-you notes for Christmas, but I’m determined to finish them this weekend. Here are a few cards and envelopes I made using my Silhouette machine. I love how easy it was to cut the envelopes out of pretty magazine pages!

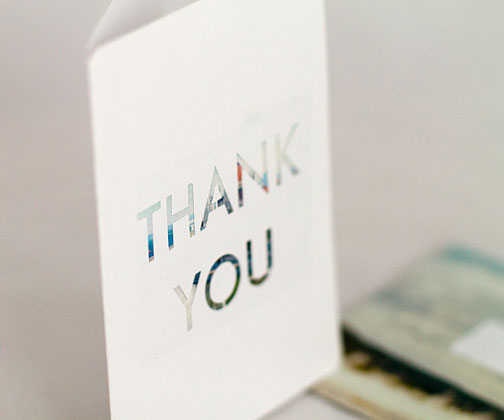
I tried a few different methods for making the cards. This is probably my favorite: I cut the words “Thank you” out of the card, and then glued a piece of magazine page under it. The downside is, when you open the card, you see the other side of the magazine page, but I’m telling myself that’s part of the handmade charm, right? Rather than deal with gluing on the little loose shapes from the interior of the letter “A” and “O,” I turned the font into a stencil-like font by just using the “Slice” tool in the Silhouette software to cut a little notch in those letters.

I also experimented with cutting the letters out of magazine pages. I had some problems with the thin pages tearing while being cut. Then I switched to the new ratchet-style blade and that worked better, though some spots still were problems. While this method eliminates the unsightly stuff on the inside of the card, it always means gluing each letter individually. (I have a Xryon sticker maker, but these letters are so lightweight they are tricky to feed in). I forget where I read this tip, but I cut a rectangle around the words, so I could use the negative space as sort of a guide to place the letters.  And I then could use that negative space/shape on another card. (see the first card on the left in the top picture)


Grown-up Gifts

Now that the New Hampshire Primary is finally over, I am looking forward to having a bit more time to sew and craft! Today was my first day off in 19 days. I haven’t calculated my overtime yet, but I covered more than 50 Jon Huntsman events during that time all over the state. It didn’t really hit me how tired I was until I went back to the office Wednesday. The adrenaline really kept me going!

Anyway, here are the last of the Christmas gifts I forgot to show you!

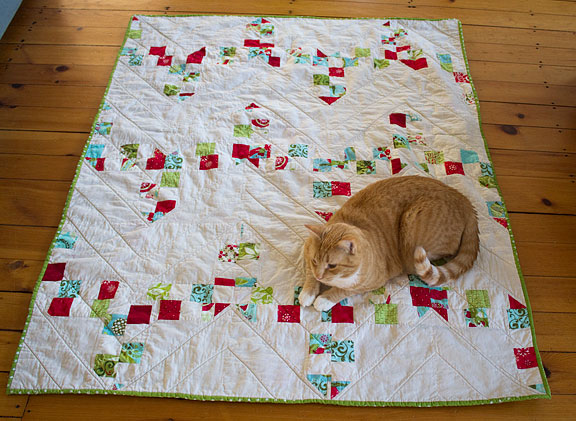
I made this quilt for my sister, using the excess fabric from my Christmas quilt. I had a bunch of strips of squares already sewn together, and my original plan was to use those to border larger squares of off-white fabric… but at some point I decided to make 1/2-square triangles instead. The top came together very quickly, though quilting those zig-zags is tedious given all the times you have to stop and pivot.

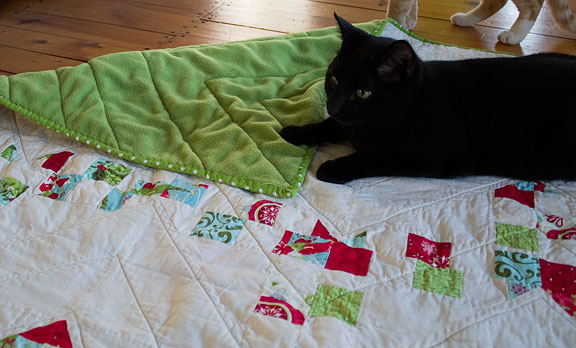
I knew I wanted this to be a cuddly throw, so I bought fleece for the backing, thinking I could skip the batting altogether. But the green showed through the white, so I ended up using batting.  As you can see, my quality-control kitties were quite pleased with the final result.

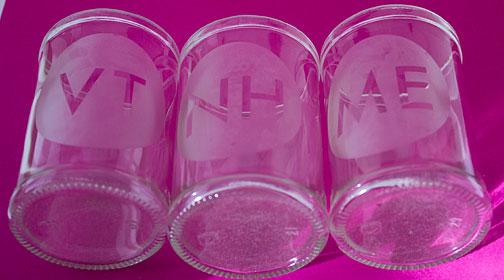
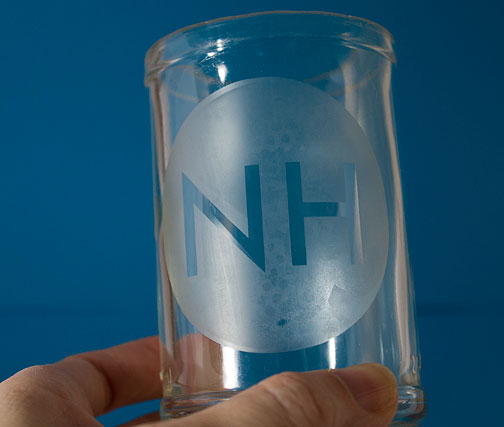
My husband helped with this next project, a set of drinking glasses made out of recycled soda bottles. We were inspired by this project  featuring wine bottles at Plastolux.com. I can’t remember where we ordered it from, but we bought the same bottle cutter featured in that post. Jason did all the cutting. He found it somewhat frustrating in that some bottles cut very evenly and others either broke into pieces or cut unevenly. Lucky for us, my father-in-law used to make stained glass stuff, so he had a sanding machine we could borrow. That made it much easier to sand the sharp edges.

They were really hard to photograph! (There actually were six glasses, one for each New England state)


We tend to drink more red wine than white, so we have a lot of dark colored bottles, which I don’t like as much in terms of turning them into tumblers. So we made this set using some soda bottles (I forget which brand, some fancy organic soda probably from our local food co-op) I used my Silhouette machine to cut vinyl stencils for the decorations and etching cream.

Our friends really loved them, so we’ll probably make more. Though this was one of those projects where we thought “We’ll make a ton of these!” and then ended up making …. one set. But we really should make more to at least get our money’s worth out of the cutter.

Decked Halls

I hate, hate, hate taking down Christmas decorations. Though we did put up our tree pretty early this year, which helps a bit. But what is nagging me now is that there were so many decorations I wanted to make and display that never came to be… since we painted the living room last January, none of our old decorations really worked, and I had such grand visions of making new decorations. I made a few, but might just start from scratch for next year.
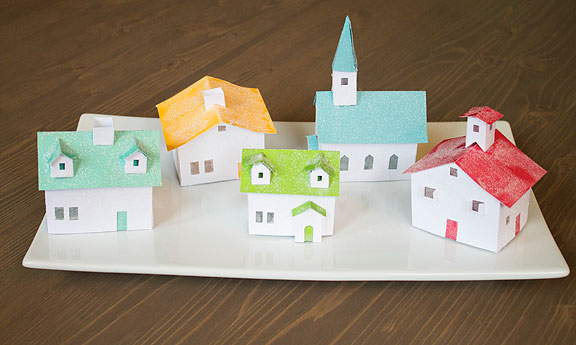
I actually did not finish this village until the day AFTER Christmas. I used the templates from Martha Stewart’s Winter Village and cut them out of cardstock with my Silhouette machine. (Martha, of course, calls for printing the templates, cutting them out, gluing them onto chipboard, cutting them out again, priming and then painting). No doubt, hers are sturdier than mine, but I did not have the patience, and the Silhouette won’t cut through chipboard. (at least, not the version I have). Rather than fiddle with trying to use the Silhouette’s trace feature, I just used the polygon drawing tool to draw the templates in the Silhouette software.
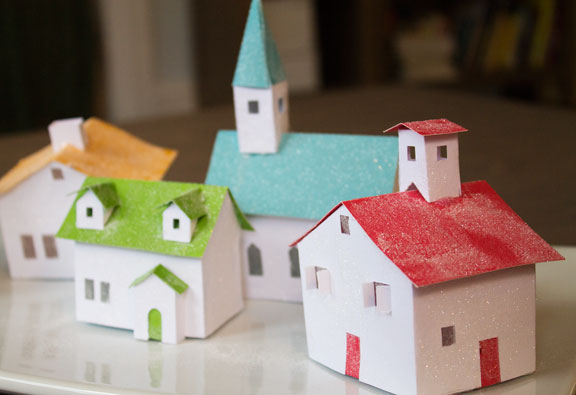
So, that made cutting them very easy. Putting them together was a little tricky. It was hard to glue some of the tiny flaps, particularly on the roof pieces. (You can see the little dormer roof on the green house is already coming loose).  Martha covers her windows with glassine, which is one of those things Martha always has laying around, but I do not. So I used waxed paper instead. To make the houses more sturdy, I cut pieces of thick cardboard as bases and then glued the houses around them using hot glue. Some came out more lopsided than others… I then brushed Mod-Podge over the buildings and sprinkled them with glitter. By this point, I was kind of sick of the project, and you can tell … the glue is a bit uneven and there are gaps that don’t have glitter. I perhaps could have used a spray adhesive to make it more even.

My plan was to display this on my coffee table but my husband thinks the cats will get destroy it, and he’s probably right. So it’s stuck on a bookcase shelf for now.

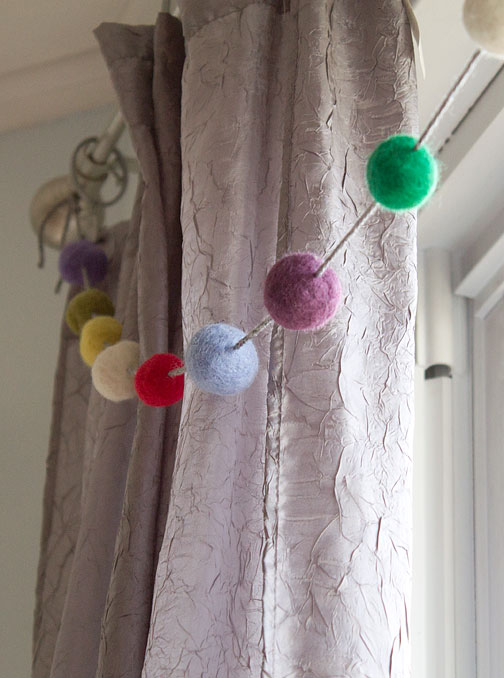
I also made a felted wool ball garland, inspired by this one at PapernStitch, to hang above my living room windows. These are pretty impossible to photograph given that they are against a bright window. I like them, though it does sort of look like I hung up a string of cat toys. Next year, I might take it apart and add more balls, but limit it to a set color scheme… maybe just the colors in my Christmas quilt, which I have slung over the back of the couch.
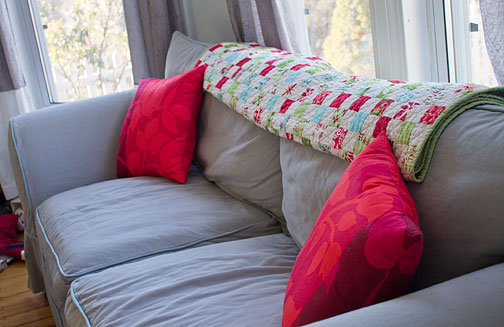
The quilt, by the way, looks very nice with my red pillow covers I made from that great fabric I got at the Crate & Barrel outlet.
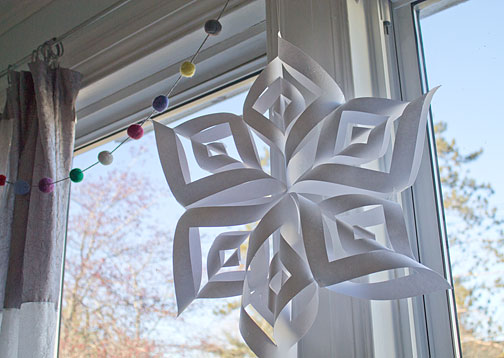
I also had envisioned a bunch of snowflakes dangling in front of the windows, but only made 1, and I don’t love it.

I got the pattern/directions from here, but had a lot of trouble getting things to stick together. I tried glue dots, but the pieces kept popping apart. I ended up using thread to hold some of it together, but it looks messy. I probably should’ve just used tape. And then it looked sort of plain, so I added a little glitter.  It still isn’t really doing much for me. Maybe if I had a bunch in different sizes?
I’m telling myself that all these decorations are more “winter” than “Christmas” because I probably won’t have time to take them down until after Jan. 10, the New Hampshire primary day. (for those who don’t know, my day job is reporting for The Associated Press. I have spent the last six days covering Jon Huntsman and have seven more to go before the political circus moves on to South Carolina.)

That’s when my new year really starts, but for everyone else, HAPPY NEW YEAR!!!!


Toys for Boys

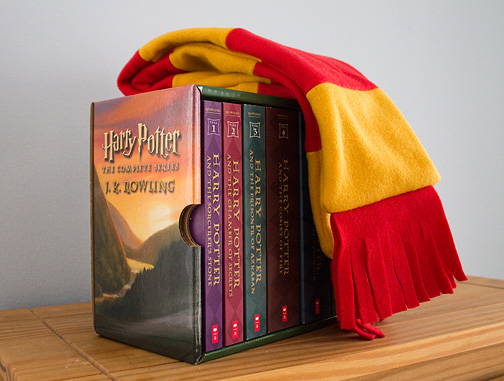
Usually I am so busy making Christmas gifts for other people, that I don’t make too much for my own little boy. I feel bad about that, but on the other hand, often when I’m making something for someone else, he will see it and want one, so I make him one on the spot instead of waiting. This year, I managed to make him a few small things, including a Harry Potter-inspired scarf. (Note: Parker has been reading  Harry Potter to my husband, and I actually haven’t read any or seen the movies. So I did a quick google/Amazon search to look at scarfs and made these rough approximations).

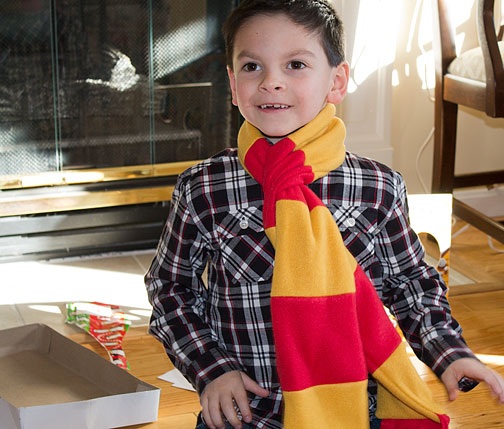
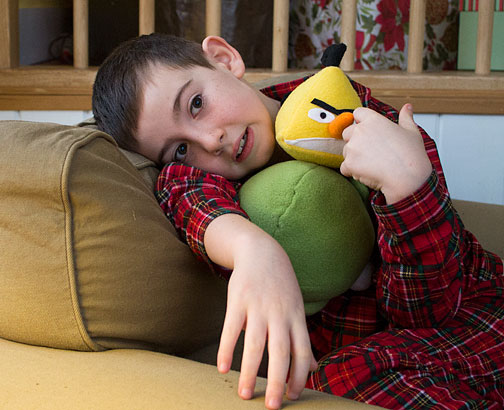
I actually made three scarves, because we bought my nephew some of the books and I made the scarf to go with them. And then my husband saw it and requested one for himself. I tried to talk him out of it (I think it looks a bit silly on an adult) but he insisted. I used red and gold/yellow fleece that was on sale for $2.99/yard at Jo-Ann’s. I think I got half a yard of each and had plenty to make three scarves. (We also bought Parker a Harry Potter magic wand, and on Christmas morning, my husband overheard him, waving the wand over a new box of LEGOs and whispering “Build yourself… build yourself.” Ha.) (A few hours later, he broke the wand, somehow by jabbing it into a plush pig… but more on that to come.)

Here’s my nephew with his scarf.

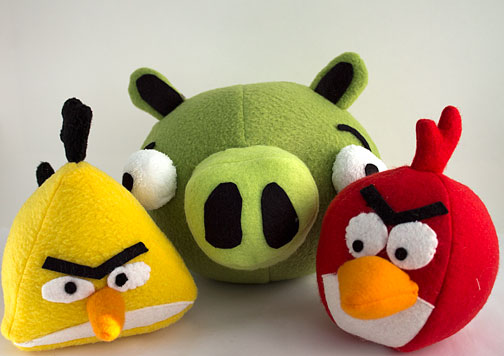
For my son, I also made some Angry Bird stuffed animals using the patterns and tutorials at Obsessively Stitching. I did not use her technique of sewing the appliqued bits on from the back and trimming the excess. Instead, I used fusible web/Steam-a-Seam to iron the shapes on (which is a little tricky with fleece. Some parts didn’t adhere well and I had to hand-stitch them later). I also didn’t have enough fleece on hand to really pay attention to which way the fleece stretched, so my birds/pig are a bit distorted, I think. But since their main function is to be hurled at each other, I didn’t stress about that.


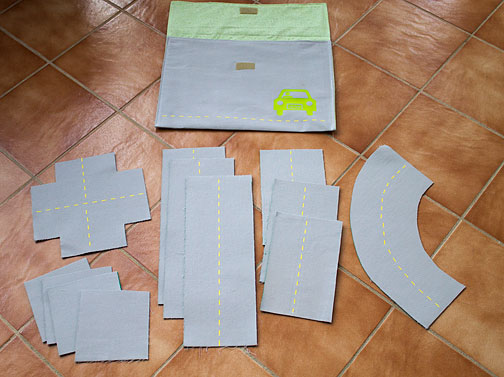
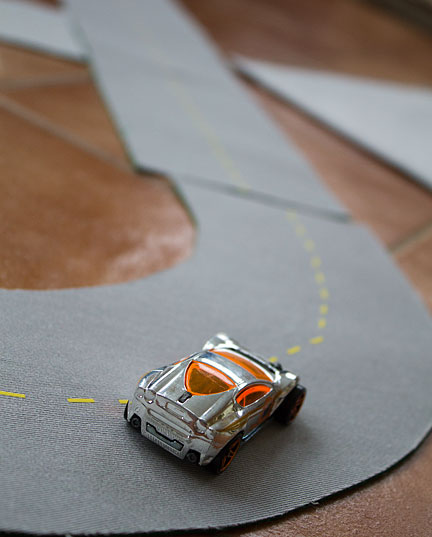
For my cousin’s almost-3-year-old boy, I made this set of “portable roads” inspired by a version made by Lil Mop Top .

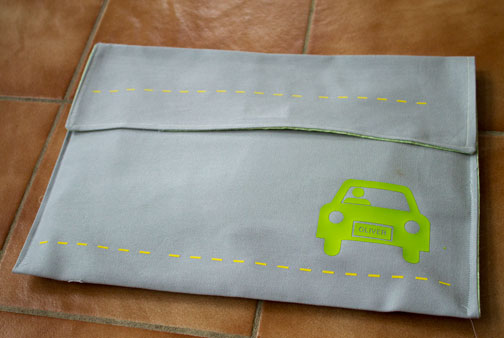
Mine are two layers of fabric (felt on the bottom, a home-decor weight cotton on top), fused together with Steam-a-Seam to make them a little sturdier (and no sewing!). I didn’t have too many sheets of Steam-a-Seam so I only made a small assortment of road pieces. (The square pieces are corners) I used iron-on heat transfer vinyl and my Silhouette machine to make the yellow dashed lines on the road, and for the decoration on the fabric envelope holder. (I forgot to reverse the car image, so I guess that’s Oliver driving in England!)

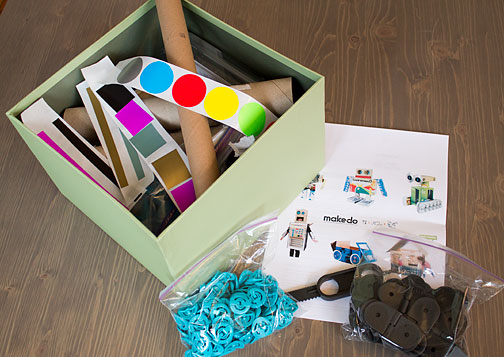
This last item isn’t really hand-made, but more of a kit so kids can make their own creations. My son loves to build “robots” out of cardboard boxes, tubes, etc., so I was excited when I read about Makedo, a set of hinges, fasteners and other tools designed for turning cardboard and other stuff into toys. The prices on the website are a bit pricey, but I found a set on Amazon described as a kit for 30 kids for $60. (300 pins, 300 clips, 75 lock-hinges and 10 safe-saws.)  I see now that the price there is even lower, $48, and the other smaller kits are on sale as well. I ended up dividing what I got and giving it as gifts to my son and three other boys (with enough left over for several future gifts as well).

I printed some pictures from the Makedo website and some instructions (since the kit only came with one sheet of instructions) and  made up boxes with the Makedo stuff, a few small boxes, paper towel tubes and stickers I made by cutting rectangles and punching circles from origami paper and running them through my Xyron sticker maker. I had planned on spray painting some boxes silver and making stickers that looked more like robot buttons but 1) I ran out of time and 2) this was supposed to be about the KIDS being creative, right?

(After I saw LiEr’s very cool series on cardboard and lighting, I really wanted to add a string of LED lights, too, but again, time was running out. But I know Parker would LOVE making his robot light up.)