Calendar

October 2009
M T W T F S S
 1234
567891011
12131415161718
19202122232425
262728293031  

Featured at:

craftsterBest of Craftster 2008

As seen on CraftGossip.com

Fan of:

the-long-thread-button

Scrappy Color Book Tutorial

finished

This little book is my entry into the Scrap Busters contest at Sew, Mama, Sew! Today’s the contest deadline, but I’m trying not to look at it as waiting until the last minute but rather focusing on, “I have finished a Christmas gift in October!” The recipient will be my cousin’s baby, who probably will mostly be interested in chewing on it for a while, but I figure he’ll like the bright colors even if he’s not actually “learning” them at this age.

Instructions:

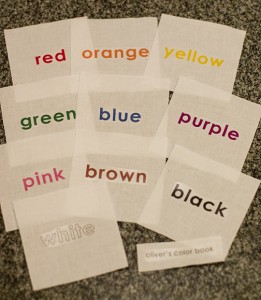
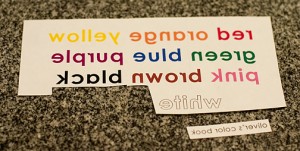
1) Use a computer and printer to print the names of the colors and the book’s title onto iron-on transfer paper. I used red, orange, yellow, green, blue, purple, pink, brown, black and white. I used Century Gothic as my font, at about 50 pt, but use whatever you find pleasing. Just make sure the letters will fit in a 3″ square.  Make sure you choose “PRINT AS MIRROR IMAGE” or whatever setting your printer has to print in reverse, so that when you iron the the words onto the fabric they won’t be backwards.

ironon


2) Cut ten 3.5″ inch squares out of white fabric

3) Following directions on iron-on transfer paper, transfer the names of the colors to the squares. Transfer the book title to a small strip of white fabric measuring about 1″ by 3″

 letters


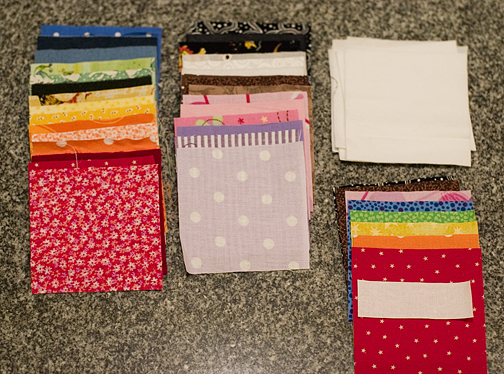
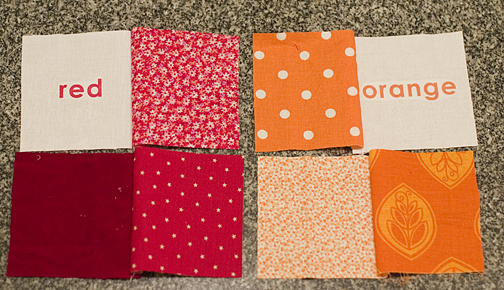
4) For each page, cut three 3.5″ squares out of scrap fabric, using different patterns and textures to add variety. So you will have three different red squares, three orange squares, etc.

supplies

5) Cut eight more 3.5″ inch squares out of different colors for the front and back covers. I used red, yellow, green and blue for the front cover and orange, pink, brown and black for the back cover.

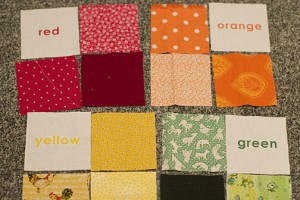
6) Each page of the book will consist of four squares: one white square with the name of the color and three squares in that color. To end up with a book in which the words always appear in the top outer corners of the pages, lay out your pieces so that the red, yellow, blue, pink and black words are in the upper lefthand corner of your 4-square arrangement. For the facing pages, lay out your pieces so the orange, green, brown and white words are in the upper righthand corners.

squares

7) Sew the top two squares of each page together, and the bottom two squares of each page together.  I like to lay out the four squares, then flip the pieces on the right on top of the pieces on the left, with right sides together, and then sew a 1/4″ inch seam along the right-hand edge. If you do all your flipping the same way consistently, you can stack all the pieces, carry them over to your sewing machine, and chain piece them by just taking the top two pieces, sewing the seam, grabbing the next two and doing the same thing without cutting the thread in between until you’re done.

chain

8 ) If you’ve chain pieced your squares, cut in between the sewn pieces. You should now have 24 pieces consisting of two squares sewn together. (20 will make up the book pages, 4 are the covers)

9) Press each two-square piece, alternating the direction in which you press the seams so it will be easier to sew the top and bottom of each page together. For example, if you press the seam to the right, away from the word “red” on that strip,  press the seam to the left on the other red strip.

pairs

10) Sew the strips together in pairs to create four-square pages. (orange with orange, yellow with yellow, etc). Sew the title onto the front cover. I used a zig zag stitch around the edges.

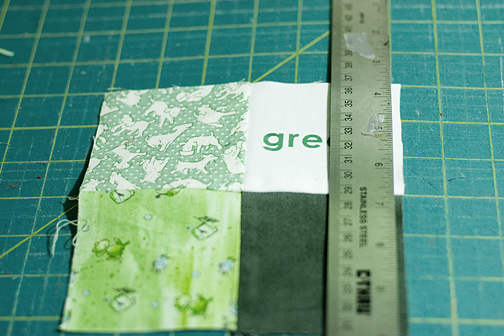
11) If you’ve maintained a perfect seam allowance, you can skip this step. But I had some tension trouble with my machine back on step 7, had to re-sew all the pieces and ended up with some pretty wonky blocks. Ideally, you should have 12 6.5″ squares (including the covers). I ended up trimming mine to 6 inches. Make sure you trim evenly.  I find it’s easiest to lay the block on my cutting mat, with the vertical center seam lined up with one of the grid lines. Then I measure three inches from that center line on each side and trim off the excess. Turn the block 90 degrees and do the same thing.

squareup

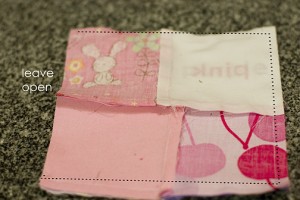
12) Lay out your blocks in order. You’ll be sewing the following blocks together: front cover/red, orange/yellow, green/blue, purple/pink, brown/black, white/back cover. Place the two blocks together, right sides together and sew together on three sides. Leave the side opposite the lettering squares open. This will become the spine of the book.

threesides

13) Turn the squares right-side-out and press. Stack them in the correct order, with the cover on the top, and sew along the left-hand edge, close to to the raw edges.


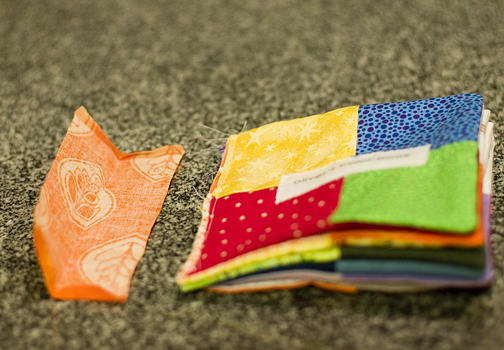
14) Cut a 6″ by 2.75″ strip of fabric for the binding. I used orange but use whatever you like. Fold over 1/4 inch at either short end and press, then fold the strip in half lengthwise, wrong sides together, and press. You’ll end up with a folded strip of binding with the top and bottom edges tucked in.

binding

15) Lay the binding along the left-hand edge of the book, raw edges to raw edges.

16) Sew 1/4 inch away from the raw edges. Fold the binding around to the back of the book and sew by hand.

17) If you’re like me, fret about how the pages aren’t even and then convince yourself that a 10-month-old baby won’t care.

sewmamasew

25 comments to Scrappy Color Book Tutorial

  • Very nice idea, and love the way your finished product turned out!

  • Great! I love it and will try it soon!

  • this is a great tute and idea
    i have been looking around for ideas for my granddaughter for xmas pressies
    yours is one of my faves this month for scrap busters!!
    thanks muches!

  • I love this! I’ve never used iron on transfer paper before so I have a question. Would it work to write/colour the words with crayon or marker and transfer it? (we don’t have a colour printer)

  • Holly

    I don’t think you can use crayons or markers with the iron-transfer paper, but I know that Crayola (and probably other companies) sell crayons and markers specifically made for writing on fabric.
    http://www.crayola.com/products/list.cfm?categories=Specialty,FABRIC
    I think with the crayons, you draw on paper, then flip it over and iron it onto fabric. With the markers, you just draw directly on the fabric.

  • Oh my gosh, I love it! Thanks for the tutorial! You make it look so easy. Definitely going on my to do list for things to sew (soon too!).

  • That is very cute! I recently made a busy book for my son and I also had trouble with the pages not being even! Oh well, they don’t notice nor does hardly anybody else, just those of us that made them.

    I am going to share a tutorial of that book at my blog on Thursday. I am hosting a Handmade Christmas carnival on Thursdays in November and December and that will be the first idea I share. I am hoping that lots of other bloggers will join me and link up their ideas. I would love it if you would join us too!

  • that’s great! i think i’m going to make pne for my little 17 months baby
    that’s another simple one i made for him
    http://www.equazioni.org/index.php/2008/11/28/libro-tattile-sonoro/
    bye, fran

  • Thanks for the great tutorial! I made two of these this week-end. I posted a picture on my blog if you’d like to see. http://laundryontheline.wordpress.com/2009/11/10/sewing-sewing-sewing/

  • ha! how funny. i found this tute on sew mama sew and didnt realize it was your blog!
    i already left a comment, but i really do love this project

  • Love this project – I linked to it on my roundup of favorite scrap busters (post is under my name). I especially love the tips on how to make it better because I *always* end up with wonky blocks. :>) One of the first big sewing projects I did was an ABC book for my daughter (you can see it here – I finally let go of perfection and just did it, otherwise I’d have never finished it for her. :>) But I learned a TON and really enjoyed making it, both of which are awfully important, I think. Thanks for sharing!!

  • […] gifts to my cousin’s four little daughters and their baby brother. The baby is getting the color book I made back in October. The girls are getting cupcake and ice cream charms I made last month and […]

  • val

    what a wonderful project. i love your instructions, especially step #17. 🙂

  • elenor

    thank you for sharing your good idea and this fine tutorial! I really love the colour book and I will soon make one myself!
    greetings from Austria!
    elenor

  • Marcia Wilson

    Loved the one you made, I hand stitched the color names and it came out really cute. Not the grandkids have MiMi’s handwriting in their books.

  • Kathy Davis

    Hi, I found your tutorial yesterday. I have everything printed, and cut out. (I did have to make a trip to WalMart for purple and orange fabric.) You have explained everything so well. I was just wondering if there needs to be some kind of interfacing or batting to make the pages thicker. Would that be too complicated or make the book too think?
    Thanks,
    Kathy from Missouri

  • Holly

    Hi Kathy,
    I don’t think interfacing would make the pages too thick, it might give them a bit more structure instead of having soft, floppy pages. But the pages already are a bit thick, because of the seams from the patchwork pieces. I think it would be easy enough to add a square of iron-on interfacing if you wanted to, though. Good luck!

  • […] Scrappy Color Book Tutorial at stitch/craft incorporates bright colors and color words printed with iron-on transfer […]

  • Thanks..it is helpful..i’ve been looking for this tutorial since last year for my baby… till i found your blog…thank you so much… lot of love from Malaysia

  • Kori

    I just made one of these with 4 blocks of each color and no words. I also added a layer of crinkly plastic (a thick shopping bag) when sewing the pages together so when it was flipped right side out the crinkly material is in the center of each page. My son LOVES this book especially with the ribbon tags I added (almost like notebook organizing tabs) in various colors and widths. I wasn’t able to use the machine to sew the binding though and had trouble keeping all the layers in the seam. I had to go back and sew again by hand the pages that escaped the seam the first time. In the future I think I’d sew each page closed individually BEFORE sewing the binding together by hand and finishing to avoid this frustrating and time consuming scenario. Thanks for the idea!!! – I feel very accomplished and now my 9 month old will have a new book (that he can’t disintegrate with his drool by chewing on it lol) that he can bring on our road trip in a couple days 🙂

  • Janine Mackie

    Hello! My 10-year old daughter loves the idea of being an astronaut for Christmas. I picked up some white coveralls at the paint store that will work perfectly and I will sew on a Canadian Flag and Nasa badges. Where I’m stumped is the helmet. Last night I thought … maybe paper mache and was thrilled to find your site. Could you please tell me how large you made the balloon. Was it one of those punching ball type balloons? Did you find with the beanie inside the helmet stayed put. Would love to see a final costume photo if you have. Best Regards, Janine Mackie White Rock, BC Canada

  • Christine Nelson

    I LOVE this…………I have all my colors laid out and will begin sewing “My Color Book”. Thank you so much for the idea. When complete I will try and send a picture.

    My 16th grandchild is on the way and I want to make this book for him or her!!

  • Christine Nelson

    Hi, I am lost on how to sew all the pages together!! I have them all made and the binding cut out and that is as far as I got…

    Can you please help? Do I hand stitch them together?

    Lost in Kenosha,

    Christine

  • Patsy

    I can’t wait to try this

Leave a Reply


You can use these HTML tags

<a href="" title=""> <abbr title=""> <acronym title=""> <b> <blockquote cite=""> <cite> <code> <del datetime=""> <em> <i> <q cite=""> <s> <strike> <strong>