Month: October 2012

  • Ninjago Cole ZX Costume


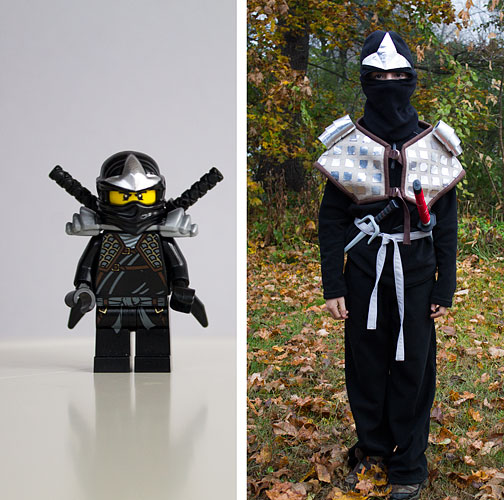
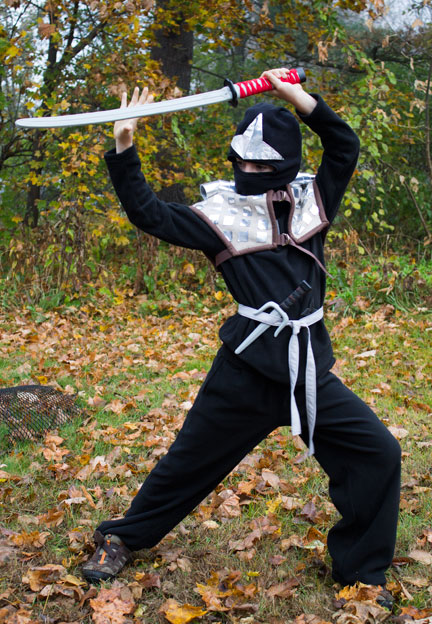
    When Parker first told me he wanted to be a ninja for Halloween, I wasn’t thrilled because I don’t like the association with violence. On the other hand, I thought “easy costume!” Then he clarified that he would like to be “Cole ZX,” one of the LEGO Ninjago characters. So that left me studying a tiny minifig trying to figure out how to recreate all the bits and pieces that go along with that character.

    I decided to go easy on myself and start with purchased clothing: black fleece pants, a top and a ski mask, all from Target and all items of clothing that Parker will wear all winter. Plus, it can be very cold here on Halloween (last year, we got almost two feet of snow a few days before Halloween. This year? Who knows if we’ll even have Halloween with this storm coming).

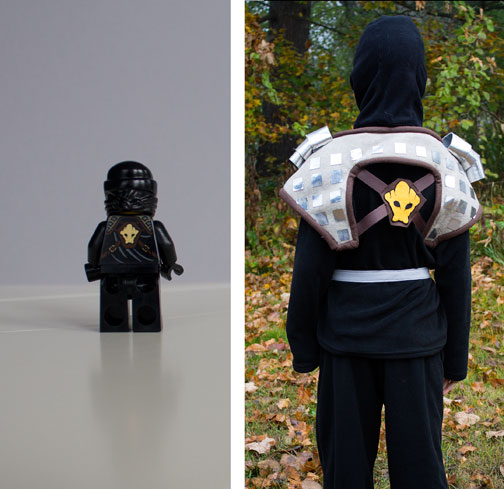
    Parker also decided he didn’t want whatever you call the thing that Cole wears on his back to hold his swords. So that left whatever you call the thing that Cole appears to have wrapped around his shoulders. Parker thinks this is “armor.”


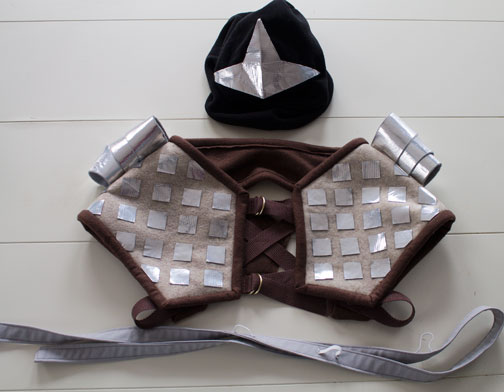
    I bought half a yard each of brown and light tan felt ($2.99/yard at Jo-Ann’s), which was way more than I actually needed, 2 yards of brown strapping and two sets of gold D-rings. I made a pattern by tracing the black fleece top onto newsprint and then sort of drawing what I thought the front and back of the armor/vest should look like.

    Once I had a basic pattern, I tried it on Parker and modified it a bit, making the back longer. It occurred to me later that I could’ve just made a super-simple vest out of one layer of felt, but I decided to get a bit fancier, so I made two: one out of the dark brown felt for the lining and one out of the light tan felt for the exterior. I then sewed the two vests together, right sides facing out, all along the perimeter, close to the edge. If I had some brown bias tape on hand, I could’ve used that to finish the raw edge (or left it unfinished, it’s felt, it won’t fray). But since I had a ton of brown felt leftover,  I cut it into 2-inch strips and sewed strips together until I had one piece long enough to go around the whole vest. (I think it was about 96″ total). I sewed the binding strip to the front of the garment, using maybe a 3/8″ seam and then folded it around to the back and sewed it in place. I didn’t pin, I just held the binding in place and sewed “in the ditch” on the front. My original plan was to finish this earlier, scan my pattern and post it here for others who want to make the same costume but I ran out of time. Hopefully I will do that eventually, and it can be a resource for next year!


    For the silver “armor” or whatever it is, I cut squares of silver duct tape I had leftover from some other project. For the shoulder thingies, I stuck strips of the tape to gray felt, cut it into strips and rolled the strips into rings, with each one fitting into the one before it. These are just sewed in place by hand with a few stitches. The vest looks a little big in these pictures, but for actual trick-or-treating, he’ll be wearing another shirt under the fleece, so I think it will look better once it’s a bit more filled out.

    For the mask, I cut out the shape out of cardstock and then covered it with more tape, and then sewed it in place by hand. I didn’t go crazy stitching it because I want to remove it after Halloween so he can still use the ski mask all winter. The belt, which could’ve been a bit wider, was made from leftover fabric from my sofa slipcovers. I added a few loops of elastic to hold the weapons more securely.

    Here’s a shot of the main pieces:
     

  • Closing the Camp

    We finally closed up our summer camp for the season last weekend. While it has a wood stove, it is not insulated (in fact, you can see daylight right through the floor boards), and we have to turn the water off for the winter. It was sad to say good-bye, but we really did have an amazingly wonderful first summer, and I know we will enjoy it for years to come.

    But all that cleaning and packing reminded me that I never really shared many pictures of all our renovations and the sewing/craft projects that were involved.

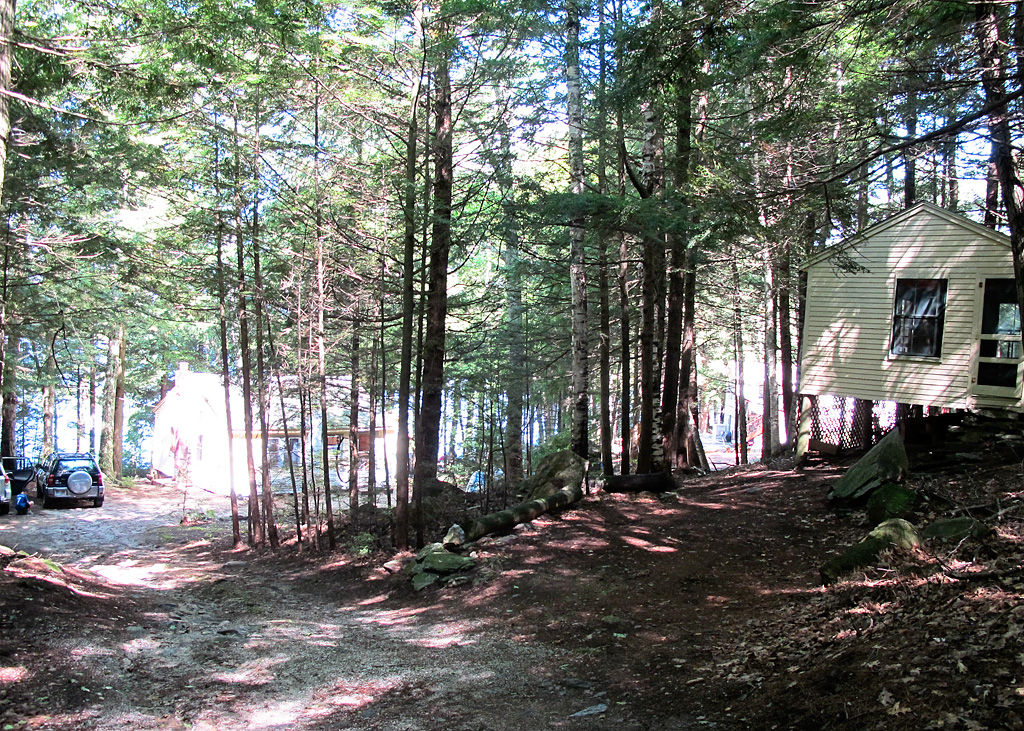
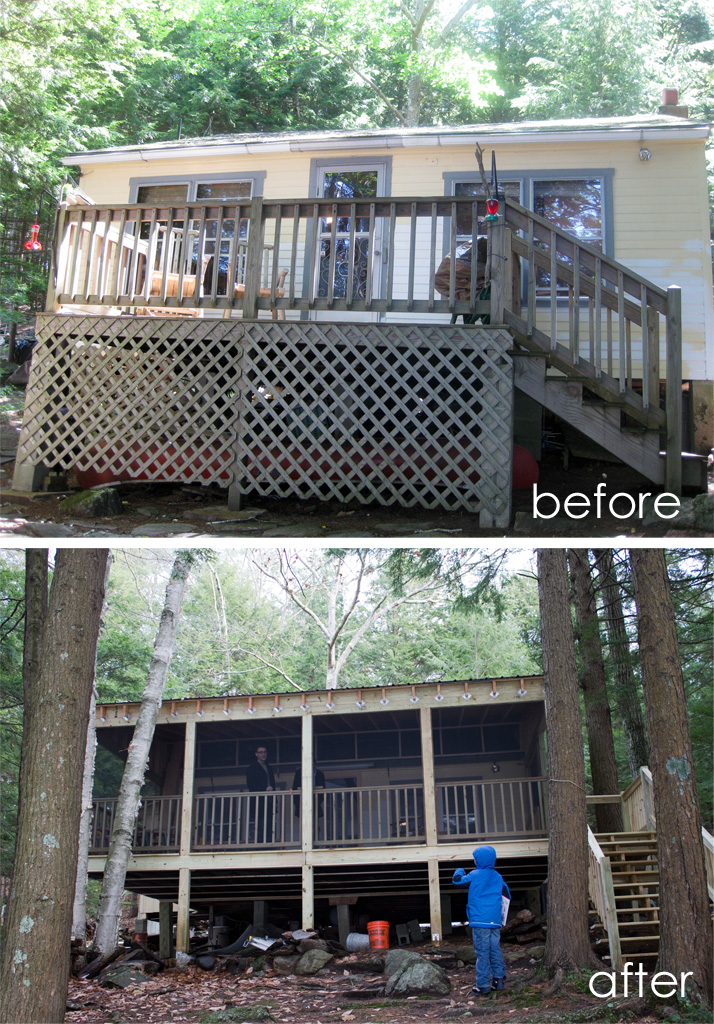
    We have two buildings: a one-room cabin (with a bathroom tacked on the side) that basically has our kitchen in one corner, living room in another, bedroom in the third and dining area in the fourth. And we have a one-room “bunkhouse.” (the bunkhouse is on the right in the picture below. The cabin is down the driveway, with the water on the other side of that). We moved the small deck that was facing the water to the driveway side of the house to make a low, entrance-way deck, and added a large, screened in deck facing the water. (I don’t mean ‘we’ actually built it… we hired someone for that!)


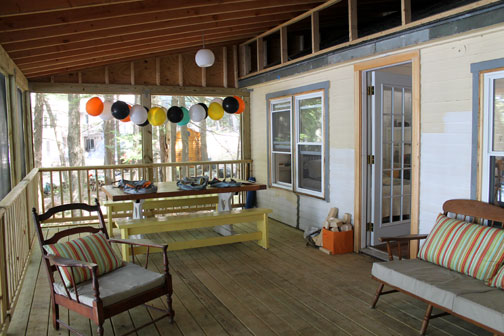
    The new deck really is where we spent nearly all our indoor time. We bought a new dining room table for our house, so we brought our old dining room table from home to the camp. I wasn’t too worried about it getting damaged by any rain that might blow in since this table was our biggest bargain ever _ purchased at an auction for $5 years ago. But it held up fine all summer (we moved it inside for the winter). My husband found the benches at an antique/junk shop for $20 and I painted them yellow.

    We also re-used some furniture that the previous owners left us. I made new cushions and covered them with indoor/outdoor fabric. Though somehow I measured the backs of the chairs wrong and those pillows are a bit too small. Oh well.


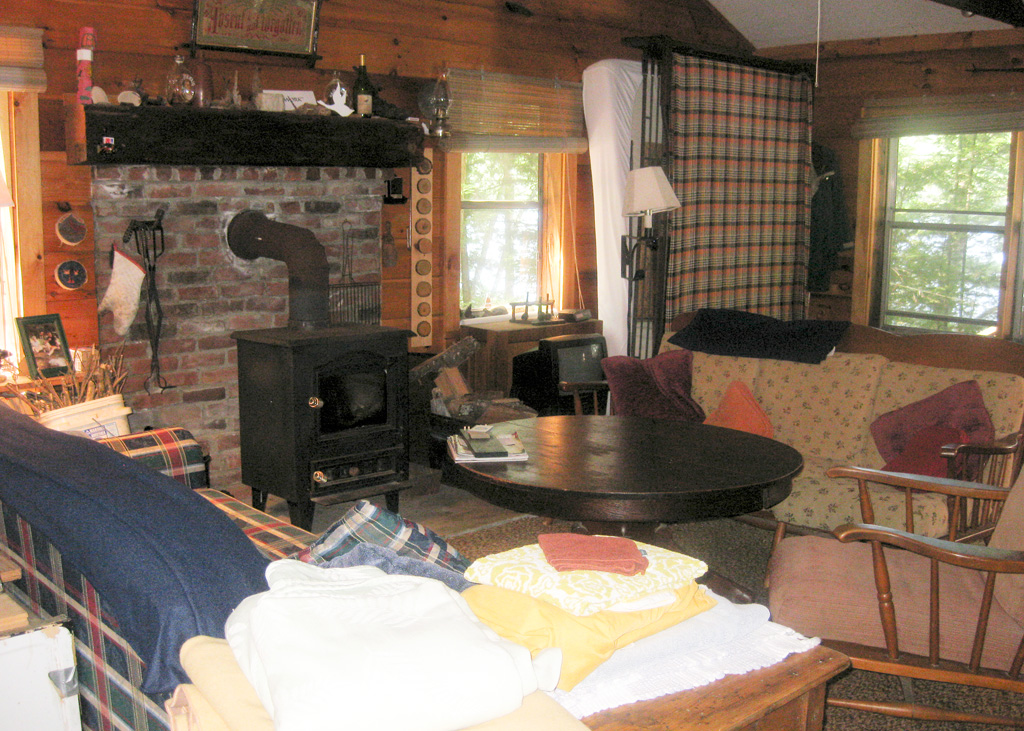
    Here’s what the inside of the cabin looked like before the previous owners moved out:

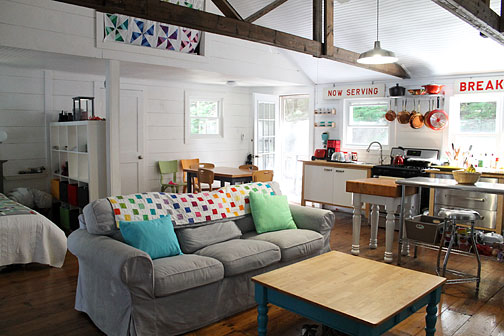
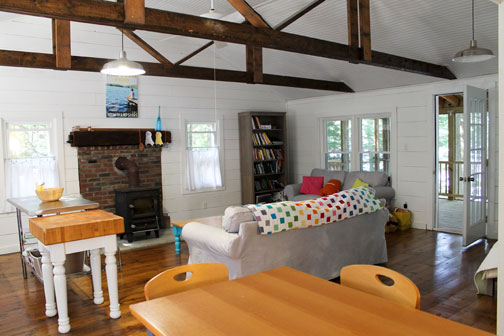
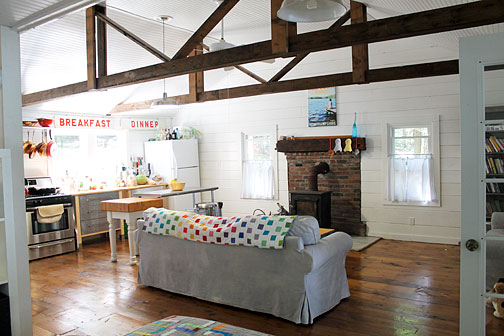
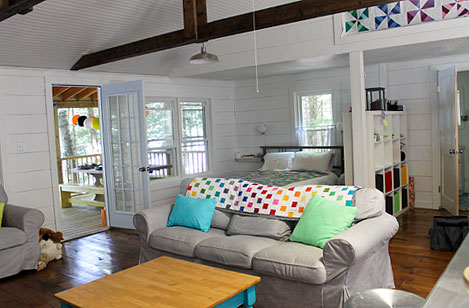
    We ripped up the carpet and linoleum underneath (luckily, neither was glued or nailed down) and were ecstatic to find wood floors that apparently had always been covered. We put a few coats of polyurethane on the floors, and LOTS of white paint on the walls. (Renting a paint sprayer made this go FAST). We hired someone to put the bead board paneling on the ceiling, to remove a small walled-in area infront of the bathroom (we’re guessing that that area used to be the bathroom, and then a new one was added on). It didn’t make any sense to have basically a closet leading to the bathroom, so we tore that down, just leaving the post you see in the picture below. So there used to be a wall where those open shelves are, and another on the other side of the bathroom door. A lot of people questioned whether we should’ve left everything so open, but really, there was never a time when someone was in bed and someone else was in the kitchen or whatever. I think it would be different if we had a bigger family, but it’s just us three.

    Inside, most of the furniture (including all the kitchen cabinets) is from IKEA. The closest one to us is about an hour and a half away. We actually rented a U-Haul van to get all the stuff, which worked out great because one of the kitchen drawer units was in the clearance section already assembled. The metal kitchen island is from Sam’s Club. The wooden butcher block used to belong to my husband’s aunt. We bought the “Now Serving” signs at an auction years ago and used to have them hanging in our living room at home.

    The dining room table and chairs were yard sale finds. The coffee table was from our living room at home; I repainted the legs.


    As mentioned in previous posts, I made the quilts on the sofa and our bed, as well as the sofa throw pillows. I also dyed the sofa slipcovers (not very successfully, but still better than plain white, I think). I also made simple white cafe curtains for the windows that face our neighbors’ homes, and a quilt-block curtain to cover the opening of the storage space in the eaves of the cabin (next year we want to look into opening up that space and making it a sleeping loft for Parker. For now, he sleeps on the sofa. That worked fine… we just sit on the deck after he goes to bed. But if we did the loft, we wouldn’t have to make up a bed for him every night).


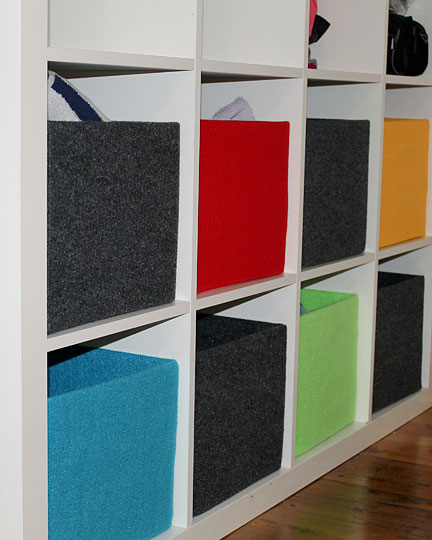
    I also made the boxes for our IKEA Expedit shelving. I really didn’t like any of the IKEA options for boxes and didn’t want to spend a fortune. Target has canvas bins, but they’re too small. I finally settled on covering cardboard file boxes from Staples with felt. Now, the file boxes are just a tiny bit longer than the shelves, but if you had this shelving unit against a wall, I think it would be fine because you probably wouldn’t have the unit flush against the wall. So the little bit could overhang in the back and not be so obvious. Here, it did annoy me a little bit because our shelves are open on both sides, but I pretty much had them stick out on the bed side of the unit.

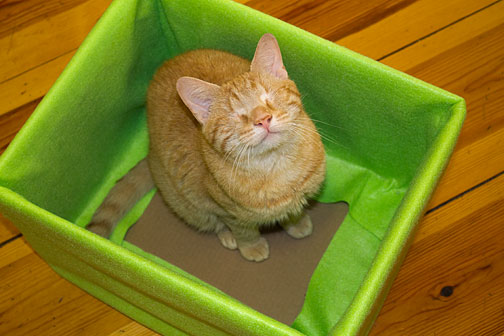
    I think I got the medium-strength cardboard file boxes, and they held up fine being stuffed with beach towels, etc., all summer. And I just bought the inexpensive acrylic felt off the bolt at Jo-Ann’s. I hope to do a tutorial on how I covered them soon, but basically I cut a piece of felt the size of the box bottom (plus extra for seam allowances) and pieces that were the width of each size but twice as tall (plus about two inches extra in height) So when those pieces were sewn together, I could insert the box and fold down the cover to the inside of the box. That was then held in place by cutting a piece of cardboard the same size as the box bottom, wrapping it in felt, and inserting into the box. So the covers are easy to put on and can be removed easily as well if needed. Here’s Tangerine trying out one of the boxes while I was making it. This is before I inserted the final piece in the bottom.


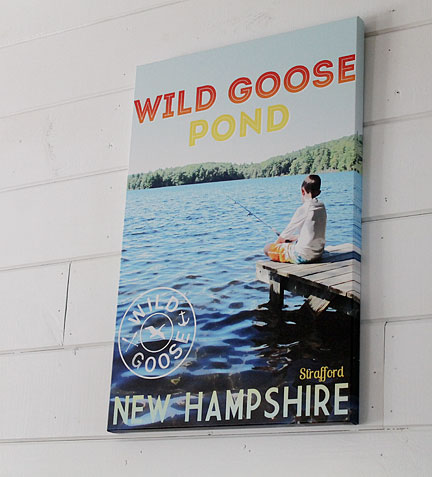
    I designed this canvas using a picture I took of Parker on the dock. I played around with it in Photoshop, trying to make it look like an old fashioned travel advertisement, and had it printed at Paper Coterie when they had a 60 percent off sale. I got the biggest size, 20 X 30, but it still looks small on this wall. Next year, I’d like to add other artwork.


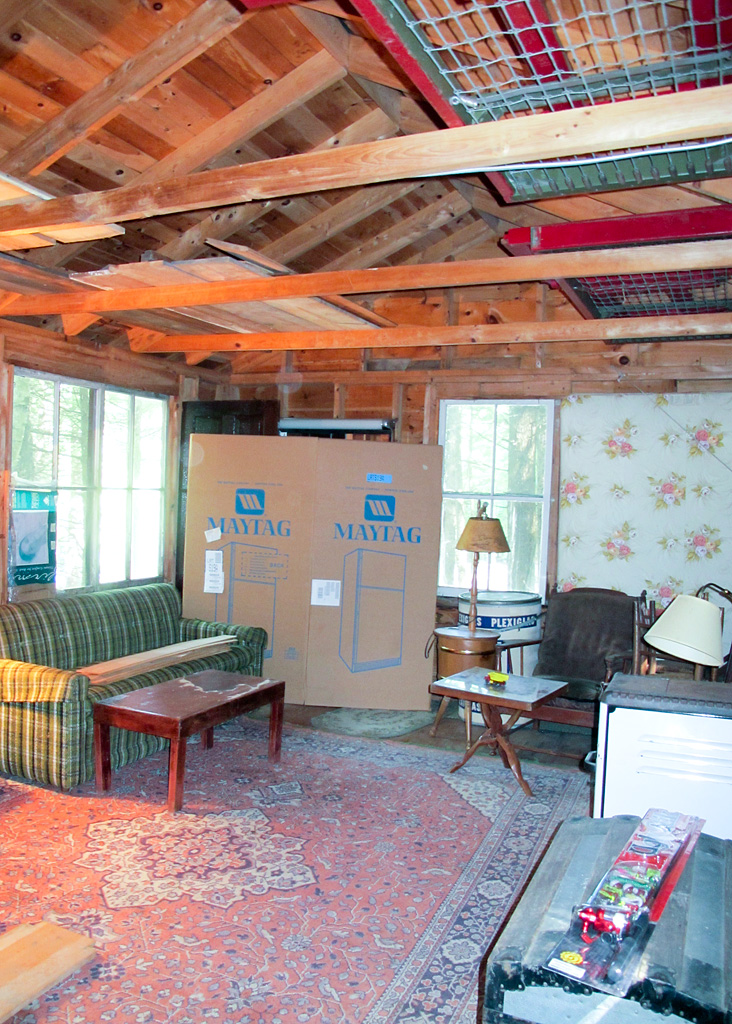
    The bunkhouse turned out to be perfect for guests. Here’s the before picture:


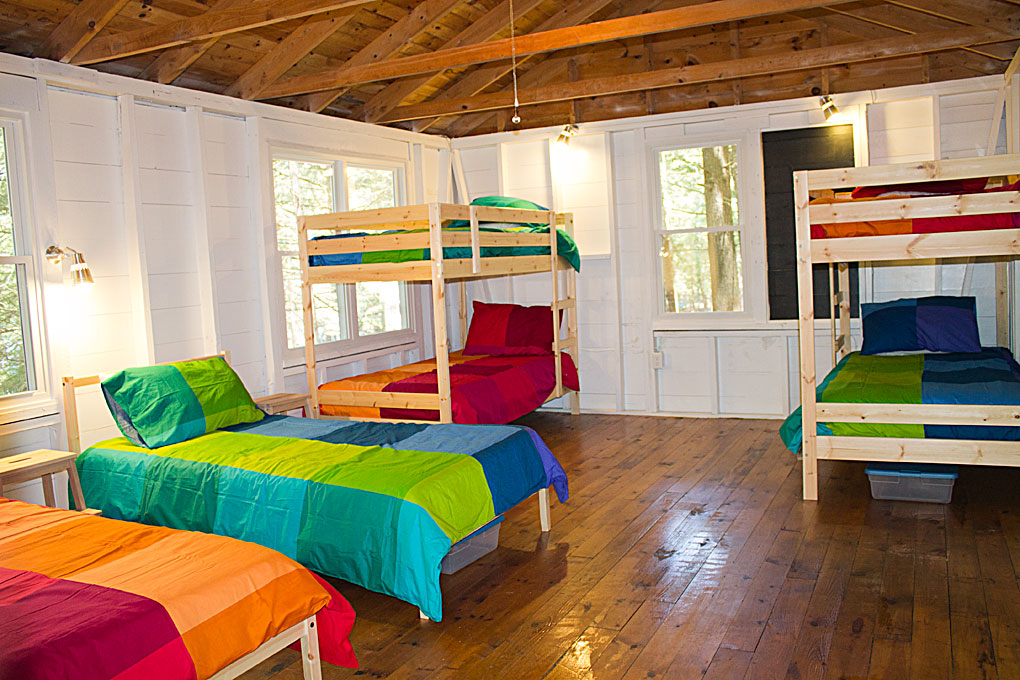
    Here’s the after:

    Pretty much everything in here is from IKEA. (Except the mattresses… those we got locally as cheap as we could). As we did in the main cabin, we basically emptied the building (including TONS of wood, junk, etc. stacked UNDER the buildings and in the rafters… Seriously, we ended up with four Dumpsters full of debris), scoured it with bleach, painted the walls white and polyurethaned the floors.

    Wow, that was a long post! And it makes me really sad that I won’t see any of this until probably April!