Month: February 2012

  • Catnip Mice


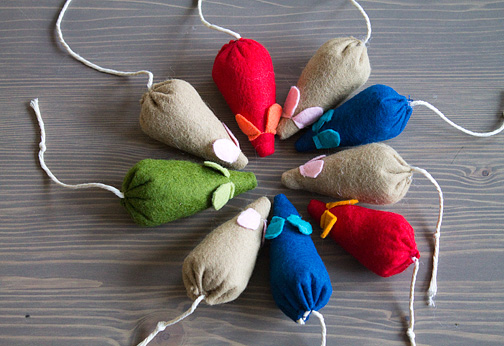
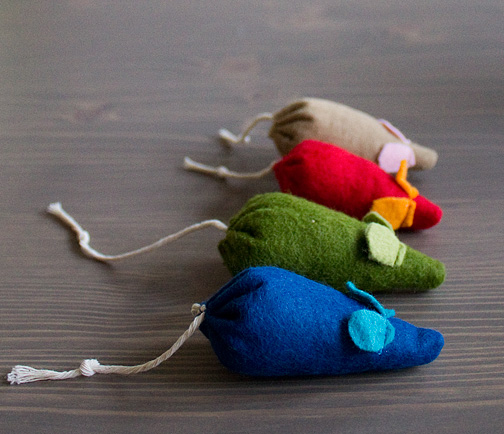
    I just realized I never shared these catnip mice I made before Christmas! My son is crazy about cats and wanted to make Christmas presents for the cats at our local animal shelter. So he helped me make these little guys.
    I was surprised to see just how many tutorials there are online on making catnip mice, but in the end, I came up with my own method. I wanted a design that Parker could help sew, so I rejected versions that involved multiple pattern pieces and sewing curves.
    These mice are super easy.
    1) Cut a circle out of felt. I believe ours was about 8″. I used my rotary circle cutter but it would be just as easy to trace a salad plate or something.
    2) Cut the circle in half in both directions, so you end up with 4 wedge shaped pieces.

    3) Cut out small, ear-shaped pieces and place them on one of the wedge pieces, about an inch and a half away from the point. Sew them on by sewing a straight line that crosses over both pieces. (you could do this by hand, by I wanted to be quick, and the machine stitching is sturdy and less likely to come undone when kitties are chewing on them)
    4) Fold the wedge piece in half, with the ears on the inside, and sew along the straight edges.
    5) Turn the body right side out, and stuff. We used half catnip and half fiber fill.
    6) Using strong thread, sewing a running stitch by hand around the opening, insert a bit of cotton twine for a tail, and pull tight to close up the opening. I made a bunch of extra stitches to make sure this part wouldn’t come undone.
    Parker helped with the cutting, machine stitching and stuffing. And the mice were a big hit at the shelter (and with our kitties at home).
  • Pretty Pictures

    We are getting ready for our annual weekend in Miami, where my husband covers the South Beach Wine & Food Festival. This year, I’m helping out by shooting video of some of his interviews, instead of doing the writing like I did last year. I am a little nervous about that, but looking forward to the warm weather!

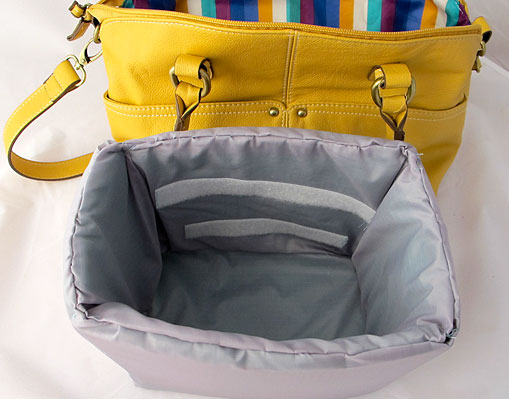
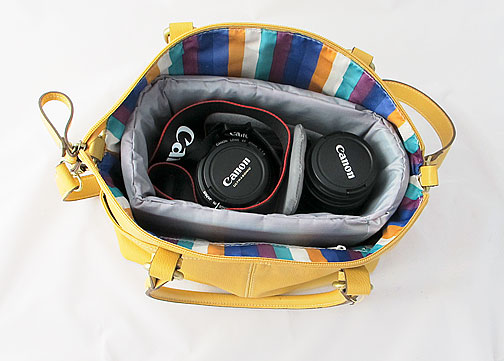
    Just in time for this trip, I finished a project I’ve been wanting to do for a while _ make a padded insert for a large purse (from Target)  to protect my camera. Initially I decided to follow a tutorial at Lil Blue Boo, but even though I measured my bag and shortened the dimensions from the tutorial accordingly, it still turned out way too big. Totally my fault for not measuring accurately. So, I started over, and rather than do what seemed like complicated math at the time, I decided to just make a lined fabric box, with foam/cardboard in between the layers. I did not follow a tutorial, but this tutorial at Crazy Mom Quilts will give you an idea of the construction (obviously, my box is rectangular, not a cube, but close enough). And this time I was smart, I measured the inside of my existing (ugly) camera bag  to get the right dimensions.

    The Velcro on the sides holds a little padded diveder in place. I didn’t make the divider, since I already had one from my old camera bag. This was a pretty easy project, and cheap, since I already had the ripstop nylon (purchased when I had some vague notion of making a bunch of shopping bags… back before it seemed like every retailer started giving them away).  The only time-consuming part was sewing the lining to the outer fabric around the top by hand at the end. But I was pretty sloppy with that step… this will be mostly hidden in a bag anyway.

    Now I can carry my camera around to all the fancy food festival parties!


    Skip To My Lou

  • Lucky Boys

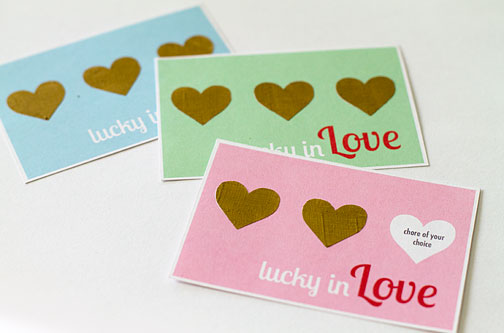
    With my husband’s birthday being just a week earlier, I have to admit I don’t do much for him for Valentine’s Day. Plus, he’s not very sentimental! Sometimes I make him little coupons for little things … I’d like to say little romantic things but they’re usually boring, yet appreciated, things like “take a nap while I play with Parker” or “go get a fancy coffee at the bookstore and browse for an hour.” This year, I tried to make things a little more interesting by turning the coupons into scratch-off lottery cards.

    I made him three cards. Each one has three hearts, with three different “prizes.” The idea is, he can scratch off one heart, and then has to decide whether to accept that prize or go for another one. But whatever he scratches last is what he gets; he can’t go back and take the first (or second) prize. And since I was having trouble coming up with nine prizes (hmmm…. what does that say about me?) I threw in a few “chore of your choice” spots.

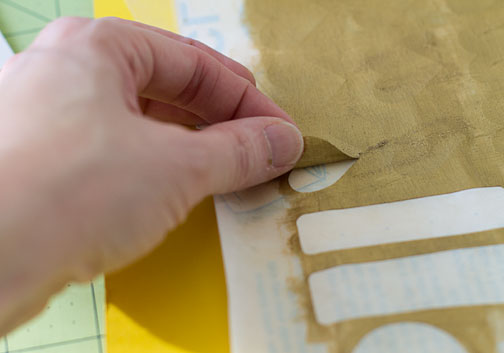
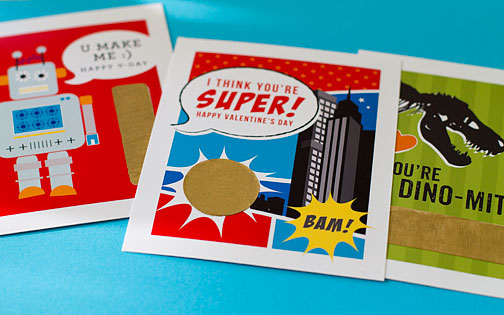
    I’ve seen this idea a bunch of places. Martha Stewart has a version for “save the date” cards, but hers involve painstakingly painting each card free-hand. Cindy at Skip to My Lou made awesome Valentines, and used a stencil to make the painting eaiser. My version is closest to this idea by Lindsey at Our Home Grown Spud, who painted on clear contact paper and then used a scallop punch to easily cut out the shapes. My twist is that I used my Silhouette machine to cut the contact paper first (it doesn’t cut through the backing paper, so you basically have a sheet of stickers that you can peel up afterward) and then I painted over the top of the shapes.


    I also made a few cards for my son, though for him, each card just has one scratch off prize. (example: “watch a movie,” or “stay up as late as you want reading in bed.”) I’m going to let him use one a week for three weeks.

    I got the free downloadable cards from One Charming Party, and just tweaked them a bit in Photoshop to cover up the “From” text on the cards.

  • Shruggie II

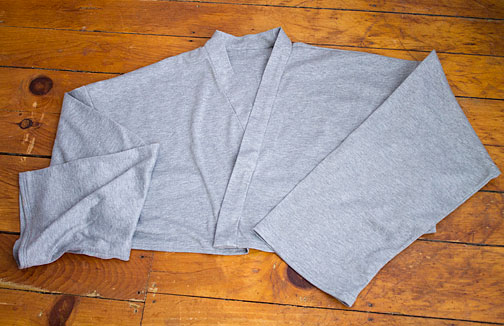
    As my husband’s birthday approached, I knew I could not top last year’s gift, The Shruggie, a fleece shrug-like garment that keeps his arms and shoulders warm while he reads in bed. He is no fan of winter, but the arrival of cold weather was made more bearable when he realized it was time to start wearing it again. It is ridiculous, really, how much he likes that thing.

    But, I managed to come up with something that is almost as good. The Travel Shruggie.

    My husband is the national food editor for The Associated Press, and frequently travels to New York for work. Now, he’ll be able to bring this lighter-weight Shruggie with him. Or use it at home when it warms up a little bit.

    I used McCall’s 9638  (my pattern says 9638, but the link says 6236) and again, cut it off across the chest. My seams are a little wonky around the armpits but otherwise this was a quick and easy project. I used 1.5 yards of a jersey knit from Jo-Ann fabrics.

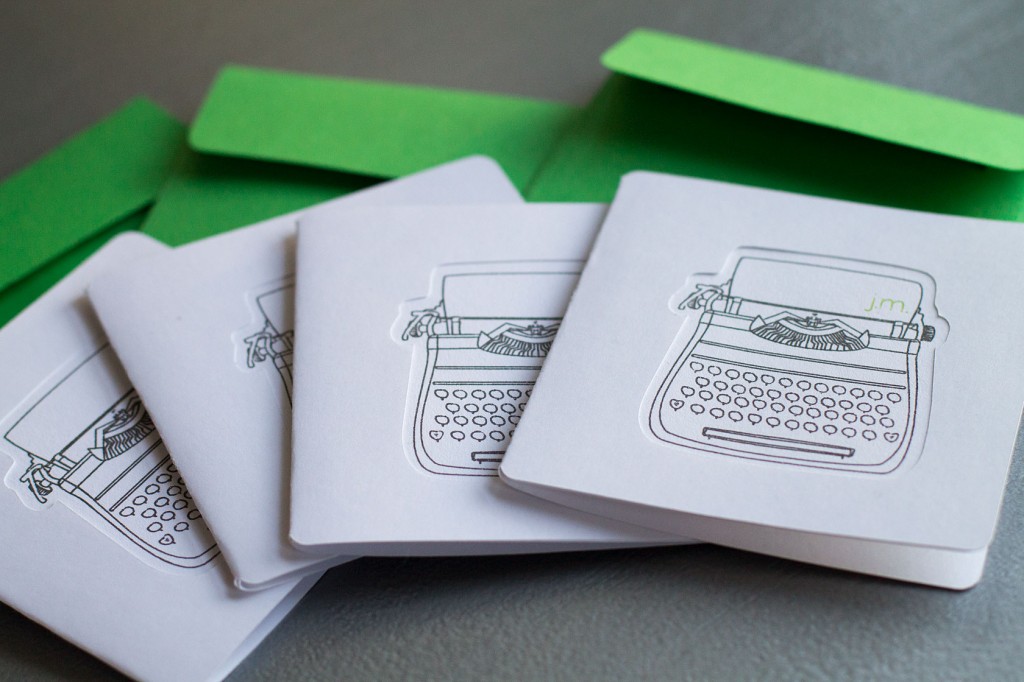
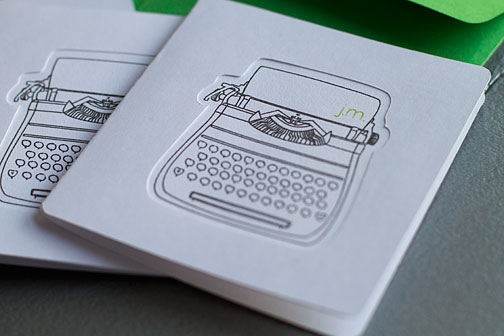
    I also made him a little set of notecards using the sketch pens with my Silhouette. He often has business meetings and lunches when he’s in New York, so now he can send follow-up notes afterward.

    The typewriter design is from the Silhouette store. At first, I couldn’t really see the point of the sketch pens, which basically draw instead of cut when used in the machines. Why not just use a printer? But, I bought some of the “glitter” pens, which I can see using since obviously my ink jet printer doesn’t have glittery ink. And I think it would be useful if you wanted to use a light color ink or even white on darker paper, which is impossible with a printer.

  • For the girls

    My editor at AP asked me to write a brief article about how I made my Star Wars light saber Valentines, so I decided to make a few girly versions as well. I’ll post a link once that story is out there, but here are some printables using my niece’s Hello Kitty figurine and a lollipop instead of the LEGO Star Wars guy and a glow stick.

    I made these with the idea of sticking a lollipop through the card. But since Kitty’s hand is actually open, not a fist, that sort of looked weird. (OK, maybe no one else would notice, but I did!) So for these, it was best to just tape the lollipop stick over the hand. (The tape actually doesn’t show up as much as it does in this photograph.)


    Here are two printable versions:

    PINK HELLO KITTY VALENTINES

    WHITE HELLO KITTY VALENTINES