
I’m still in disbelief that I am the mother of a 7-year-old second-grader. I think part of it stems from the fact that I am helping to plan my 20th high school reunion, and the person who is leading the effort was my best friend in second grade. So I’ve been remembering all the fun we had, and it doesn’t seem possible that my child is already making those kinds of memories.
Parker originally wanted to have a LEGO Star Wars-themed sleep-over party, with just two friends. He then changed his mind, so we said he could invite a few more friends just for an afternoon. And then two friends asked if they could bring siblings, so altogether we had eight kids.
First, the invitations: (altered a bit to remove our real address etc)

I scanned the instruction manual from a LEGO set to make this invitation, but later realized you can dowload PDFs of many different manuals from the LEGO website, so I could’ve saved myself a step. Using Photoshop, I created the “Parker Seven Years” piece to match the LEGO Star Wars logo. I can’t find where I got the LEGO-like font, but here is one that appears to be close or the same.
I looked at one of my son’s LEGO boxes to mimic the words on the left-hand side, which specify the age-range, how many pieces, etc, and replaced it with the date of the party, location, etc.

I might have gotten a little carried away with the goodie bags. I made personalized drawstring bags, using my Silhouette machine to cut out the iron-on letters. For the boys, I used a free font called Star Jedi for the letters, and a free dingbat font called Famous Spaceships for the tie fighter silhouette.

Inside, I put a small bag of LEGOs (we bought Parker a few used Star Wars LEGO sets from eBay, and they came with a large bag of random pieces), a box of crayons and personalized stickers. I made the crayon boxes using the image from invitation, and after some trial-and-error, printed and cut them out using my Silhouette. Once I figured it out, it was pretty amazing to just fold up the boxes (the Silhouette cuts dashed lines for fold lines, so you don’t even have to score the sides, etc.) and glue them together.
I also used the Silhouette to make the stickers. The mini-fig images are from a downloadable poster at the LEGO website. I opened the poster in Photoshop, and then cut and pasted each image into a new document, and then (just to make things more complicated) re-colored the backgrounds. (Actually very easy, just use the ‘magic wand’ tool to select the background and either fill with a new color or adjust the hue/saturation). I printed them on full-sheet labels and used the Silhouette to cut around each sticker (but not through the label backing). The only downside to this method is that with the Silhouette, there are wide areas around the margins of the paper where you can’t place images to print and cut, so it does waste some of the label sheets. But, the end result is pretty impressive. I see a lot more sticker-making in my future!
When the guests arrived, we sent them to find their bags, which we had hidden around the yard. They then sat at our big outdoor table, and we told them their mission was to build a spaceship using every piece of LEGOs in their bags. This proved to be more involved than we anticipated. Quite a bit of time went by and they were all still quietly working away. In fact, we had to stop them because the pizza we ordered for lunch arrived.
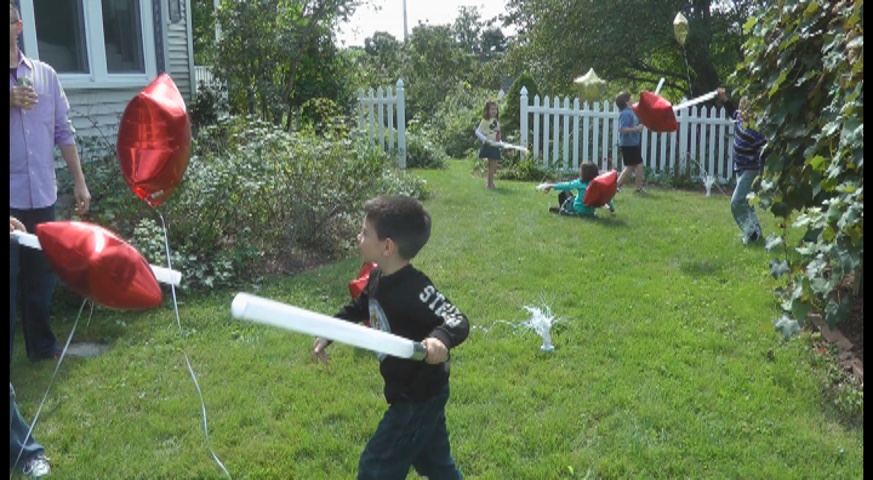
After lunch, we gave them handmade light sabers. I had seen all the pool-noodle variations on other blogs, but I really wanted something that would light up. (which turned out to be kind of dumb, since it was so bright and sunny that you couldn’t tell these lit up at all! But they are really cool at night.)

Here are the basic supplies I used: small flashlights, some kind of thick translucent paper (drafting film?), clear packing tape, silver duct tape, colored transparent file folder dividers.

You’ll notice I have two different kinds of flashlights. The smaller, silver flashlight on the left is an LED flashlight. I found a pack of four of them at Home Depot more than a month before the party for about $5, and was thrilled. (at the time, I was anticipating only having to make 3 light sabers). By the time the guest list had expanded, Hurricane Irene had happened, and thus both Home Depot and Lowes had almost no flashlights left, except super-exepensive versions.
I finally found the larger flashlights on the right at Walmart, I think for about $3 each, the night before the party.
The first step was cutting a circle out of the file folder divider and taping it over the top of the flashlight lens, to make the light beam take on a slight color. Next, roll up a piece of vellum/drafting film, tape it together with a long piece of packing tape and then tape the tube to the flashlight.
The translucent paper I used was in an 18X24 sheet. My father-in-law gave me a whole stack of it when his office closed years ago and it has been sitting under my bed, waiting for the right project! After some experimentation with size, I determined that rolling a 6X18″ inch piece lengthwise made for a sturdy-enough tube that was still translucent enough to let the light shine through.
I found it easiest to roll the paper into a tube roughly the diameter I wanted, and then check it against the flashlight, rather than try to roll it around the edge of the flashlight. To reduce the wrinkles in the tape, I cut a long piece of tape, rolled up the tube, placed one long edge of the tape on the loose edge of the paper and then sort of rolled the whole thing gently on the counter to get the tape to stick the rest of the way. (that probably makes no sense, but basically: don’t try to smooth the tape out with your hands, place it gently in place and then roll the tube on the counter to get it to stick).
Once the tube was securely taped to the flashlight, I covered the handle and a few inches of the paper with the silver duct tape. In retrospect, I should’ve covered the bottom few inches of the paper tube with packing tape as well for extra stability.

Unlike this picture above (which was taken AFTER the party), I did not want the kids to be bashing each other with the light sabers because I was afraid the paper tubes would bend and I didn’t want them to possibly get paper cuts from the edge of the tubes. (I was imagining someone getting poked in the eye). So, we bought a bunch of helium balloons, anchored to the ground with rocks and ribbon, and let the kids loose to battle the “droid army” in the back yard.
That proved to be great fun, though the boys were quite a bit rougher than I expected (I’m sure my husband was not at all surprised), and several balloons were quickly popped and several light sabers bent. I brought out the duct tape, though and did some quick repairs.

Two days before the party, I read this list of classic party games at One Charming Party, and immediately decided I would do the “hot potato present opening” game. One of my party pet peeves is the feeding frenzy that happens when kids crowd around the birthday boy or girl. I know, I know, it is human nature and they’re just excited, but I didn’t want to have to spend time nagging them to move back, etc. So, I had the kids sit in a circle, and we played “Pass C3PO.” I downloaded the Star Wars theme music, and when the music stopped, whoever was holding C3PO got to give Parker his gift.
The cake. Finally, the cake. This is my food editor husband’s job every year, and every year, he does not disappoint.

This is a clone trooper helmet, made by photocopying and enlarging an image and using that to cut out the shapes. The base layer is a yellow cake, and the parts that protrude from that are made from brownies. The entire thing is covered in fondant.


