Month: October 2010

  • Paintbox Quilt

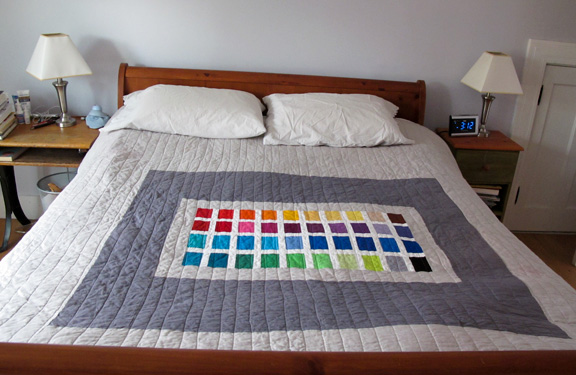
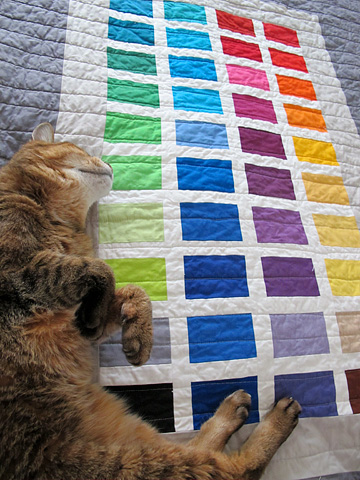
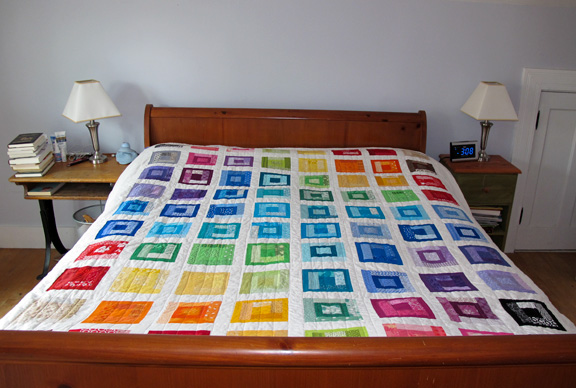
    Wow. I can’t believe this quilt is finally done. This is the Paintbox Quilt by Oh,Fransson! that I started back in March. I basted it in June (first time using a basting spray. It worked very well. I can only imagine how much heavier this quilt would’ve been with a million safety pins in it), quilted about four lines in August and then put it aside until Wednesday, when I spent most of my day off doing all the quilting.  My intention was to quilt straight lengthwise lines about 1 1/2″ apart. Pretty quick, I realized that I am not very good at keeping the stitching straight on such a large quilt. But my lines are actually almost crooked enough to look deliberate, and once it was washed and dried everything crinkled up nicely.

    The only thing I don’t like about it is that once I put my pillows on the bed, it covers up the top two rows, so you don’t really get the whole color spectrum effect. I wish I had thought to take that into account.

    This is the first queen-size quilt I’ve made, and the first quilt I’ve made for my own bed. By my quick calculations, I used 160 different fabrics in this quilt, the vast majority from what I already had. A few friends gave me some of their scraps, and I did have to buy some fabric, but for those I just bought very small cuts of fabric (1/9 of a yard) to keep it affordable. The sashing is a cotton-linen blend.

    For anyone considering making one of these, I did spot one error in the instructions. It’s not a big deal if you’re the type of quilter who likes to start with strips that are a bit long and then trim as you go, but I figured I’d post the correction here anyway. In the directions for making the scrappy-style blocks, it says: “From your 1 1/4″ solid fabric strips, cut pieces in the following lengths: 5″, 6″, 6″, and 6 1/2.” But it it should say: 5″, 5 3/4″, 5 3/4″ and 6 1/2″.

    Again, not a big deal to just trim off that extra bit, BUT if you follow my method below to preserve more of the solid color “jellyroll” fabric this pattern uses, you need the exact measurement.

    The original directions say:

    “Begin by trimming the selvedge from your solid fabric strip. From one end, cut a square, 2 1/2″ x 2 1/2″ and a rectangle, 2 1/2″ x 3 1/2″. Cut the rest of the strip into two thinner strips, each 1 1/4″ wide.” (the square is for the center of each block. The rectangle is for the design on the quilt back)

    But if you want to preserve as much of your 2 1/2″ solid fabric strip as possible for another project, here’s another method:

    1. cut the 2 1/2″ square and 2 1/2″ X 3 1/2″ inch rectangle from one end of the solid strip as directed
    2. cut another strip that measures 2 1/2″ X 11.5″
    3. cut that 11.5″ strip into two thinner strips, each 1 1/4″ wide
    4. cut one of the thinner strips in half lengthwise to make two strips each 1 1/4″ X 5.75″
    5. cut the other one into two strips, one 1 1/4″ X 5″ and the other 1/4″ X 6″
    1. A Present a Week, Week 16

      Eight weeks ’til Christmas! I just realized that I had a lot of vacation days carried over from past years, so I am taking a week off in November. Which means it is very likely I will accomplish my goal of finishing all Christmas-gift-related sewing and crafting in November, leaving December free for relaxation (ok, probably not likely) and FUN.

      I’m very excited for the return of Handmade Holidays at Sew Mama Sew!, since it was that series a few years ago that really got me into sewing.

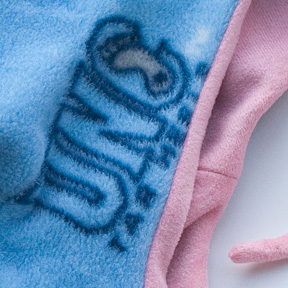
      Here’s a sneak peak of my latest gift for Deb’s “A Gift a Week ‘Til Christmas” challenge. It’s not too late to join! (As always, if you want the link to the “hidden” blog where I’m posting these projects so the recipients won’t see them, just leave me a comment or send me an e-mail)

    2. Happy Birthday Ned-or-Evan

      Two of my son’s best buddies are a pair of identical twins named Ned and Evan. For a good six months after meeting them, he (and I) were unable to tell them apart. (I’m a twin myself, but look nothing like my sister). So Parker was always telling me stories about his adventures with his pals that went something like this: “Today, at recess, Nedorevan and I were playing knights, and then His Brother came over and….”

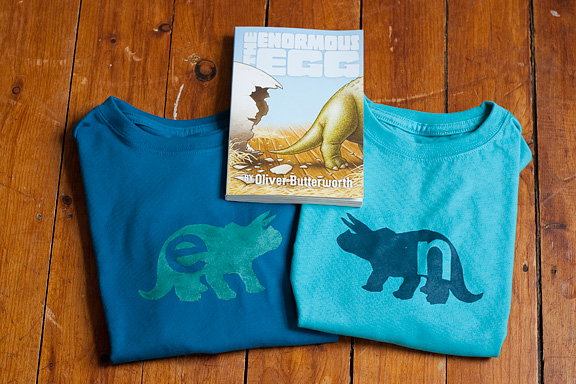
      So, in honor of Nedorevan and His Brother’s sixth birthday, I put together another book-and-homemade gift combo: freezer-paper stenciled shirst and a copy of  The Enormous Egg. It is a very sweet story about a boy raising a baby triceratops that’s all the more special to us because it takes place in New Hampshire, where we live.

      Their party is Saturday, in the middle of a very hectic few days that will include a Halloween parade, trick-or-treating at Main Street businesses in our hometown, a bonfire, fireworks and MORE trick-or-treating with Parker’s cousins. Oh, and the election on Tuesday which will mean a very long night of work for me!

    3. Halloween Crafts

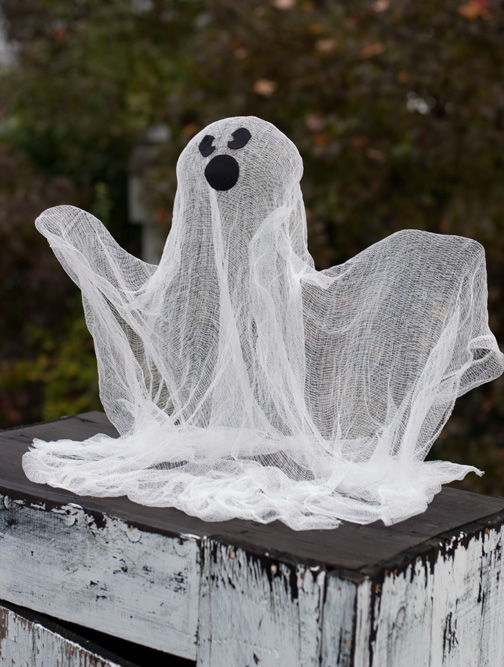
      I’m finding myself in the odd position of having churned out dozens of Christmas ornaments in the last month or so, yet have made almost nothing for Halloween. I finally convinced my son to help me make this cheesecloth ghost last weekend, but I think that’s about all we’re going to get done. I used this tutorial at Every Day is a Craft Day, though I used a wine bottle instead of a 2-litre plastic bottle because, uh, I guess we drink more wine than soda. Looking back at the cute examples from the tutorial, I’m thinking of ripping off the nose and mouth and replacing them with just two little round eyes. I’m not sure if there is a difference between the starch you’d buy in a jug or what comes in the spray bottle. I used the spray stuff (not the aerosol, but similar, in a squirt bottle) and this didn’t actually get all that stiff.
      Here are some projects I did last year, in case you weren’t one of the three or so readers I had back then! (Click to go to the original posts)
      Pantyhose Pumpkins

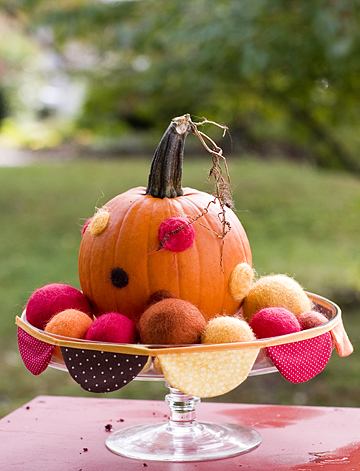
      Needle Felted Pumpkin
      Halloween "Snow" Globes
    4. It isn’t easy being (married to someone) green….

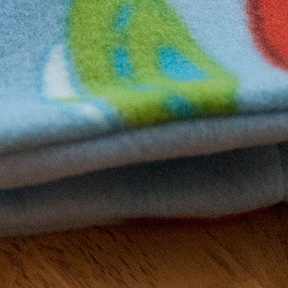
      When I first met my husband, I thought maybe he was color blind. Either that, or he wore the same thing every day. Everything he wore seemed to be the same dark Army-green color. Eventually, I convinced him to branch out a bit and try some blue. After all, he has beautiful blue eyes! He then wore nothing but blue for the next 10 years or so, until recently, when he has been shaking things up a bit for the television appearances he’s done to promote his cookbook. (sweater vests! yellow! purple!) But when we had a yardsale this weekend, I realized just how much green clothing he still had. Here’s just a sampling of what I decided to keep:

      So tell me, what would you do with this stack of green shirts? They include heavy fleece, knits and a few t-shirts. Surely they could be transformed into some kind of Christmas items?

    5. Fabric Flowers


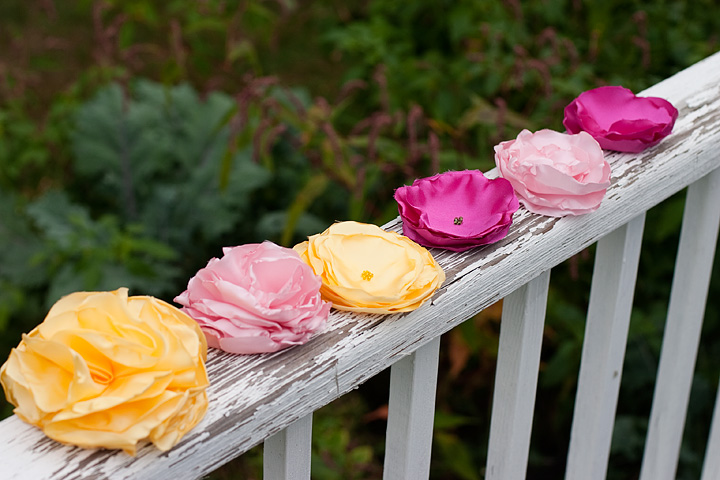
      There are a mind-boggling number of tutorials out there on how to make fabric flowers. I made these recently using a pair of tutorials at Mary Janes & Galoshes, but there are dozens more I’d like to try at Oopsey Daisy. Here are my two cents, in the form of two tips:

      1) Many of the tutorials that involve synthetic fabric call for using a candle flame to heat seal the edges. I found another easy and potentially safer method: an embossing heat gun. I bought a heat gun probably 15 years ago when my sister and I used to make stamped and embossed Christmas cards. (You use the heat gun to melt the embossing powder.) I’ve saved it all these years, and now I’m glad I did! I placed the flower petals on a large tile, held down one edge and waved the heat gun over the edges until they started to curl a bit. I was using rather large petals so wasn’t in danger of burning my fingers, but with smaller petals you could always use a chopstick or something to hold the flower in place.

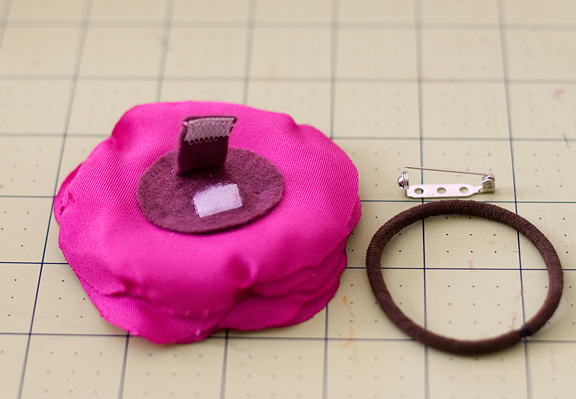
      2) I was telling my sister about these flowers and suggesting we make some as gifts for her daughter and other little girls we know. When I suggested adding a pin back to the flowers that could also be pinned to  a  hair band she said, “That would look cute until someone fell and then got a pin stuck in their head.” Now, I think you’d have to fall pretty hard and in just such a way to have the pin open and then stab you in the head, but just to be on the safe side, I came up with an alternative.

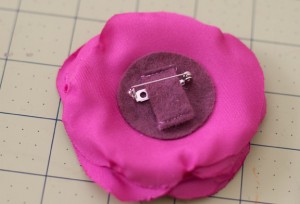
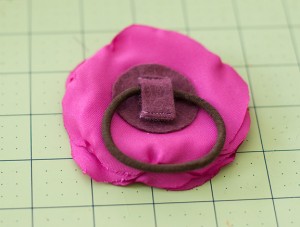
      I cut a circle of felt and a small strip slightly narrower than the width of the pin back. I sewed one end of the strip to the circle, and added a tiny bit of Velcro to both the strip and the circle. (It is a little tricky to sew Velcro to such a small piece of fabric. This would be a good project for the iron-on Velcro.)

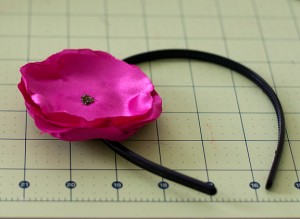
      That way, the pin can be slipped under the strip of felt, or a hairband. At this point, I admit it did seem like a lot of work just to guard against the very slight chance of injury. Then I realized that by doing it this way, I could also slip the flower on a headband, which would not have been possible with just the pin back. (Not that I would ever wear a huge flower on the side of my  head, but I would LIKE to be the kind of person who could pull that off. But little girls can get away with that, right?)


      (Edited to add: As my clever commenter Katherine points out below, it would be easier to just sew both ends of the felt strip to the circle, making a little loop that could be slipped over the pin or headband, and the hair band could be looped through there as well. Or a bit of elastic, which would be sturdier than a strip of felt. Or forget the extra piece and just make two slits in the felt? Sometimes I make things more complicated than they need to be!)

    6. Preserving Autumn

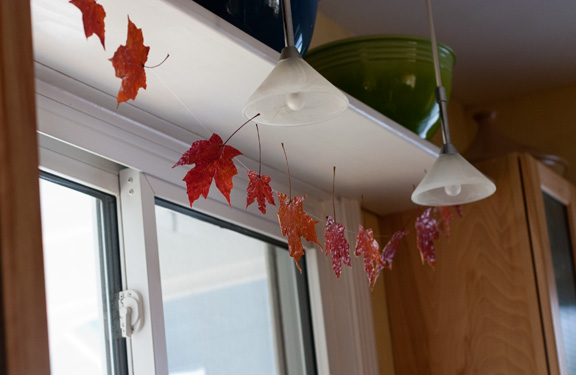
      The fall foliage here in New Hampshire  is spectacular. I hate that it comes and goes so quickly, though, so this year I’ve been expermenting with preserving leaves. It has not been a particularly satisfying experience! Here’s a rundown of techniques I tried:

      • ironing leaves between sheets of waxed paper, which was supposed to leave them coated with wax. Didn’t work at all.
      • coating dried leaves with Mod-Podge. I saw this technique at Gingerbreadsnowflakes but was put off by the directions to let the leaves dry for a few weeks. Who is that patient? I read somewhere else that you could speed-up that process by ironing the leaves, but I found that really darkened and dulled the colors. But, my leaves seemed plenty dry after only a few days, so I tried this again with a new batch of leaves. The Mod-Podge worked well, but it was time consuming because it takes quite a while to dry beteween coats.
      • Dipping leaves in wax. I didn’t actually try this technique because I couldn’t find any wax. All the tutorials I saw called for paraffin, the type used to seal canning jars, but my grocery store didn’t carry it, nor did Target or Wal-mart. Then I found some references to using beeswax, which looked beautiful, but again, I couldn’t find it. Michael’s had some, but it was something like $17 a pound. At that point, I was starting to feel like Beth at Remarkably Domestic, who has been working her way through Martha Stewart’s Encyclopedia of Crafts and describes the “fruitless shopping” involved in many of the projects.

      So,  I ended up with a rather pitful little garland of about a dozen leaves.

      They are pretty, but I’m also quite fond of the newspaper leaves my son and I painted together (got that idea from Maya*Made). Especially when he said to me, “I like these nights when it’s dark and we can do stuff together, Mommy.”

    7. Purse organizer and ornaments

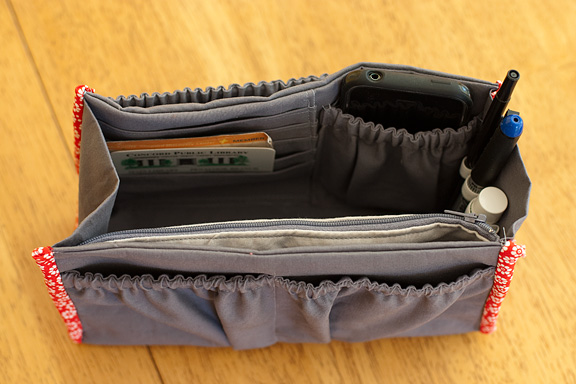
      I made my sister a tote bag as part of her birthday present and since the pattern had no pockets, I made this purse organizer/insert to go with it. The idea is that you could easily switch from one purse or bag to another by removing the insert. I found the tutorial at the Fredericton Quilters’ Guild site (UPDATE: The pattern seems to have disappeared) and found it fairly easy to make except for the binding around the edges. It was really tricky to sew the binding around the U-shaped sides, and I cut my binding too narrow and had to really work to get it on there. I also think the slots for the credit cards are far too shallow. I followed the directions exactly, but I had a lot of fabric left over after folding it as specified, so perhaps there was a typo in the directions. If I make this again (maybe for myself!) I will make the slots deeper. It’s a little hard to tell from the pictures, but there are outside pockets with elastic edges and a long zippered pouch that sort of acts like a divider in the interior. The pattern doesn’t call for it, but I added a few loops of elastic on the side to hold pens or lipstick. I also forgot to add the little loops of twill tape for pulling the organizer out of a purse, but I think she’ll be able to figure that out without them.

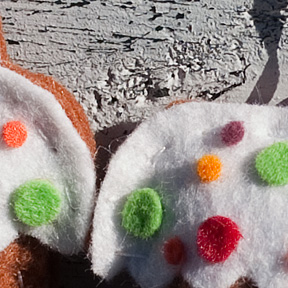
      Also, here’s a glimpse of my entry for this week’s “A Gift a Week ‘Til Christmas” challenge at Works in Progress. As usual, I’m posting it on my “hidden” blog so the recipient won’t see. Leave me a comment or send me an e-mail if you don’t have the address.

    8. Candy Corn Cuteness

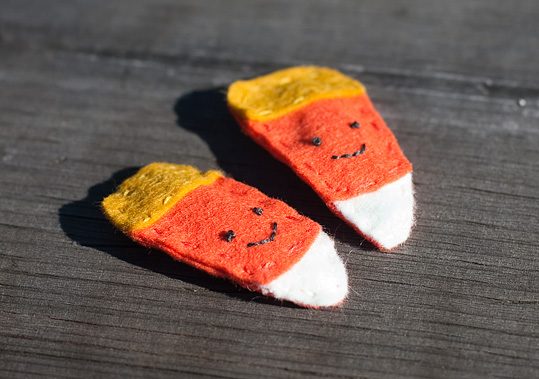
      Even though I don’t have a little girl, and even though I don’t like the taste of candy corn, I am oddly drawn to all the cute candy corn crafts out there this time of year. Woman’s Day Magazine (which also has a huge spread on my husband’s cookbook this month!) had a bunch of decorating projects involving candy corn … though I know I lack the patience to glue individual candies to a wreath,etc. These cute little candy cane barrettes are MUCH quicker. I used this great tutorial by Katherine at One Inch World. Her technique for partially sewing the pieces together for the top of the cover and then sewing them to backing piece really streamlined things. So these little guys will be for my niece, who is generally the recipient of all the cute girly projects I try.

    9. A Present a Week, Week 13

      Here’s a glimpse of my entry for this week’s “A Gift a Week ‘Til Christmas” challenge at Works in Progress. As usual, I’m posting it on my “hidden” blog so the recipient won’t see. Leave me a comment or send me an e-mail if you don’t have the address.