Month: May 2010

  • Princess & the Pea, the sequel

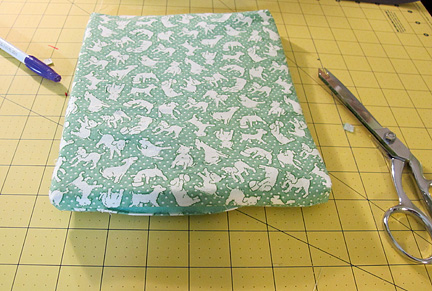
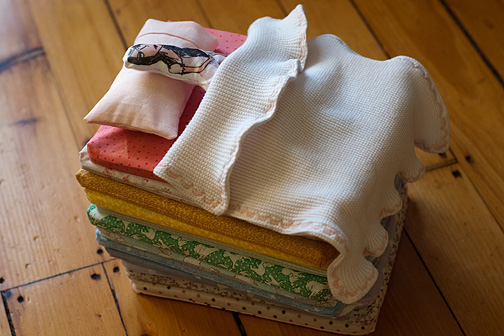
    I was asked to make another “Princess and the Pea” play set like the two I made as Christmas gifts, but this time, I wanted the mattresses to look more like, well, mattresses, rather than quilts. So I used a sheet of foam instead of batting and made the corners of each mattress cover boxy. If you’ve ever made a purse or tote bag with a squared-off bottom, you already know how to do this technique. But here’s a little tutorial in case you want to try it:

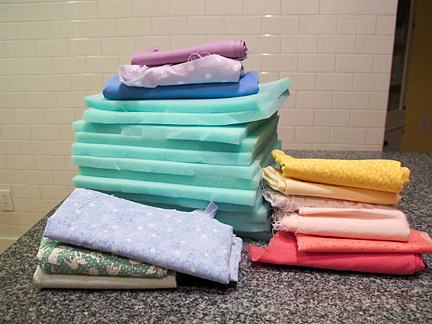
    1) You need 1 yard of 1/2″ thick foam. It’s a bit pricey, but I used a coupon at Jo-ann Fabric and I think it cost about $6 for the sheet.

    From the sheet of foam, cut 12 rectangles, each 7 X 9 inches. (You’ll have a strip of foam left over). You also need 12 different fabrics. I originally planned to mix solids and prints, but ended up switching to all prints.

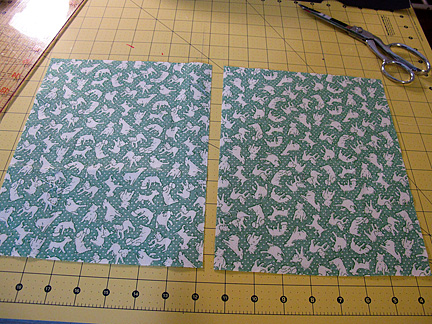
    2) Cut 2 rectangles from each fabric, 8 X 10 inches each.

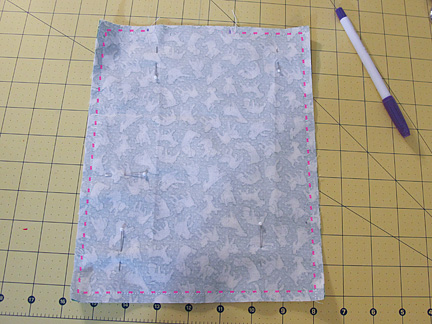
    3) Using a 1/4″ seam allowance, sew around the rectangles, leaving a 3″ opening at one short end.

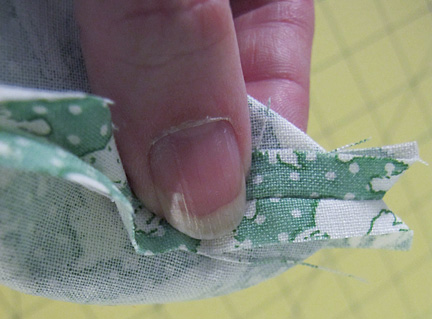
    4) This is the tricky part to explain. Pinch the corner of the rectangle so the two seams are on top of each other. I find it easiest to finger-press the seams open.

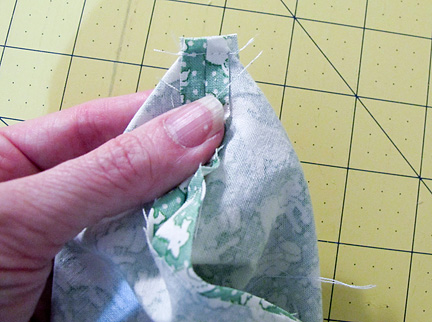
    Sew across this triangle, perpendicular to the seam,  1/4″down  from the point of the “V” shape made by the seam allowances.

    5) Repeat for each corner, trimming off the extra fabric

    6) Turn the mattress cover right-side out and insert the foam. I rolled the foam lengthwise into a tube shape then pushed it into the cover.

    It takes a bit of fiddling, but it was easier than I expected.

    7) Sew the opening closed using a ladder stitch or whip stitch.

    As I did with the original version, I scanned the cover of the “Princess and the Pea” book by Lauren Child, edited it in Photoshop to remove the background and printed it on iron-on transfer paper. I transferred the image to white fabric, and made a simple flat doll. The pea was a wet-felted ball, and a sewed a little pocket onto the bottom of one of the mattress covers so it wouldn’t get lost. I used my pillowcase tutorial HERE to make the little pillowcase, and the blanket was cut from one of my son’s old baby blankets, hemmed with one of the fancy stitches on my sewing machine.
    Check out more great projects here:

  • Giveaway Winners

    Once again, I’m amazed by how many Lowly Worm fans there are out there! Thank you so much for all your kind, and often amusing comments! I hope some of you will come back and read more, even if you didn’t win. I hope to do more giveaways in the future.

    Lowly Worm will go to sharon, who commented at 11:49 a.m. Wednesday:
    oh my gosh i love lowly SO much but i also love felt – i want them both but i think i would have to pick lowly he is so perfect!!!

    The felt scraps go to duff, who commented at 11:14 p.m. Wednesday suggesting this for my 4th of July project:
    “I just saw a giveaway for a utensil roll-up. Just like the crayon roll up except it has three slots for the utensils (maybe add one for a napkin?). what a great way to have “real” utensils on hand for 4th of July barbecues!”

  • Limited-edition Lowly!

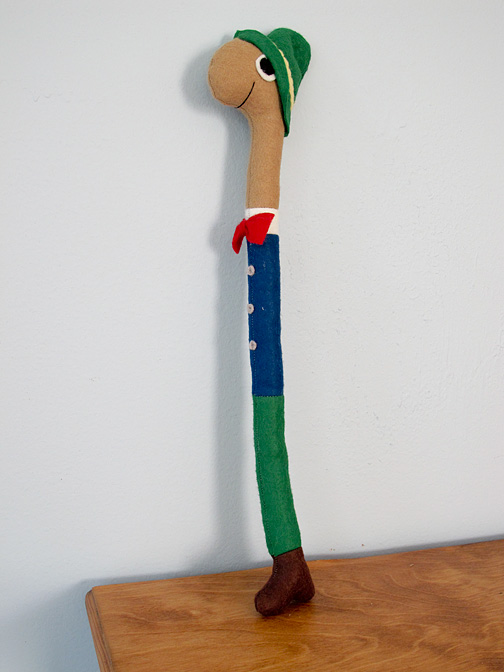
    Here is my offering for Giveaway Day at Sew, Mama, Sew! I had no idea when I posted pictures from my son’s Busytown birthday party last fall that there were so many Lowly Worm fans out there! This version is a bit of an upgrade from the Lowlies I churned out 10 at a time for the party. Those were made with inexpensive acrylic felt. The new version is made with a wool-blend, and I’ve streamlined the design a bit to make his coat part of the body instead of a seperate piece.

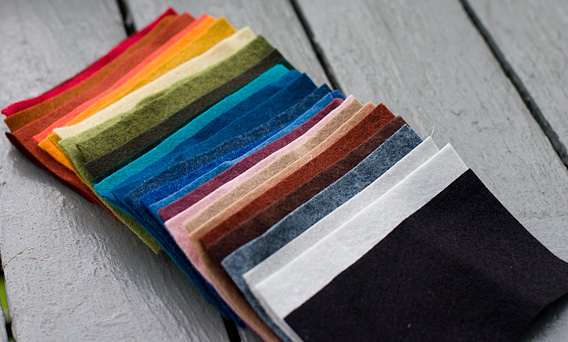
    For those of you who AREN’T Lowly fans, I’m offering an assortment wool felt scraps.

    There are 28 pieces, all different colors, and all cut to 3X5″. These would be great for small applique projects, or the little ornaments I made for my son’s advent calendar.

    Here’s a different options to win:

    1) Simply leave a comment specifying which item you want: Lowly or the felt scraps. (make sure it includes a way to contact you) (If you already commented when I was just offering Lowly (before 11 a.m. Monday) and you win, you’ll get both. Otherwise, I’ll pick two winners)

    For extra chances, do any of the following (in seperate comments if you do more than one):

    2) Leave a comment telling me you follow my blog. (either longtime readers or brand new!)

    3) Leave a comment describing some kind of 4th of July craft or sewing project idea, either something you’ve made, seen elsewhere or would like to see.  I write a craft column for The Associated Press and need to come up with something that will run in June, usually I look ahead to the next holiday/season.

    4) Check out my talented husband’s blog: jmhirsch.com. He is the national food editor for The Associated Press, and has a cookbook coming out in the fall. If you’d like, leave him a comment, but it’s not necessary. Just tell me you took a peek and will consider going back!

    I’ll close comments at 8 p.m. EST Thursday and announce the winner Friday morning. I am willing to ship internationally. Good luck!

  • Giveaway Day

    I’m looking forward to participating in my first Giveaway Day at Sew, Mama, Sew! In December, I won some beautiful fabric from Jenny at Cut. Sew. Iron. Repeat (which I have yet to use! I need to find the right project.) I think I’m going to give away something related to what has been by far my most popular post.

    Here’s a hint: You’d have to hunt high and LOW to find another one of these items. Check back on Monday!

  • Itty Bitty Baby Dress

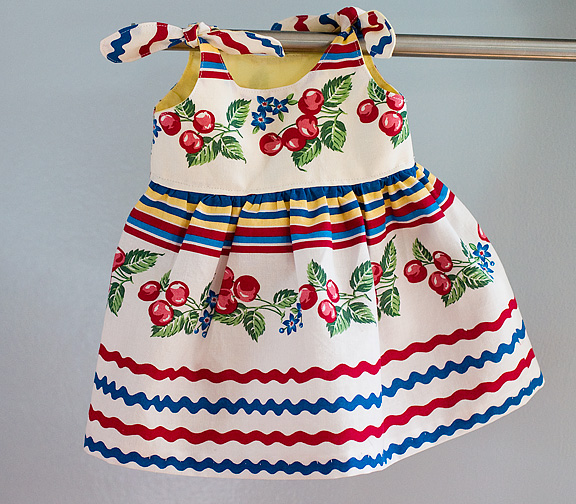
    I made this for a friend whose daughter was born last week, 5 weeks early and weighing just 3 lbs! But she is healthy and doing well, and I’m sure she’ll look beautiful when she’s big enough to fit in this tiny dress! (The picture makes it look big, but it really is itty bitty). The pattern is from Made by Rae. I didn’t have any piping or bias tape on hand so I skipped the piping and did a blind hem on the bottom. I’ve had this 1/2 yard of fabric for at least six years and never had just the right project to show off the fun print.

  • Good Friends are Better than Ice Cream

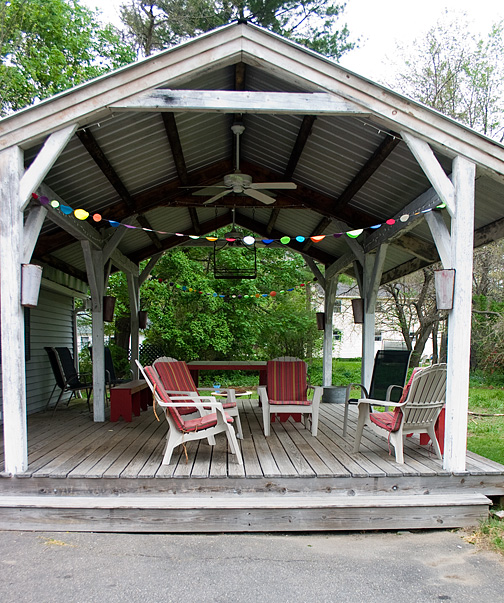
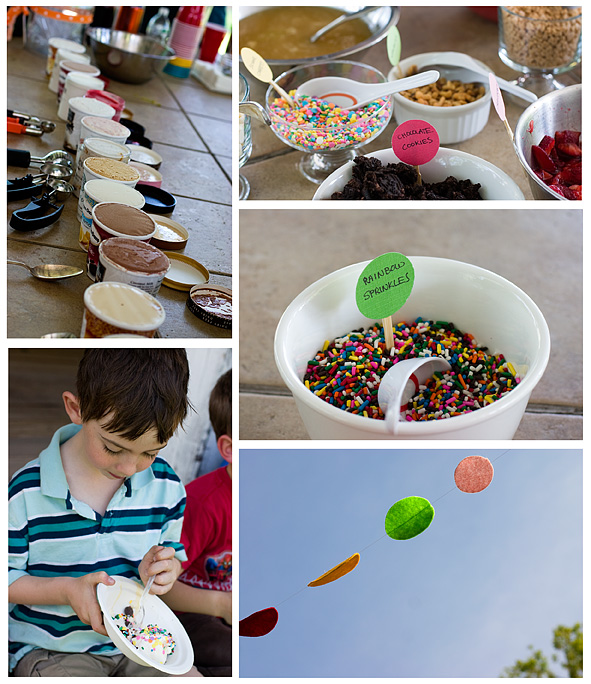
    We had a very casual party on Saturday to thank all our friends who were so generous when our son had his tonsils out last month. It really made us realize what a wonderful community we live in. Two of Parker’s friends used the same local gift basket company to send him some treats a few days apart, and the owner realized that and made sure to include different items, and even added a little picture drawn by her 6-year-old son (and fellow tonsillectomy survivor!). We decided to have an outdoor ice cream party, since now that some time has passed, Parker is enjoying ice cream again. (within days of his surgery he was sooo sick of ice cream. Poor thing was begging for crackers. (Our deck used to be a car port for an RV, but since we we are not planning on ever owning a Winnebago, my husband and a friend built a low deck under it a few years ago). We were lucky we had perfect weather, sunny and in the 80s (this, just a few days after snow flurries!).

    The only decorating I did consisted of a very quick and easy garland made of felt circles cut with the Olfa Circle Rotary Cutter I bought a few months ago and hadn’t really tried out. It made cutting the circles a breeze, though it took some getting used to. It’s a bit pricey, but I waited until I had a coupon and got it on sale online at Joann’s. After I cut out a bunch of circles, I just sewed down the middle with my sewing machine, leaving a few inches of stitches in between each circle.

    We bought A LOT of different ice cream flavors and set out little bowls of toppings. I made homemade hot fudge and butterscotch sauce, both from Epicurious.com. Yum!