Month: April 2010

  • The top that nearly toppled me

    Just in time, I finally finished my entry for Spring Top Week at Made By Rae. I made Simplicity 2922 out of a linen/cotton blend and then dyed it. This is the first top I’ve ever made for myself (or anyone for that matter), so you’d think that would be enough of a challenge, but I had to make it about 100 times harder. That might be an exaggeration, but you know how sometimes you get to a point in a craft or sewing project when you consider just throwing it out? This project was full of such moments. Here are but a few:

    1) With “These are a Few of My Favorite Things” running through my head, I cut out the front, yoke/sleeve, neckband, armbands and facings out of some fabric I had leftover from making curtains, only to realize I didn’t have enough fabric for the back.

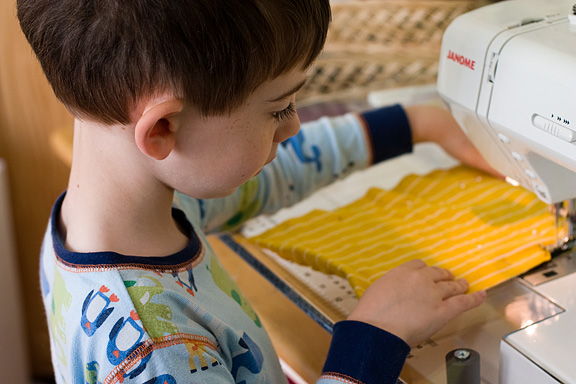
    2) I somehow managed to sew the neckband to the ARMPITS. I know that’s hard to imagine, but the pattern calls for sewing  the yoke and sleeves first, then adding the neck to the top and the rest of the shirt to the, so I accidentally flipped the yoke over. And sewed it even though it didn’t quite fit. And then trimmed the seam and ironed it. THEN noticed the mistake.

    3) When I tried it on before hemming it, my husband poked me in the belly and said I looked pregnant.

    4) I realized I should’ve dyed the fabric first, because I didn’t use cotton thread, and now the white stitches show up on the bright pink fabric. They’re not neat enough to look  like I did it intentionally as decorative topstitching.

    BUT… on the bright side, I successfully used the blind stitch function on my sewing machine for the first time! (Of course, the “blind” stitches are blindingly WHITE, grrrr) And I figured out a cool way (I think) to keep the edges of the fabric flower from fraying and give the petals a bit of stiffness. I’ve seen several tutorials that call for using some kind of spray, but I don’t have any and didn’t really like the idea of spraying some kind of chemical sealant on the petals. Then I saw this project in the latest issue of Martha Stewart Living, which calls for printing out little clipart flowers onto iron-on transfer paper and then transferring them to fabric. So I figured, why not use a flower outline (Martha has a bunch of templates on her site), print it on iron-on transfer paper and go from there? The transfer paper leaves a clear coating on the fabric but it’s barely visible. The great thing about this technique is that you don’t have to trace the pattern because you’re printing it right on the fabric.

    I really want to be the kind of person who can pull off wearing a huge flower pinned to a shirt like these lovely poppies at Grosgrain. But apparently I’m not quite ready for that, since I didn’t dye any big scraps of fabric, so I went with a small-ish bloom instead. But it’s on a pin so I may remove it and re-do it.

    Would I make this pattern again? Maybe, slightly smaller or in a different fabric. I’m not crazy about the slits in the sleeves, but the pattern also includes gathered or plain flat sleeves. I might try the dress version. I ended up chopping about 4 inches off the bottom of the tunic because I’m short, and it just didn’t look right. I also took Amy Karol’s advice and made pleats along the yoke instead of gathering.

    **UPDATE: I wasn’t surprised at all that my top wasn’t a finalist because there were so many amazing tops. But I was thrilled that Carolyn at Sycamore Corner Crafts took the time to list it among her personal favorites! It really boosted my spirits after such a frustrating sewing experience, and I now have a new blog to read!

  • My apprentice

    I loved reading Beverly Cleary books when I was young, and my 5-year-old really likes having them to read to him now. We’ve gone through all the Henry Huggins books, The Mouse and the Motorcycle, and the Ramona Quimby series multiple times. After listening to a chapter in “Ramona and her Mother” that featured Romona using her mom’s sewing machine for the first time, Parker very sweetly asked if he could try mine if he was really careful. Of course, his first plan was to make some pants for one of his stuffed animals, despite the fact that in the book, Ramona is crushed when the “slacks” she tries to make for her stuffed elephant turn out awful, and she ends up storming off and squeezing out an entire tube of toothpaste in the sink. (“Slacks” always makes me think of my grandmother, who also says “dungarees.”)

    So I gently suggested an easier project, and we settled on a pillow for our cat and a little stuffed cat for Parker made out of two of his old t-shirts. I set my sewing machine on the slowest speed and had him stand up so he could press the pedal and guide the fabric. He did a great job on the pillow!


    I did most of the work on the kitty, which is a variation on the Mooshy Belly Bunny by Holly at Chez Beeper Bebe. I was pushing for a bunny, but Parker looked at the picture and said “That’s too CUTE!” Emphasis on CUTE, with a bit of a disdainful tone rather than the way I would say it, “That’s TOO cute!”

  • Paintbox Quilt Top

    Here’s the finished top to my Paintbox Quilt from the quilt-a-long at Oh, Fransson! (turned 90 degrees so it wouldn’t drag on the floor). I wasn’t going to post any pictures of this quilt until I was done, but I have a bad feeling I’m going to mess up the quilting so I might as well show it off in its pristine state. I’ve never made a quilt this big and the thought of basting it and then maneuvering it through my sewing machine to quilt it is quite intimidating. Though a lot of the other quilt-a-long participants are using a stippling quilting pattern, I think I’m going to go with wonky, narrow lines because the few times I’ve done stippling have not been fun, and I know I’d have trouble keeping a consistent look if I stopped and started a lot.

    The quilt top looked so pretty hanging up in my dining room, I’m tempted to call it curtain and be done with it.

  • Ticker Tape Doll Quilt

    As my son gets invited to more and more birthday parties, I’ve noticed the trend of kids NOT opening their gifts during the party. I understand the reasons for it, but I also think it’s nice for my son to see his friend open the gift he brought, rather than have it squirreled away to be opened in private later. And to be honest, it especially irks me when I’ve made someone a gift, because I want to see the reaction. (and to be REALLY honest, I like hearing the praise of other adults who appreciate the work that went into the gift!) This particular gift was given to one of Parker’s girl friends/girlfriends. Back in November, we had this conversation:

    Parker:  I’ve realized that I love A.

    Me: (surprised silence)

    Parker:  I thought you’d be happy for me!

    A. is a wonderful little girl, but their mutual affection seems to have cooled down a bit to friendship, which I think is appropriate for two kindergarteners!

    I made the pillow case using my tutorial (minus the trim between the cuff and the body), and the quilt using this Ticker Tape Quilt tutorial at Sew,Mama,Sew! The scraps were all leftover from the Paintbox Quilt I’m getting close to finishing! I forgot to take a picture, but the back is the same print as the pillowcase, which looks nice with the rectangular quilting lines. Who knows? Maybe this quilt will end up being passed down to my future grandchild! Ha.

    The happy couple last fall:

  • Wooly Pig

    I realized at 9 p.m. last night that my son has a playdate today with a friend who 1) sent him a very nice gift basket after his recent surgery and 2) turned six last week. So my husband suggested I “craft something up” to give her.

    I quickly settled on this stuffed pig from “Martha Stewart’s Encyclopedia of Sewing and Fabric Crafts.” (Look for my AP review/article next week). I’ve been saving this pink thrift-store sweater I felted for a while and figured it would make a cute pig. It did, though I found it pretty hard to work with since the sweater is so thick. The directions call for a 1/8″ seam allowance, which was all but impossible given how thick the wool is. I would’ve been better off cutting around the pattern a bit wider and then trimming the excess later. There also was no way I could sew the extremely narrow tube to make the tail and then turn it right-side out, so I just kept the seam on the outside.

    I love the fuzzy wool, but I think this project also would be cute in fleece or even cotton quilt fabric. Or maybe a thinner sweater.

  • Robot Memory Game

    I don’t generally go crazy with my son’s Easter basket, and especially so this year given that our house looks like the day after Christmas thanks to generous friends and family who showered him with gifts after his recent surgery. But I did make him this little memory game featuring his current obsession: robots.

    My first thought was to use clipart, but I was worried I wouldn’t find enough or it would take forever to re-size each image. Then I thought of the perfect solution: a dingbat font! I found this cute, free set of robots at dafont.com. (The font is called “Lost Robo” by Slaager David Alexander). I then typed up a page of robots, using a different color for each one, at about 300 pt. to get each robot to be about 2″ tall.

    I then printed two copies on photo paper, glued a piece of blue cardstock to the back of each for stability and cut them apart. (Two robots got discarded after I unsuccessfully tried to use a corner rounder punch on the corners… anyone have a corner rounder punch they like? I hate mine. It always jams)

    I also printed a few robots onto iron-on transfer paper and added that to a strip of white fabric to label the little storage bag. My son enjoys playing a memory game on my husband’s iPhone, so hopefully he will like this low-tech version as well!