Month: March 2010

  • “More than brilliant, creative and imaginative”

    I’m not quite sure why, but for the last few years my family has not eaten much breakfast cereal, so I was always disappointed when I saw awesome crafts using cereal boxes. But recently my husband (who does all the grocery shopping, lucky for me!) started buying cereal again, so I’ve been squirreling away the boxes in my son’s craft drawer.

    First up was cereal box journal based on this tutorial at The Long Thread. I decided to adhere the fabric to the printed side of the cardboard to leave the inside cover blank. I didn’t have any spray adhesive, so I used strips of Stitch Witchery fusible webbing to iron the fabric on. Obviously a sheet of webbing like Steam-a-Seam would work better, but since I had the Stitch Witchery on hand, I went with that. It seems to be holding pretty well!

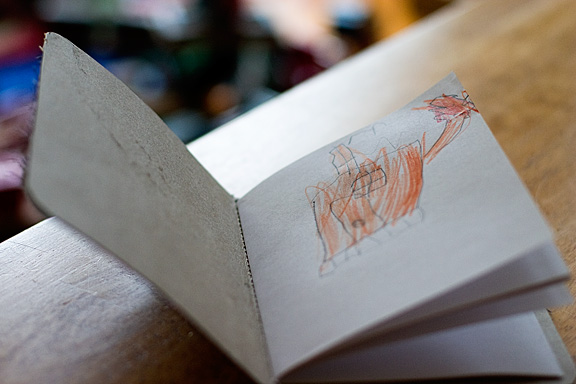
    I’ve been trying to do a few “schoolwork” projects with my son while he’s home from kindergarten recovering from getting his tonsils out, so I asked him to draw a picture and then try to write the word to go with it. He drew this nice steam shovel, and then threw a huge fit about writing it, which escalated into him screaming at me “YOU’RE MAKING ME YELL AND CRY AND HURT MY THROAT.” Sigh… surely others have faced this scenario of lovingly making something for a child who doesn’t quite appreciate it?

    Just when I was about to get discouraged though, I discovered that a blog in Hungary had written a post about the mini treehouse my husband and I made. And thanks to Google Translator, I now know how to write

    ” Holly Ramer, is more than brilliant, creative and imaginative. I can not find the words to it really, just staring at the pictures jaw dropped.” in Hungarian.

    Ha. I will try to stay humble.

  • Paintbox Quilt

    My son’s surgery went well, and we are home after a rough night in the hospital. He likes his new robot very much and is still thinking about what to name him. I’m too exhausted to do any sewing/crafting today, but have been meaning to post a picture of a work in progress, the Paintbox Quilt-a-long at Oh, Fransson! It started back in January, so I’m getting a late start and have done 26 of the 80 (!) blocks so far. I really don’t know why I am taking on this project because for the first time ever, I am starting a quilt without a recipient in mind. I want to keep it for myself, actually, but it really doesn’t go with the decor in any room of my house. I am doing the scrappy blocks, which will require 160 different prints plus 40 solids. (I’m pairing four prints with each solid. The directions call for 5 but there is no way I could find that many). I bought the Kona roll-up strips for the solids and am trying to see how many prints I can get out of my fabric stash. Luckily, there are a lot of blues in the solid strips and I have a lot of blue prints leftover from my son’s colorwheel quilt, but I already know I’ll have to buy some yellows and purples. But I think it will be pretty neat to see the finished quilt come together using so many different scraps from so many different projects.  Some of the scraps I’m using are close to 10 years old!

    I had a definitely “duh!” moment in starting these blocks. This is the first quilt I’ve started since getting my new sewing machine last year and using the 1/4″ foot. My seams still were more than 1/4″ though, until I finally figured out I can move the needle position just a tiny bit to make the seams come out just right. I still have some blocks that are a bit wonky, but overall, I’m finding I’m not having to stretch or persuade the pieces to fit together like I have with past projects.

  • Stuffed Robot

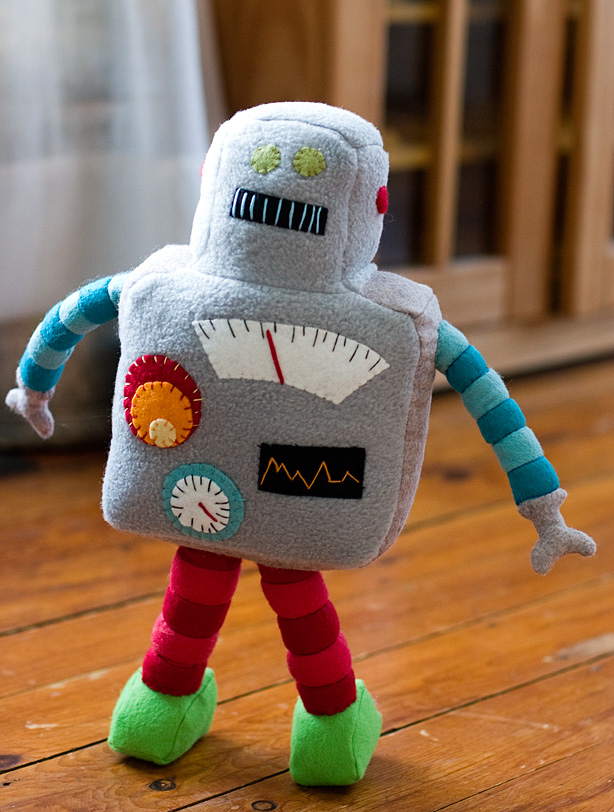
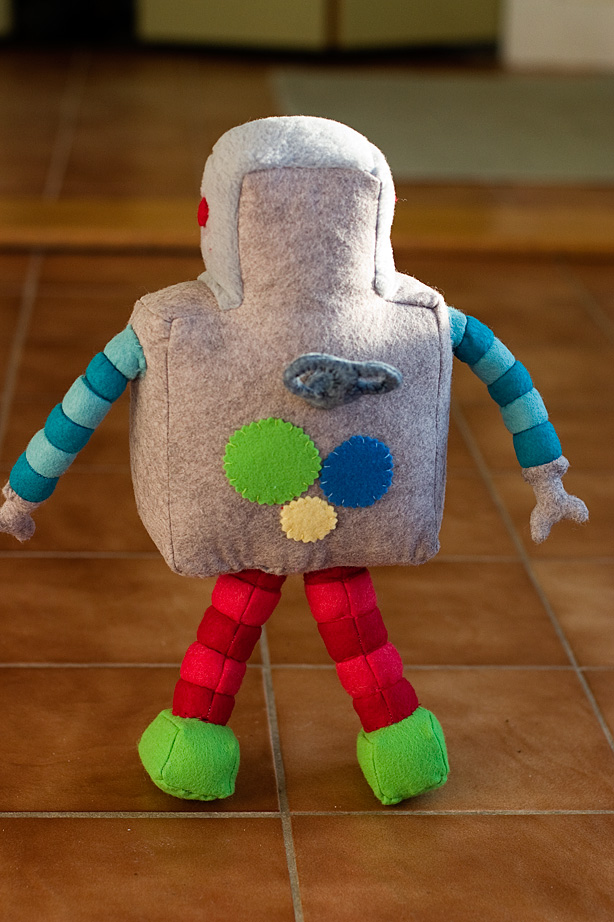
    I made this plush robot for my 5-year-old son, who is getting his tonsils and adenoids out tomorrow in hopes of solving sleep apnea and other related problems. He has been crazy about robots lately, and loves to make his own with cardboard boxes and various craft supplies. My father-in-law, an electrical engineer, has promised to help him make a “real” robot, but in the meantime, this one will be better for post-surgery snuggling.

    The pattern is the Retro Robot Plushie by Gulf Coast Cottage, who sells patterns for the most adorable felt food and other playthings. I didn’t have quite enough gray felt, so I used fleece on the front (didn’t have enough to do the whole thing in fleece of course). The instructions were super easy to follow.  I detoured from them a bit by sewing it with the seams on the inside because I was using fleece instead of all felt, so I added the arms and legs after sewing the body together (leaving an opening for stuffing). That resulted in the body being a bit more rounded instead of squared off, but I still liked the result. I also made the arms and legs striped by sewing strips of felt together before tracing the pattern.

    I can’t decide whether to give it to him before surgery or wait until he wakes up. Wish us luck!

  • Felted Eggs

    Felted Eggs

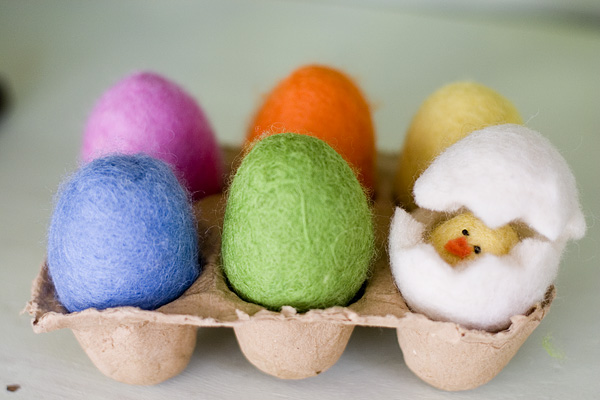
    Even though I am a smidge more Irish than I am anything else, I’m going to let St. Patrick’s Day pass and move right along to Easter crafts. Here are some of the wet felted eggs I made last year. I used cheap plastic eggs as a base and felted over them. For the open egg, I carefully cut open the felted egg after it dried and removed the plastic.

    You can find the article and step-by-step instructions I wrote for AP HERE, and an audio slideshow HERE. (Ack… I HATE the sound of my voice! And despite the appearance of my wrinkled hands, I am not 80 years old. All that hot water makes for less-than-photogenic hands)

  • Reduce, Reuse, Recyclebot

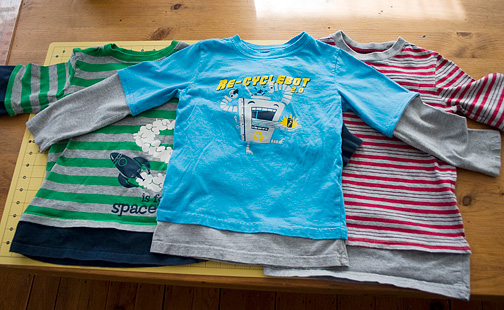
    My son decided yesterday that 6:23 a.m. was the perfect time to go through his clothes and “find the stuff that doesn’t fit and use it to make clothes for my critters,” (i.e., stuffed animals). While I have yet to provide Fat Kitty, Skinny Kitty or Huckle with any new clothing, I did go through his clothes, find the stuff that doesn’t fit and turn some of his shirts and new-and-improved versions thanks to this tutorial by Betz White that I have been meaning to try for a long time.

    Transforming two  long-sleeved shirts into one faux-layered shirt was surprisingly easy. Part of me thought, “Is it really worth it to save shirts that I probably spent $4 each on at Target and could just pass along to my nephew?” But there was something very satisfying about this project, and I can always hand the shirts down once he outgrows them a second time.

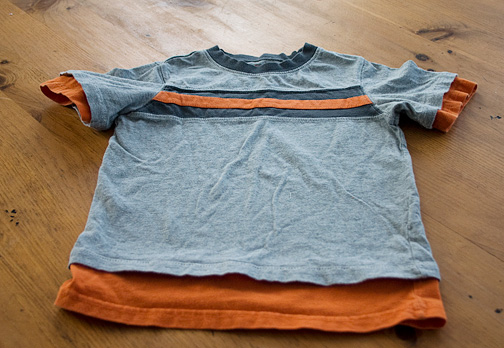
    For the short-sleeved shirt, I used two short-sleeved t-shirts (duh) and used the technique for the bottom hem on the sleeves as well, since I wanted to keep the original hemmed sleeve of the outer shirt. Very easy!

  • Origami Organizer

    Origami Organizer One-Yard Wonders

    I bought my friend and fellow-crafter One-Yard Wonders for Christmas, and she has been gracious enough to share it with me when we get together to sew! I think I might have picked the most complicated project in the book to start, the Origami Organizer, but 1) it just leaped out at me as a cool project and 2) it was written by Katherine of One Inch World, who was very helpful to me when I had no idea what I was doing setting up this blog!

    I used some leftover fabric that I wasn’t crazy about for my first attempt, just in case I messed up. I found some of the diagrams a bit confusing, but once I figured it out, it was pretty amazing to see the boxes come together all at once.

    I gave the organizer to my son, who is forever sorting little treasures he picks up and putting them in various boxes.